The later Anafi Thermal and Anafi FPV drones come with revised legs which are not only much stronger, but actually lighter as well.
Like all modders the question is will these new legs fit on the original Anafi body and work. (click on images to enlarge).
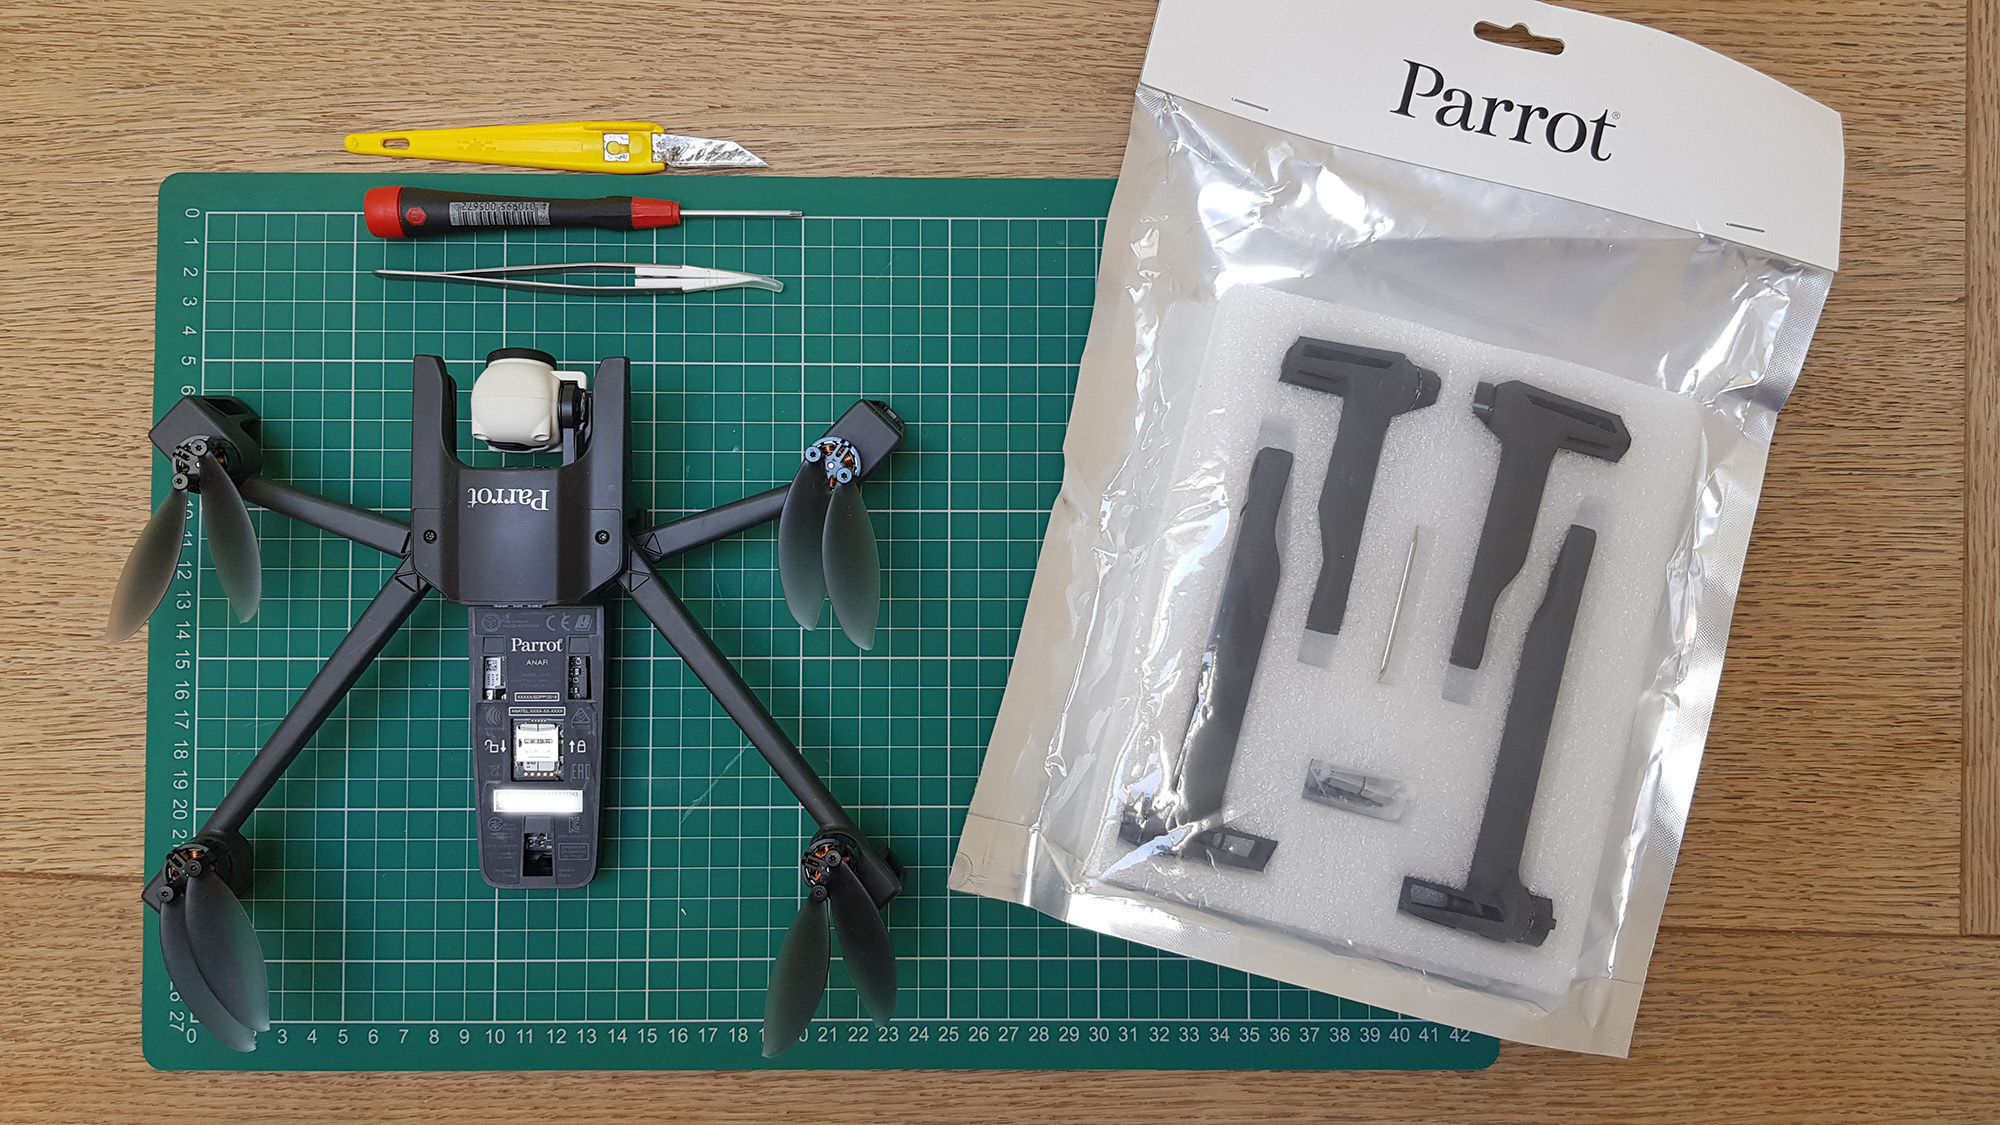
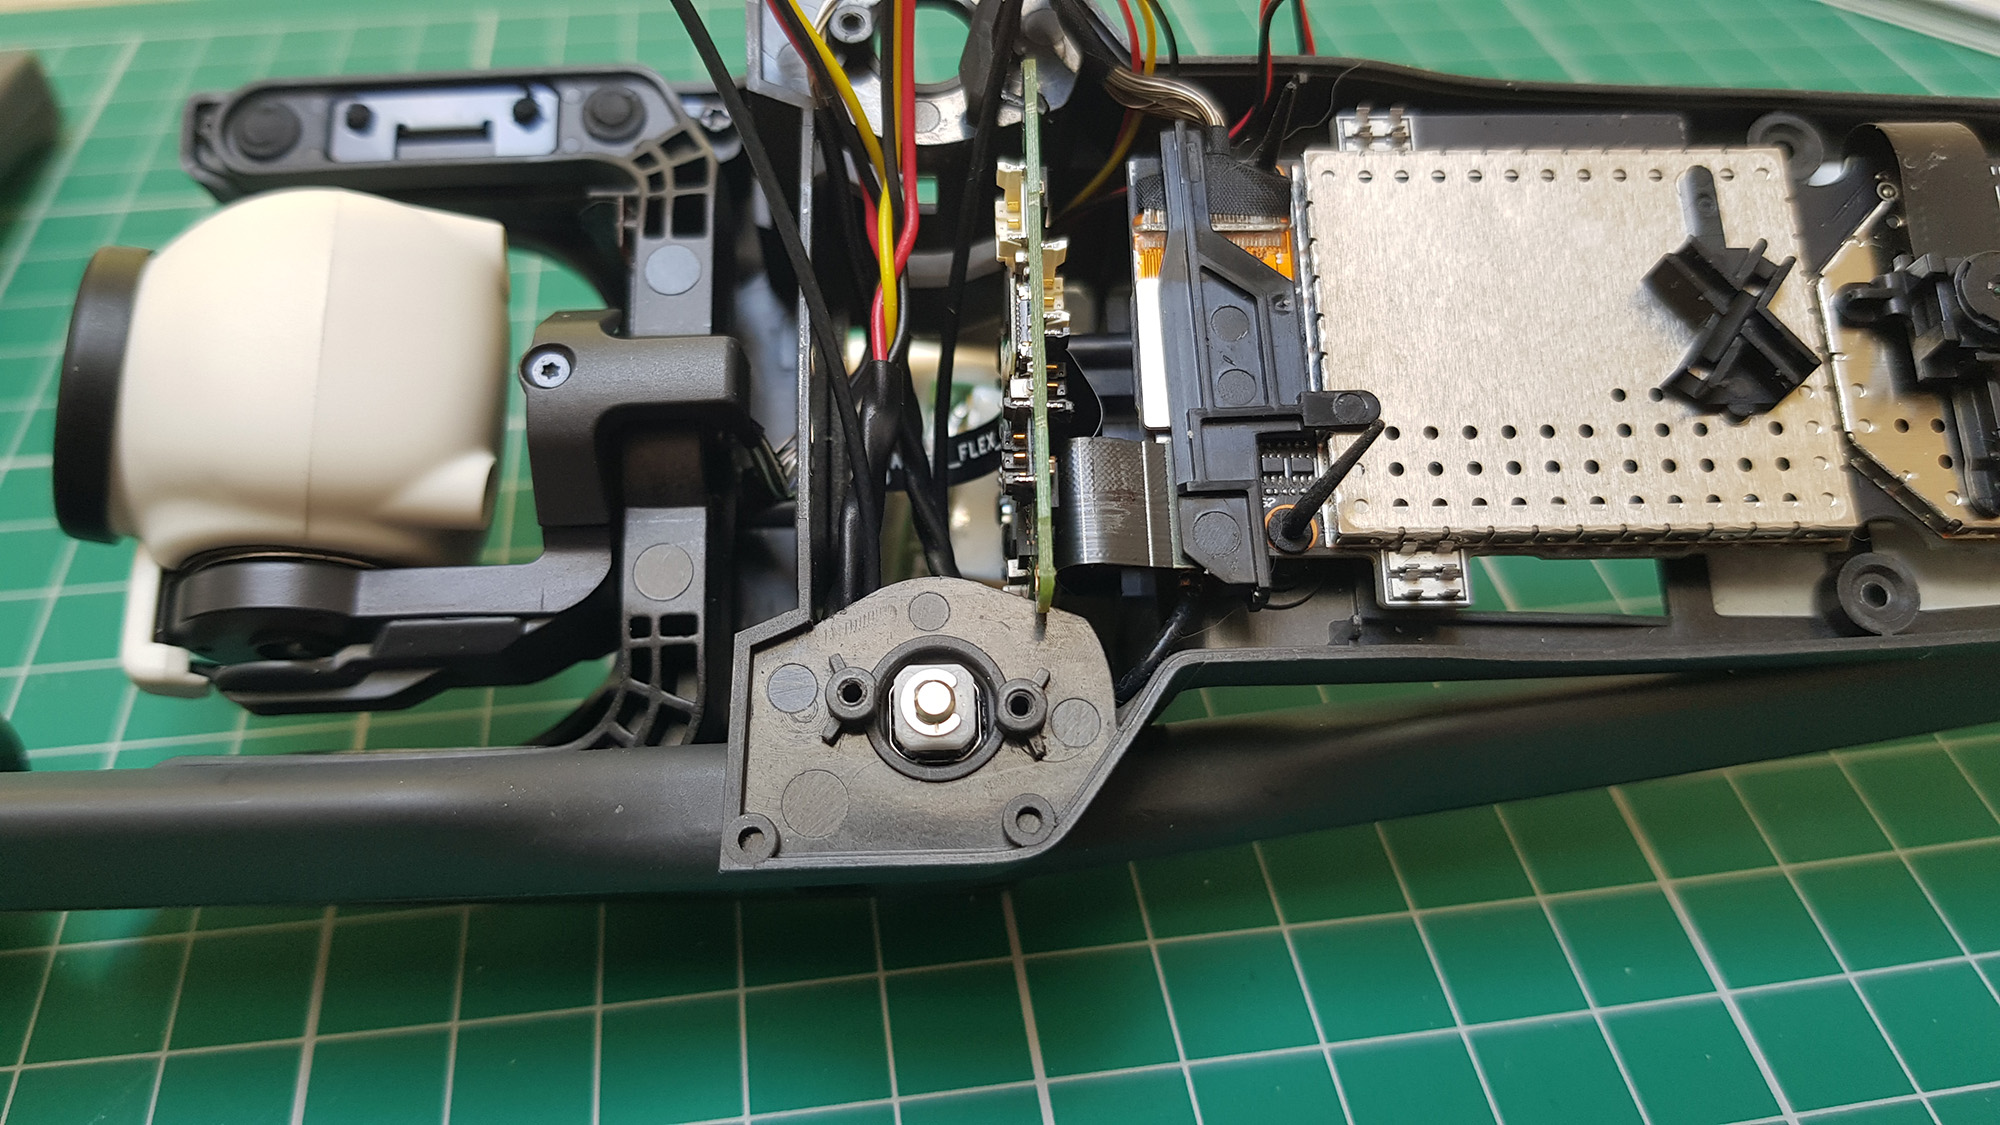
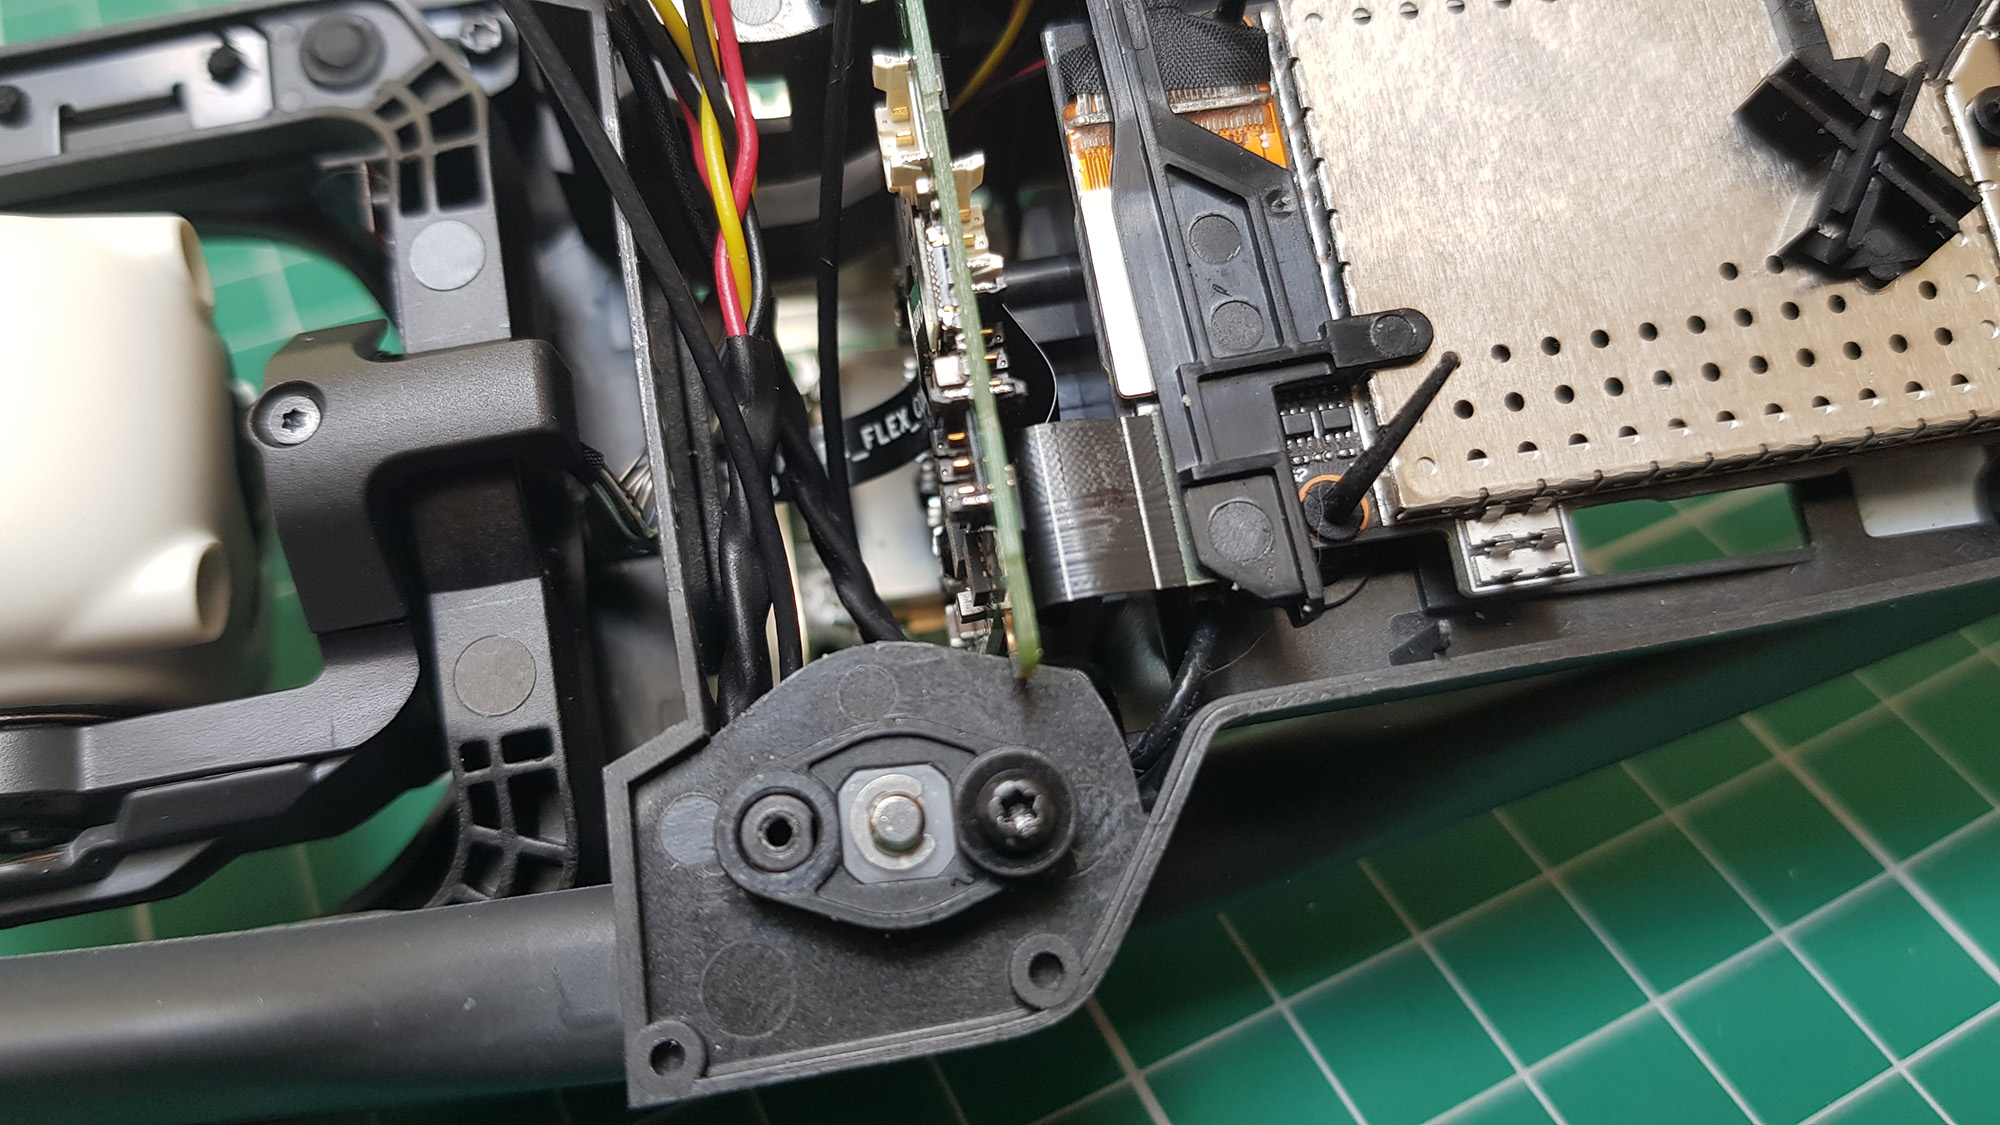
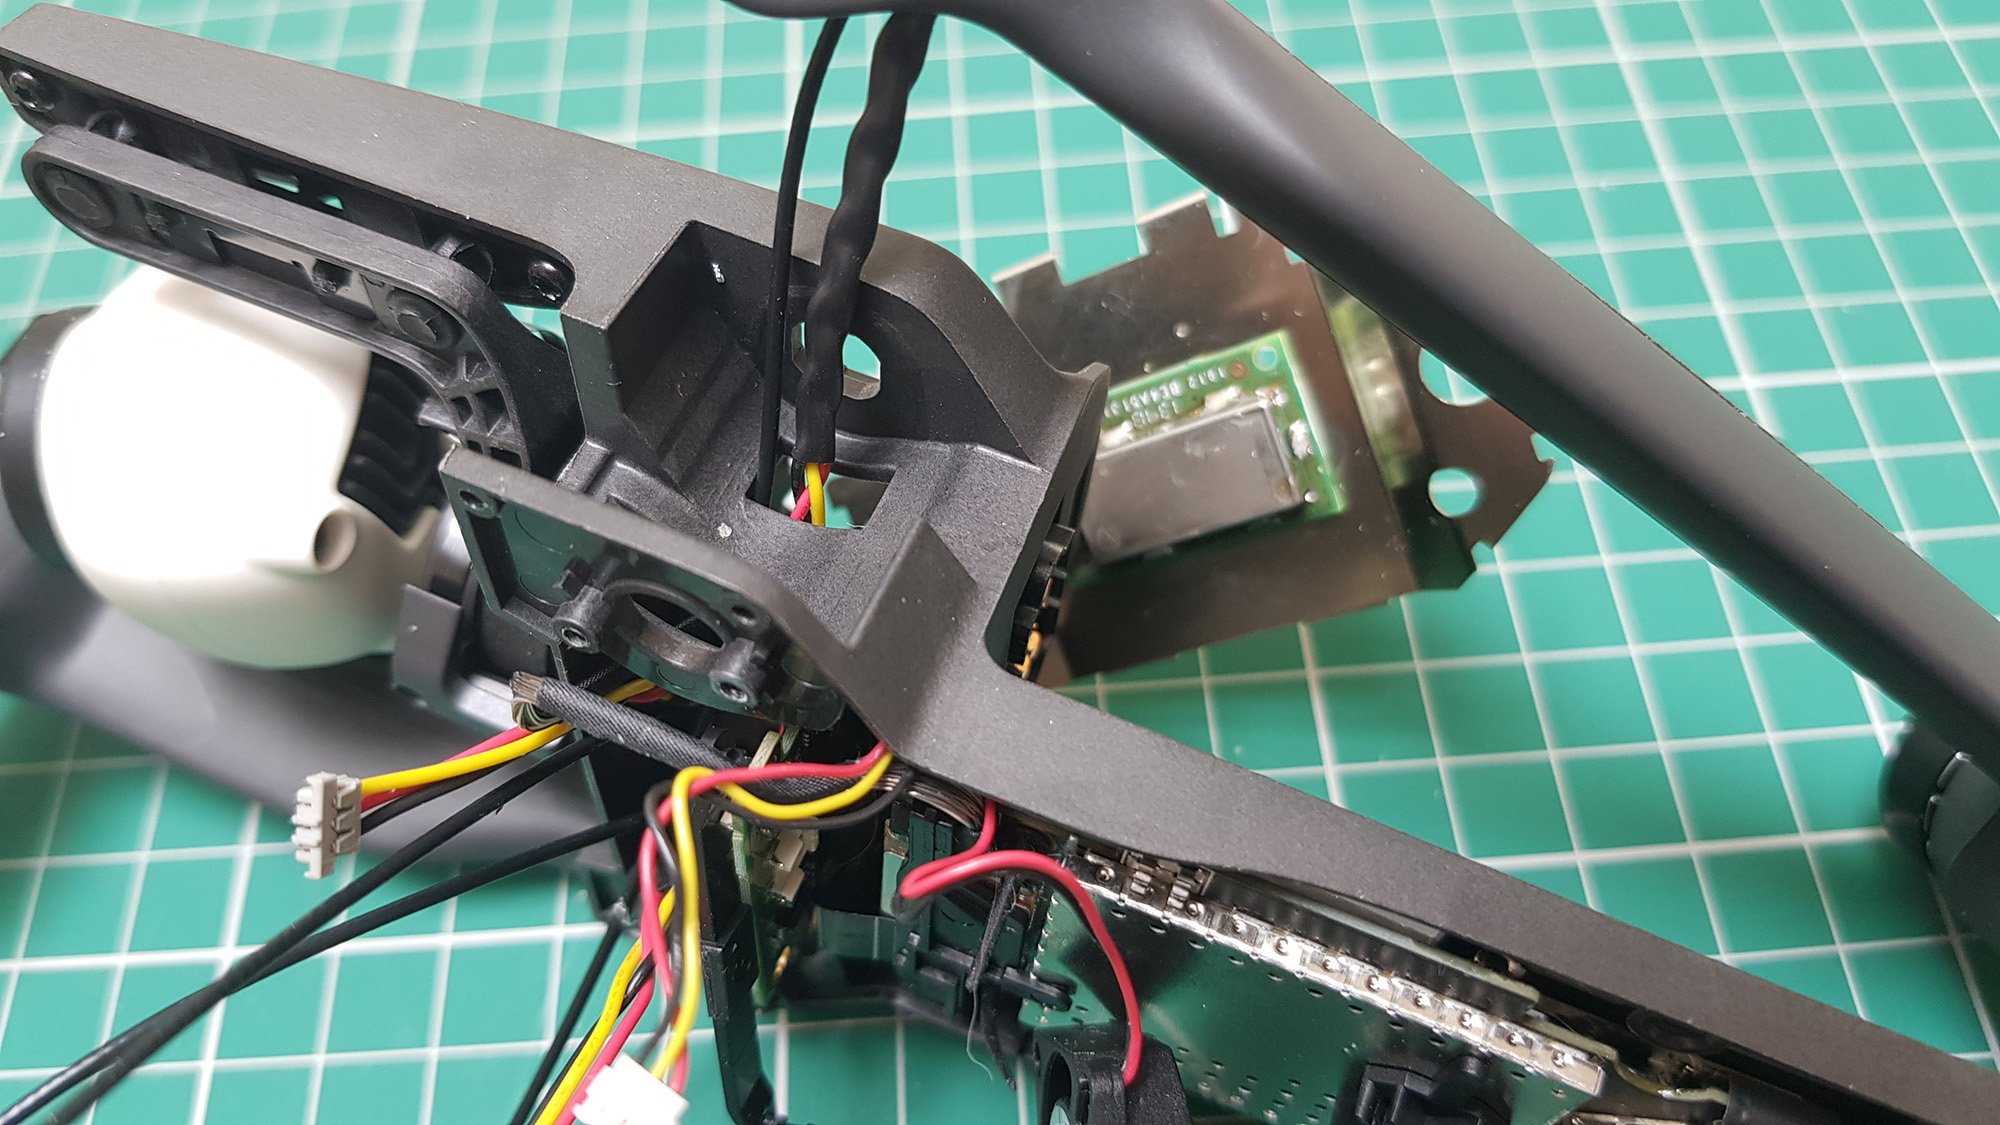
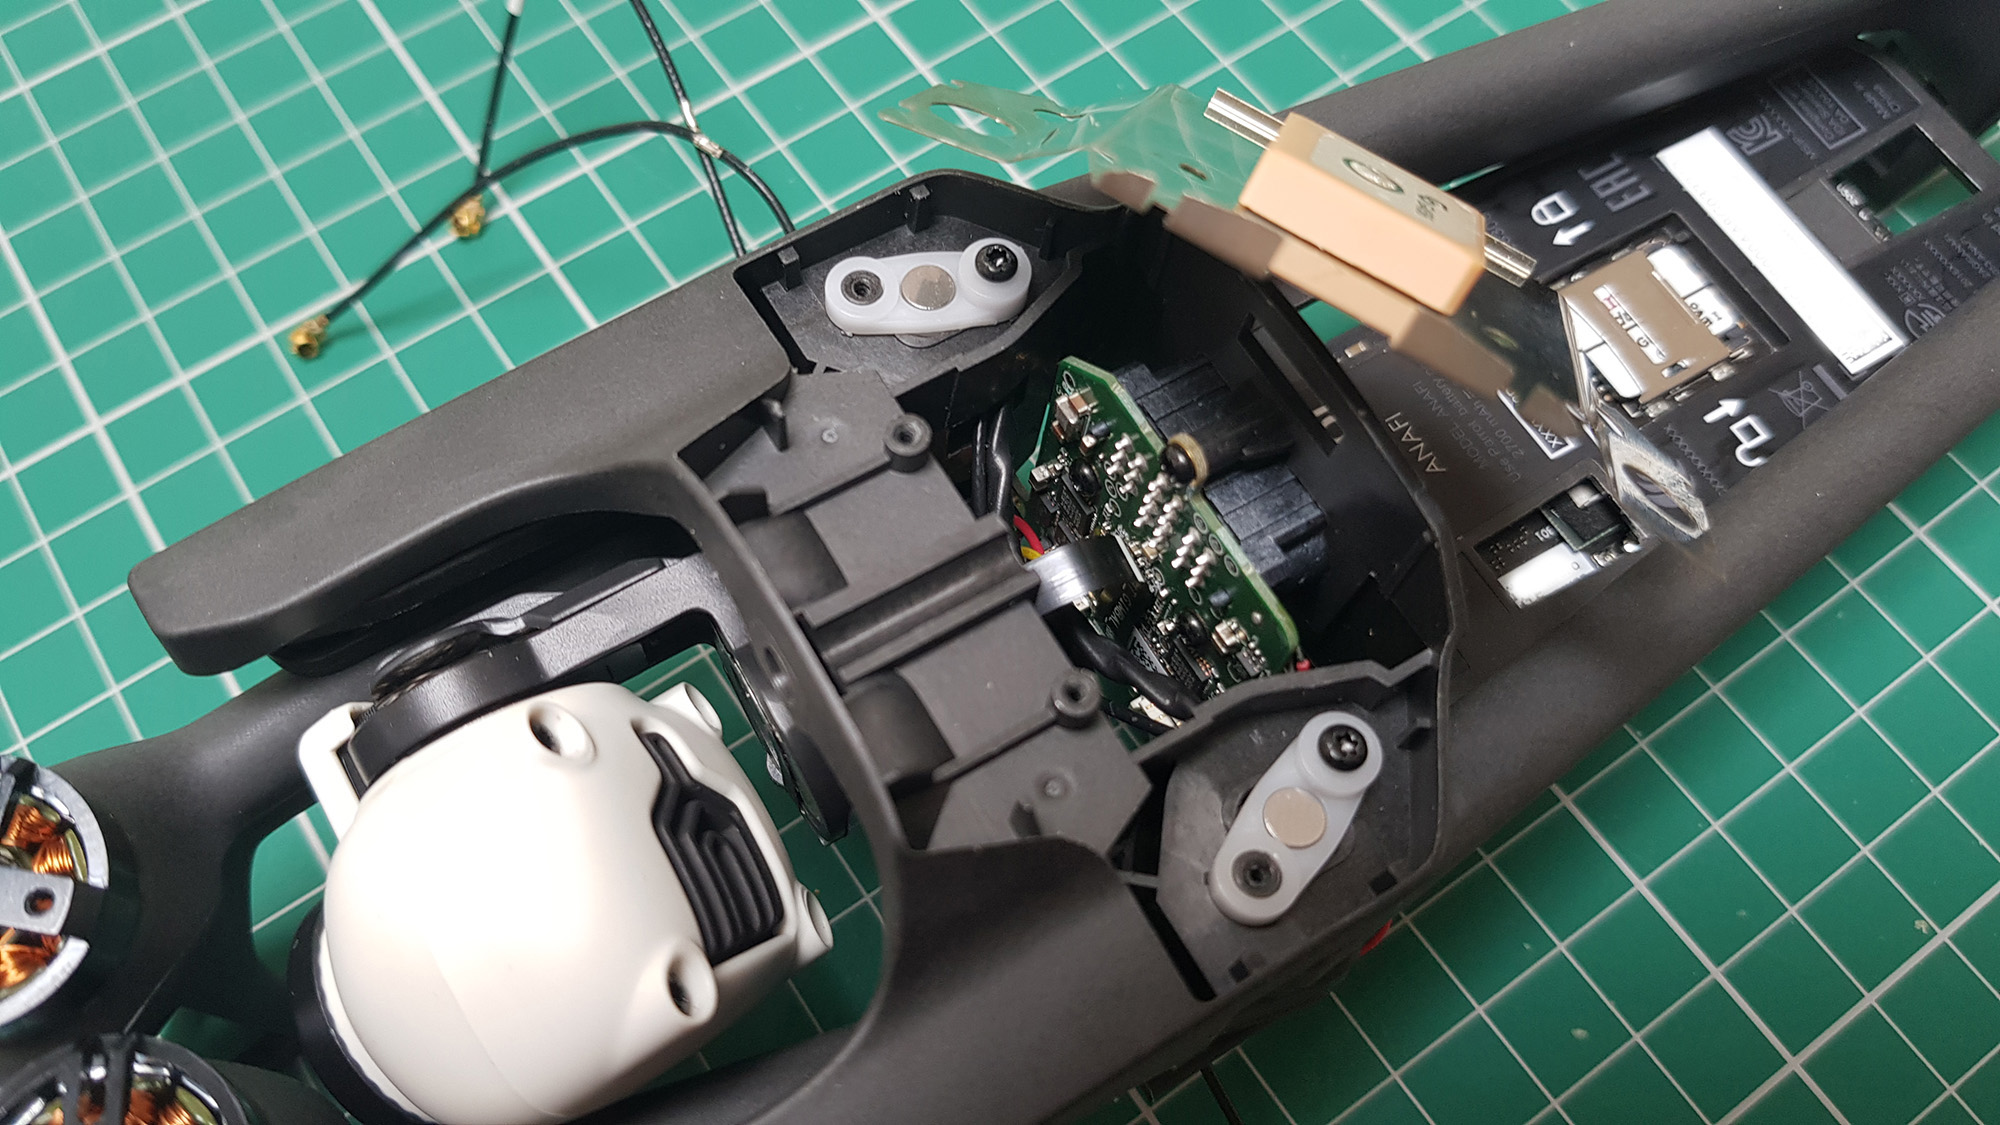
How to install
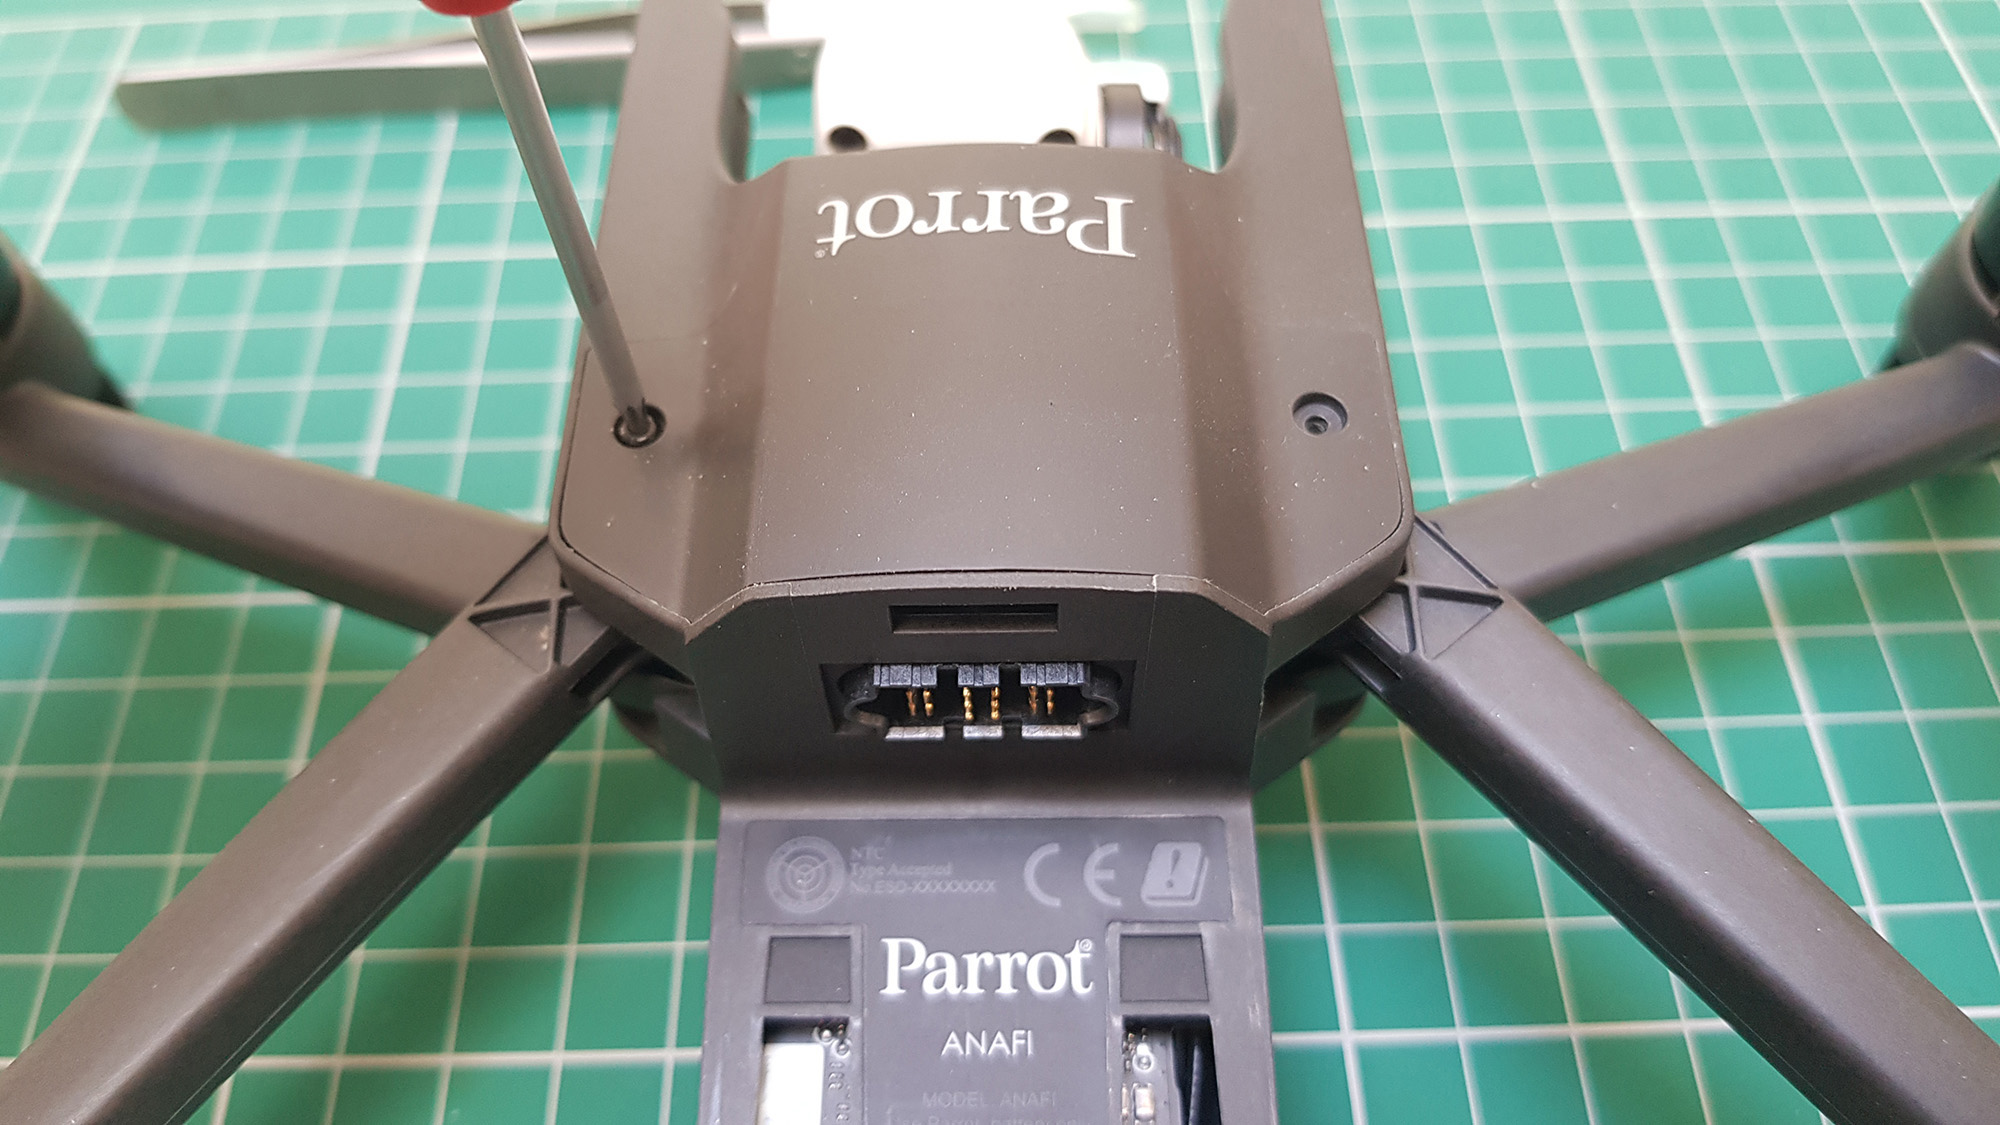
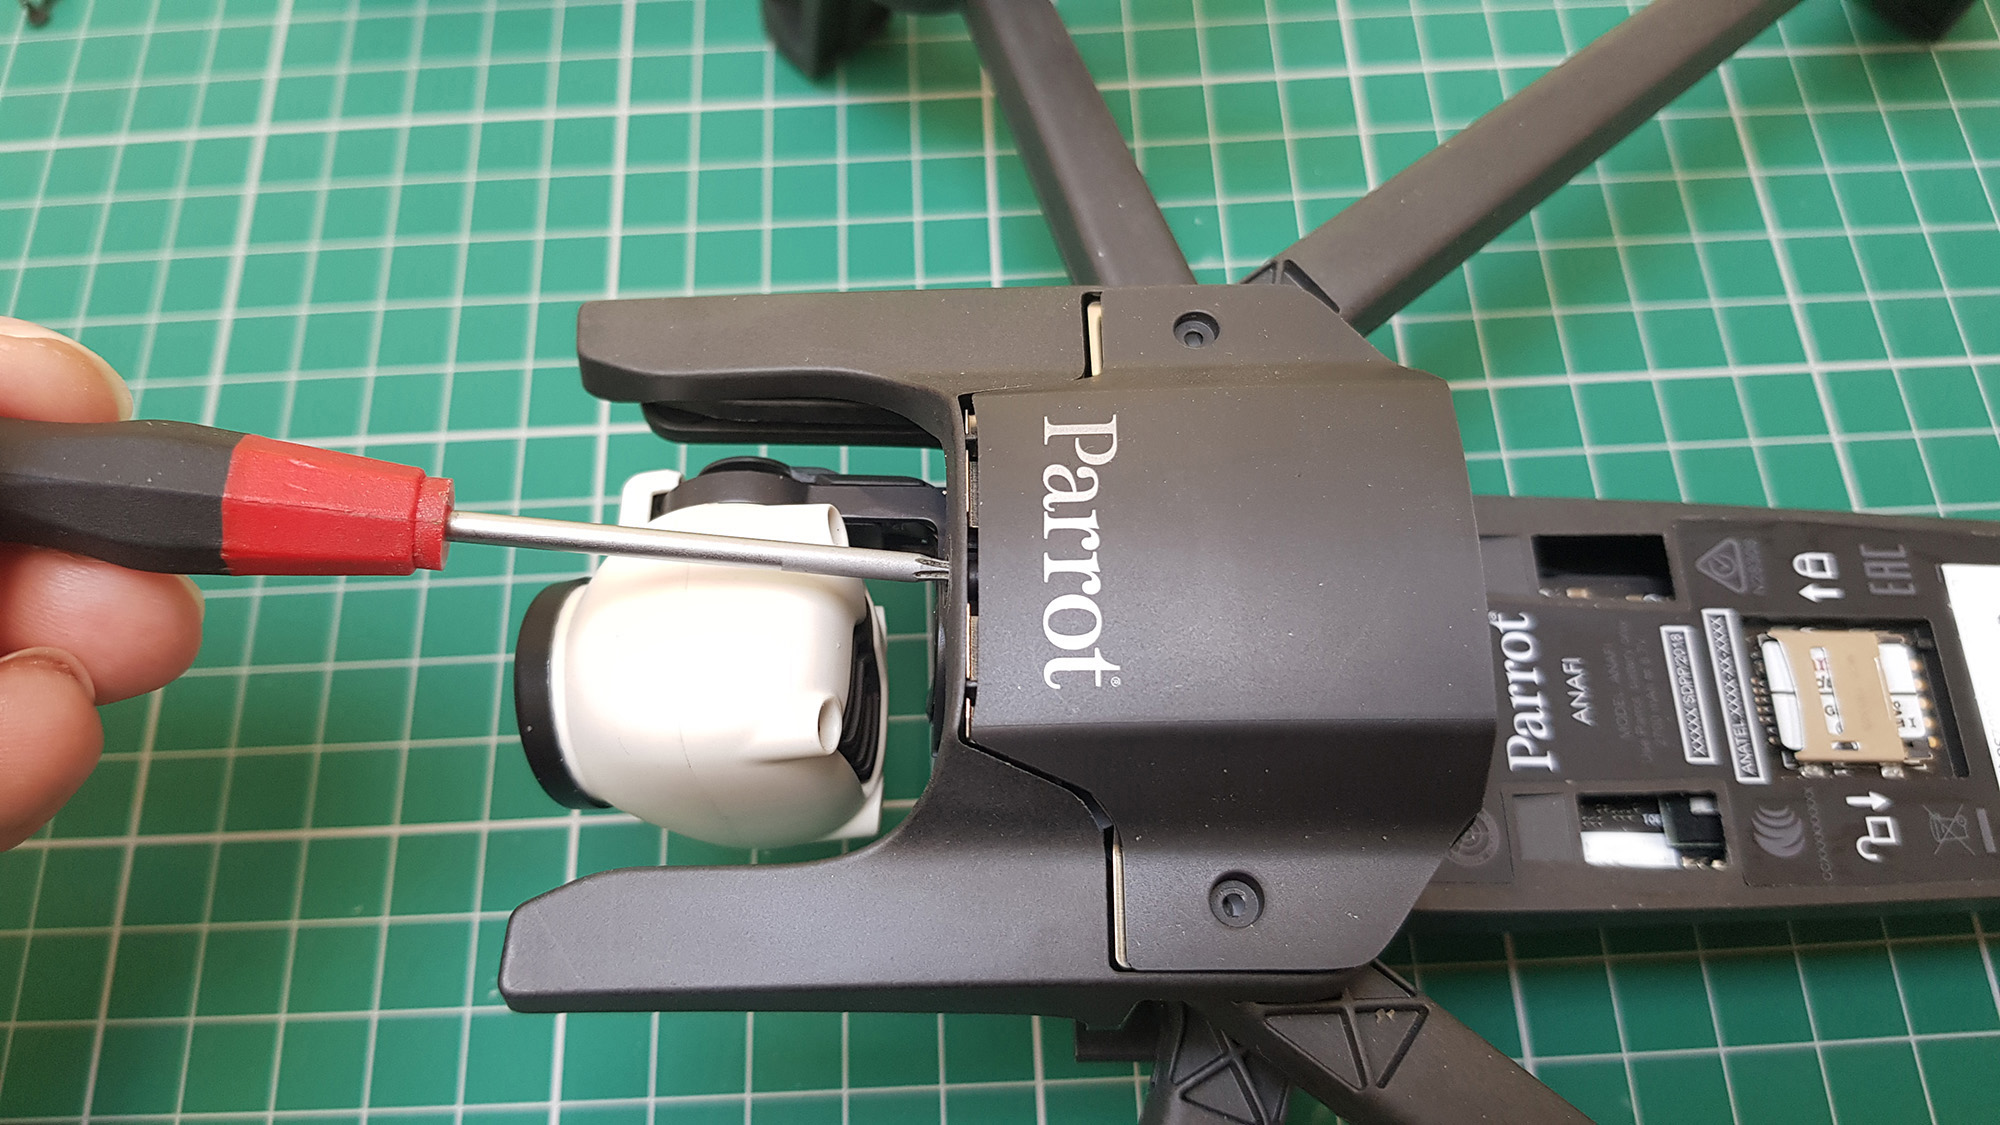
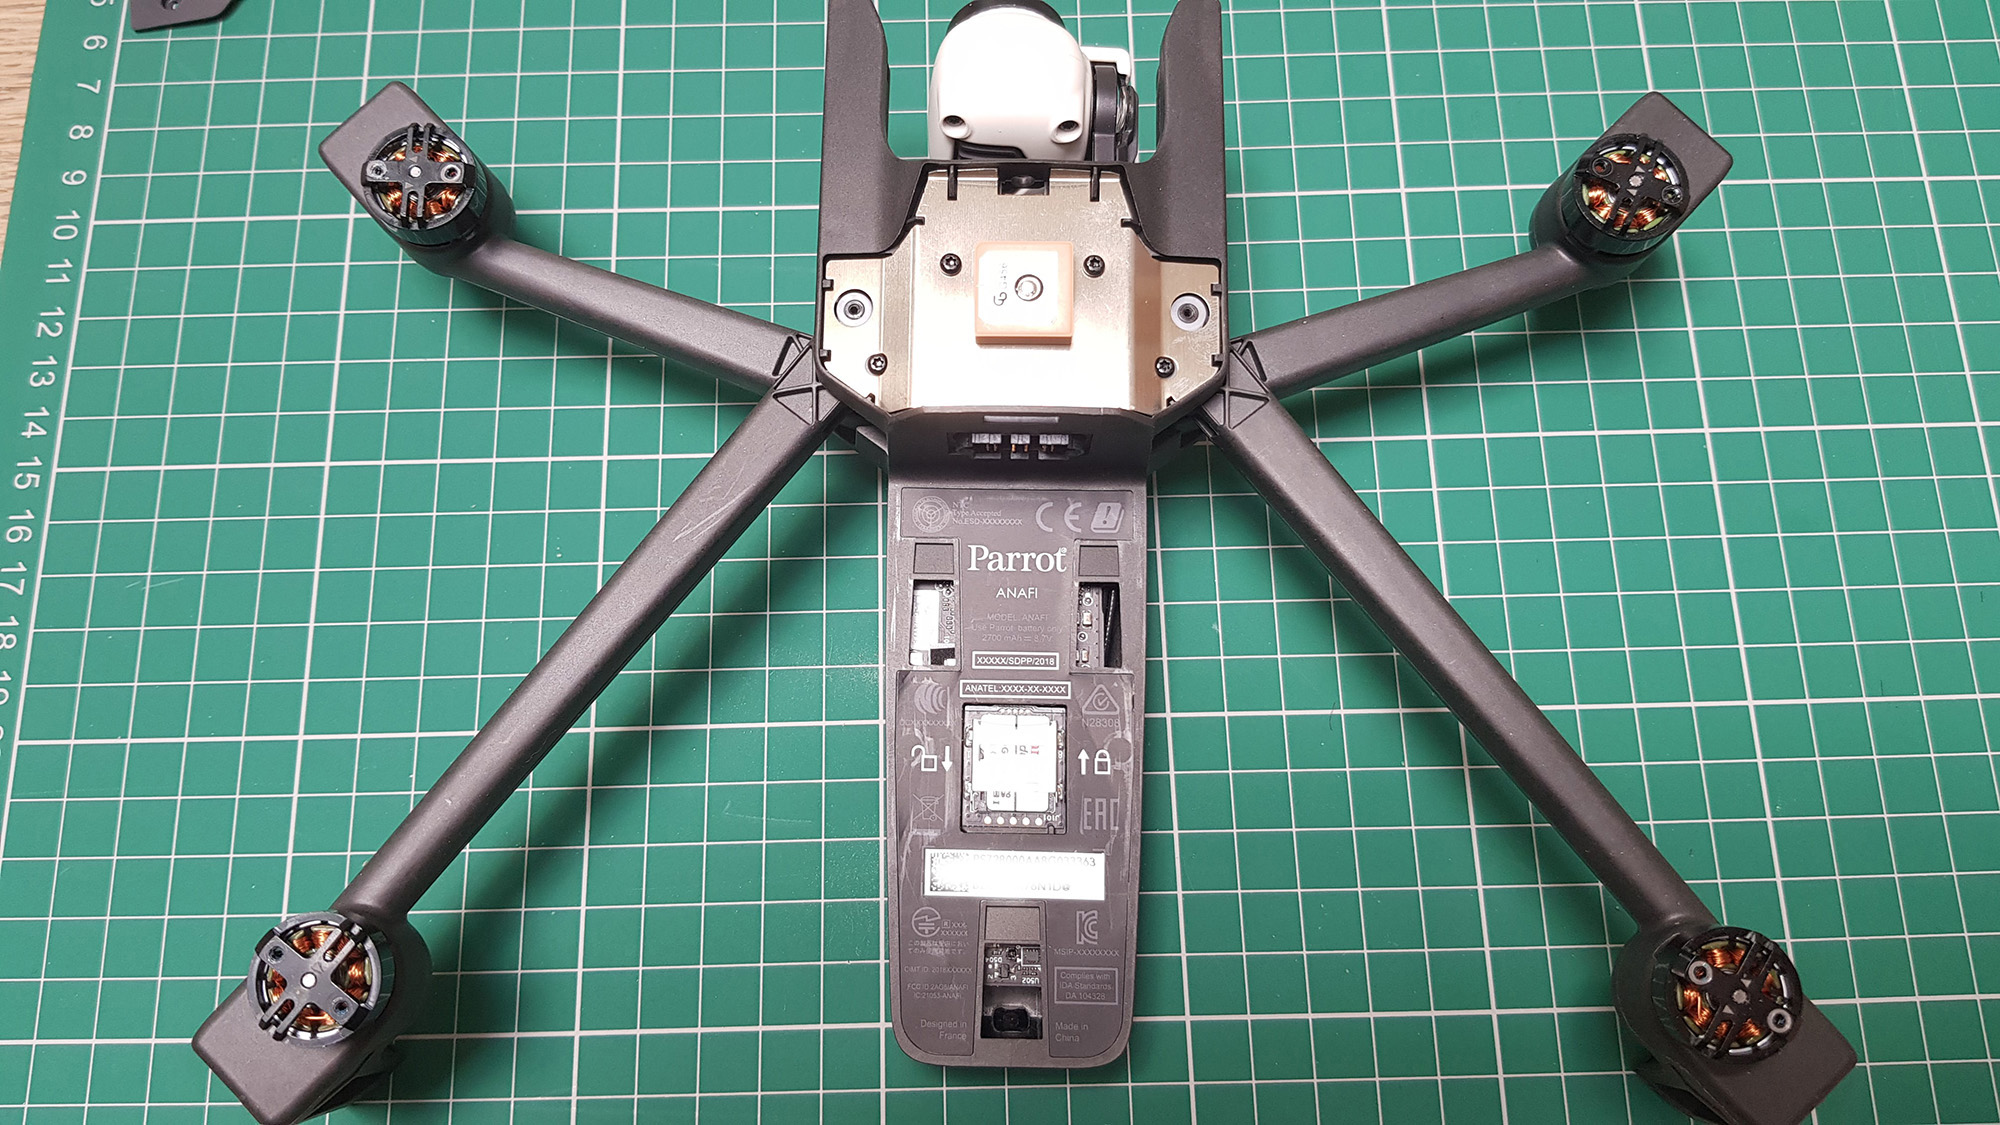
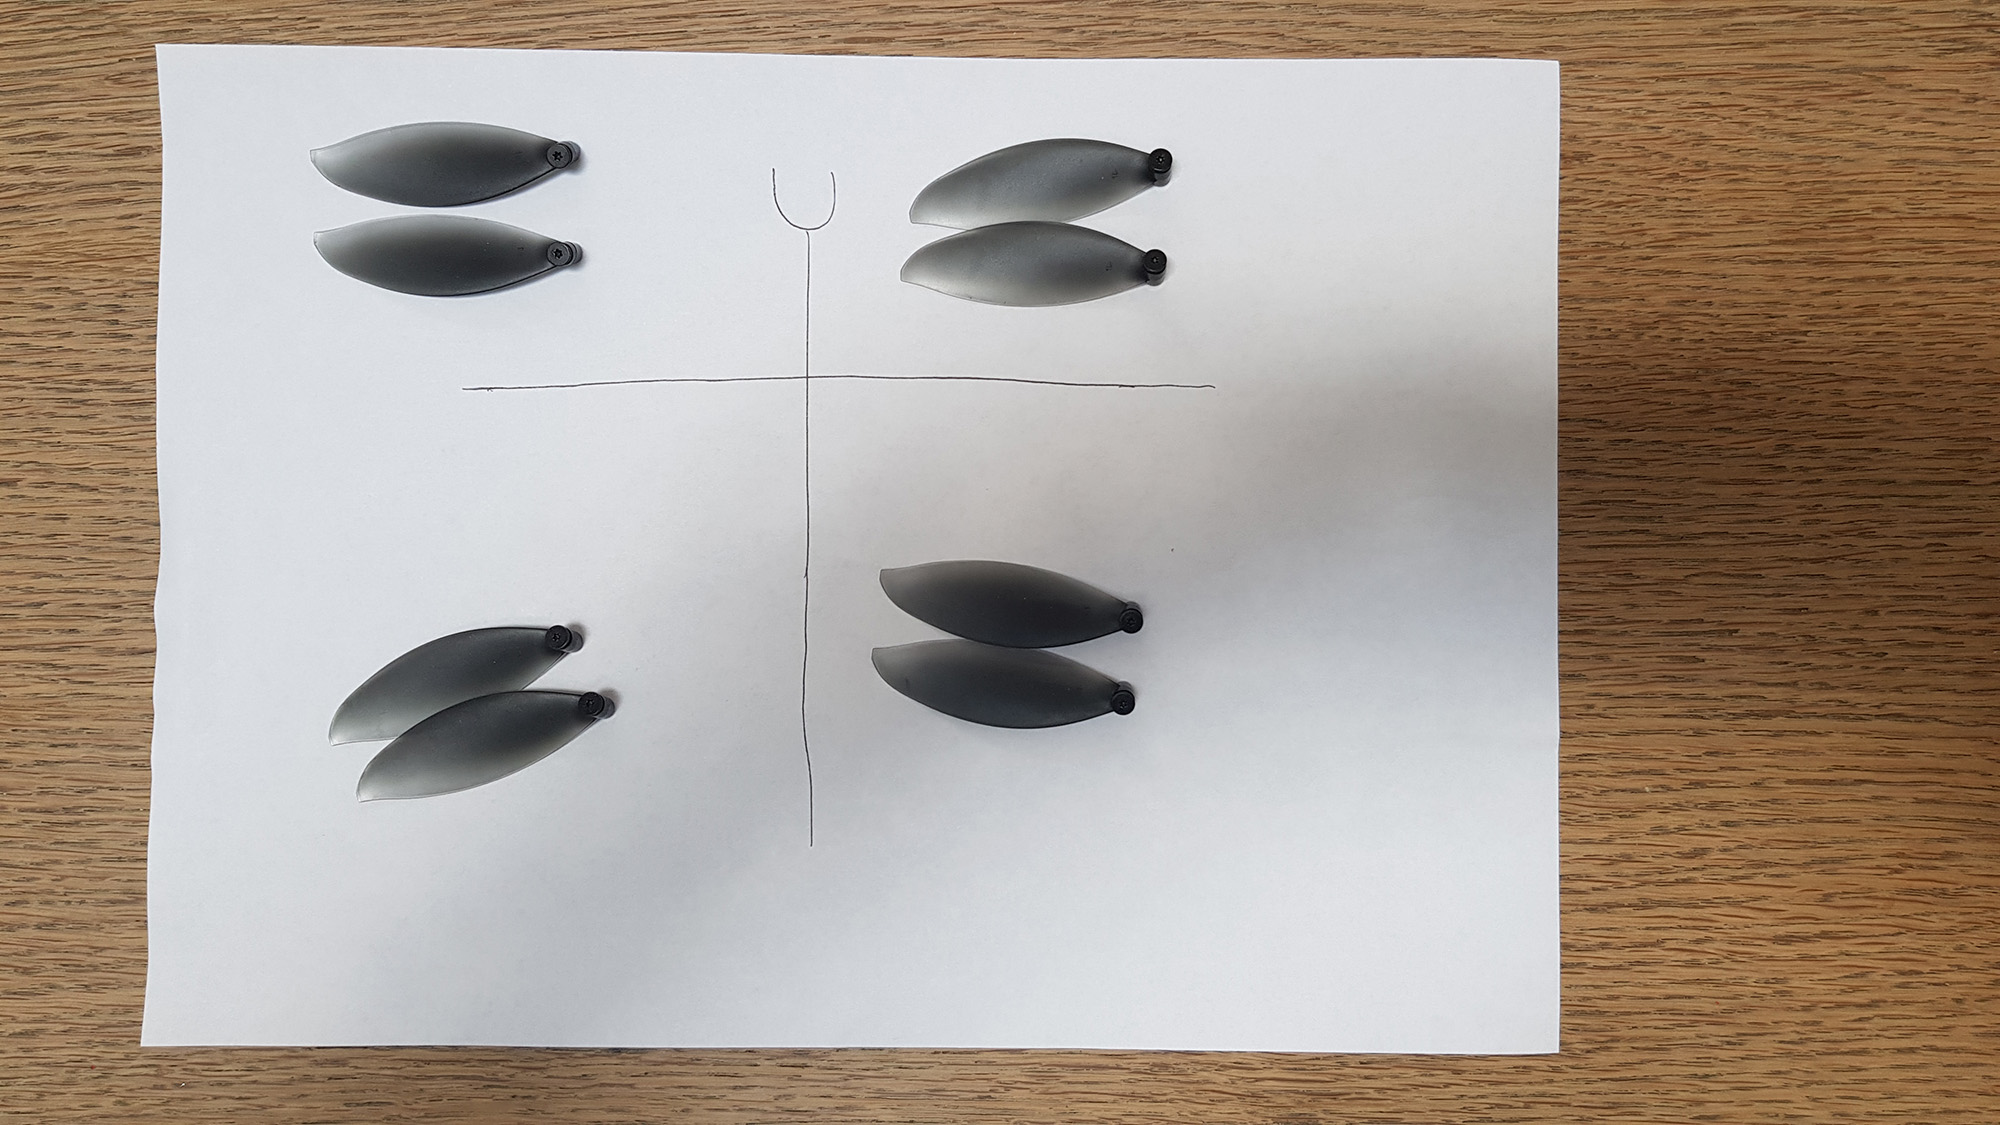
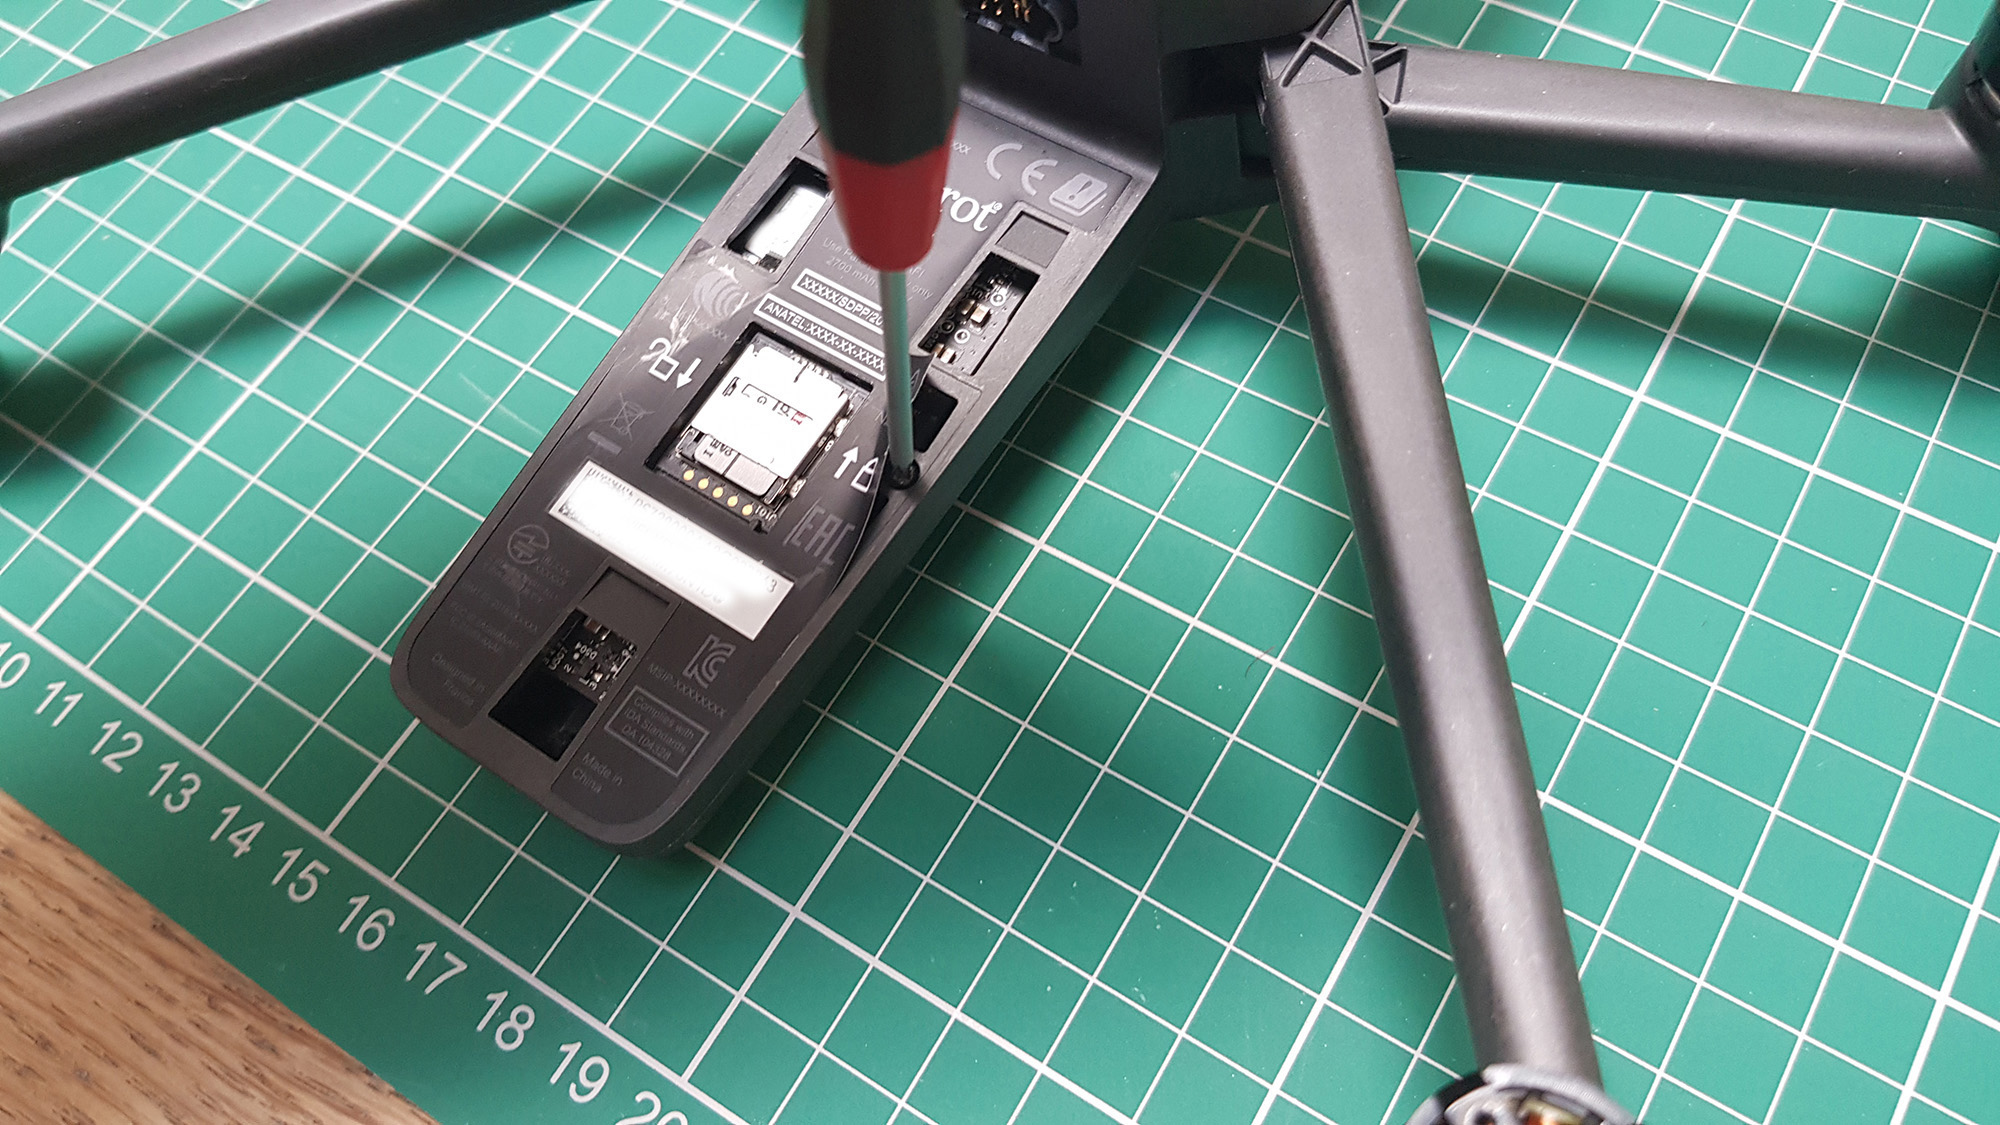
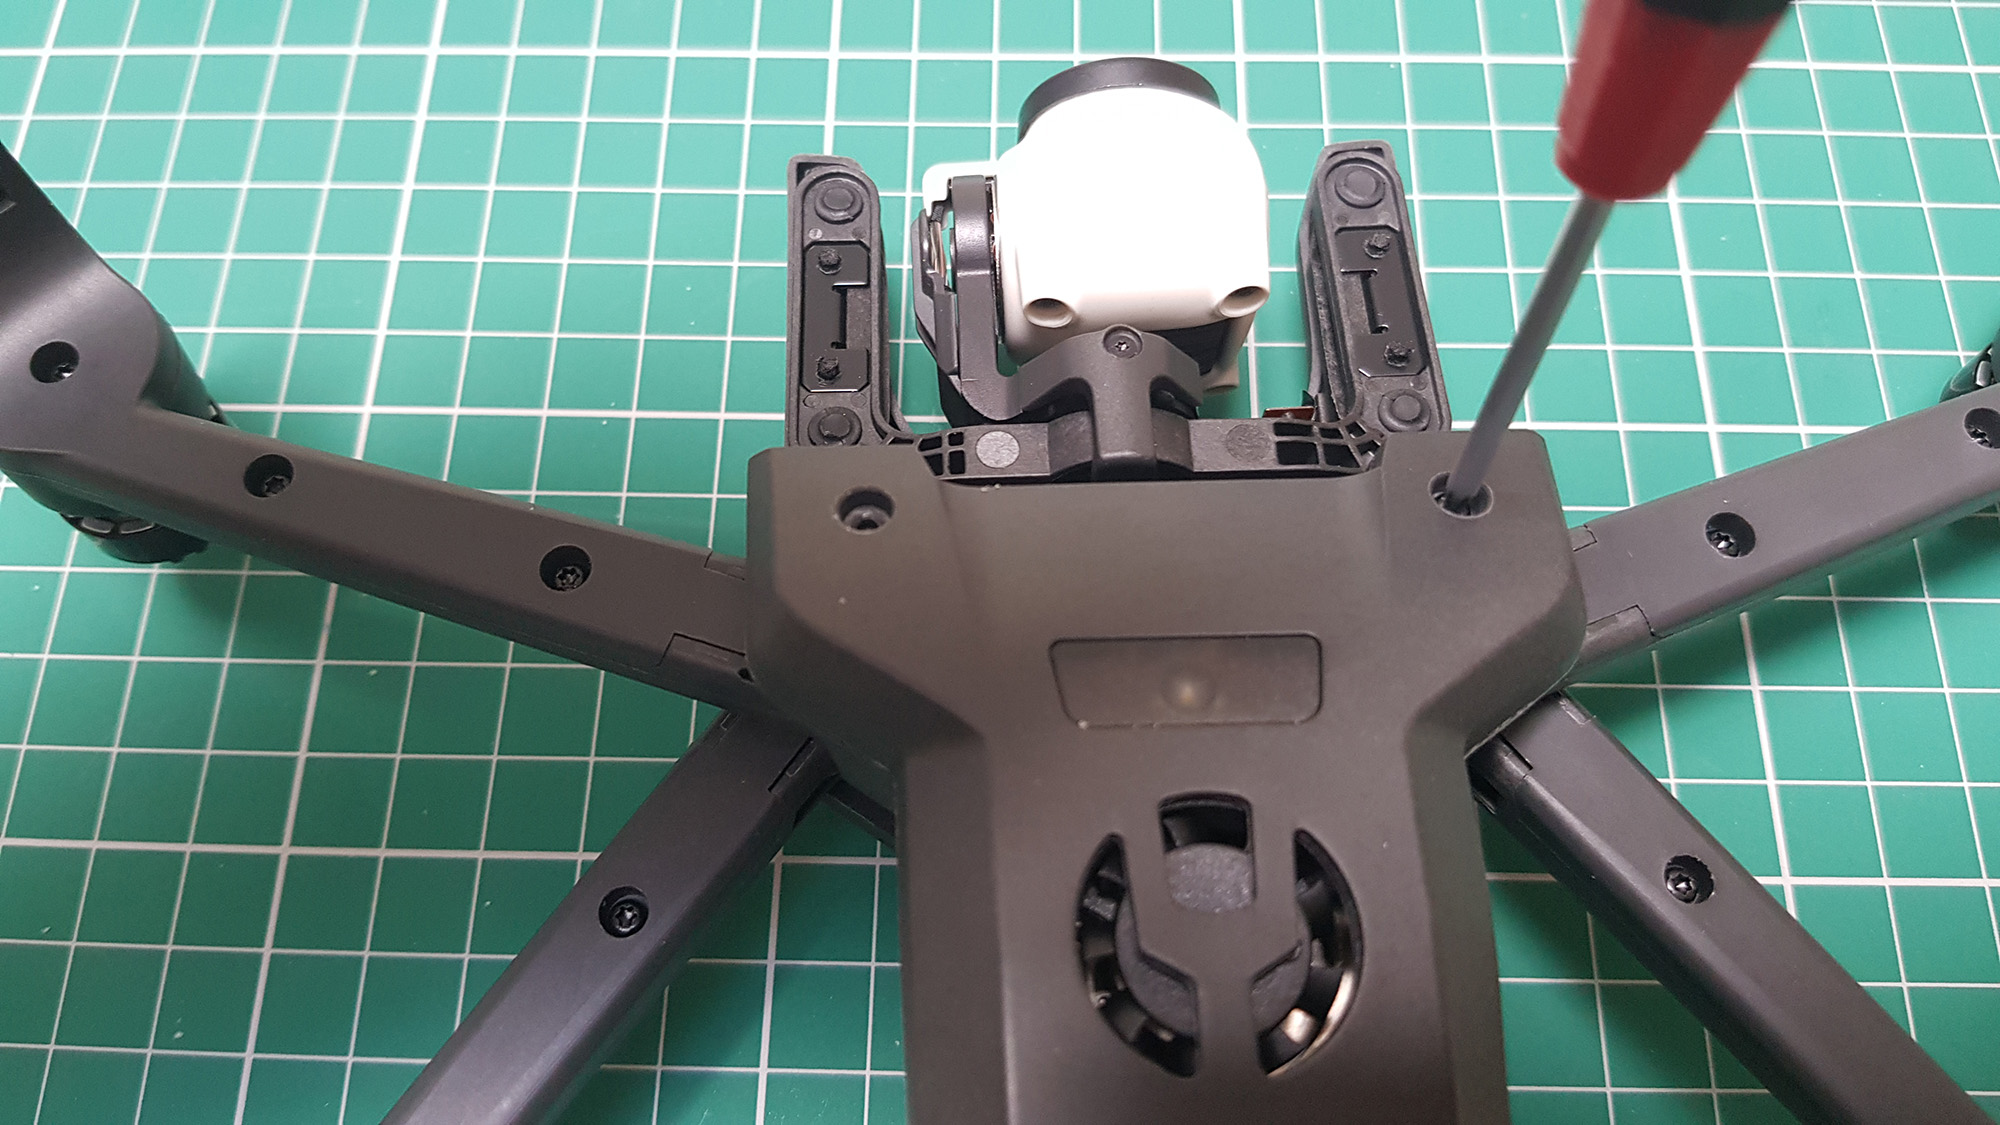
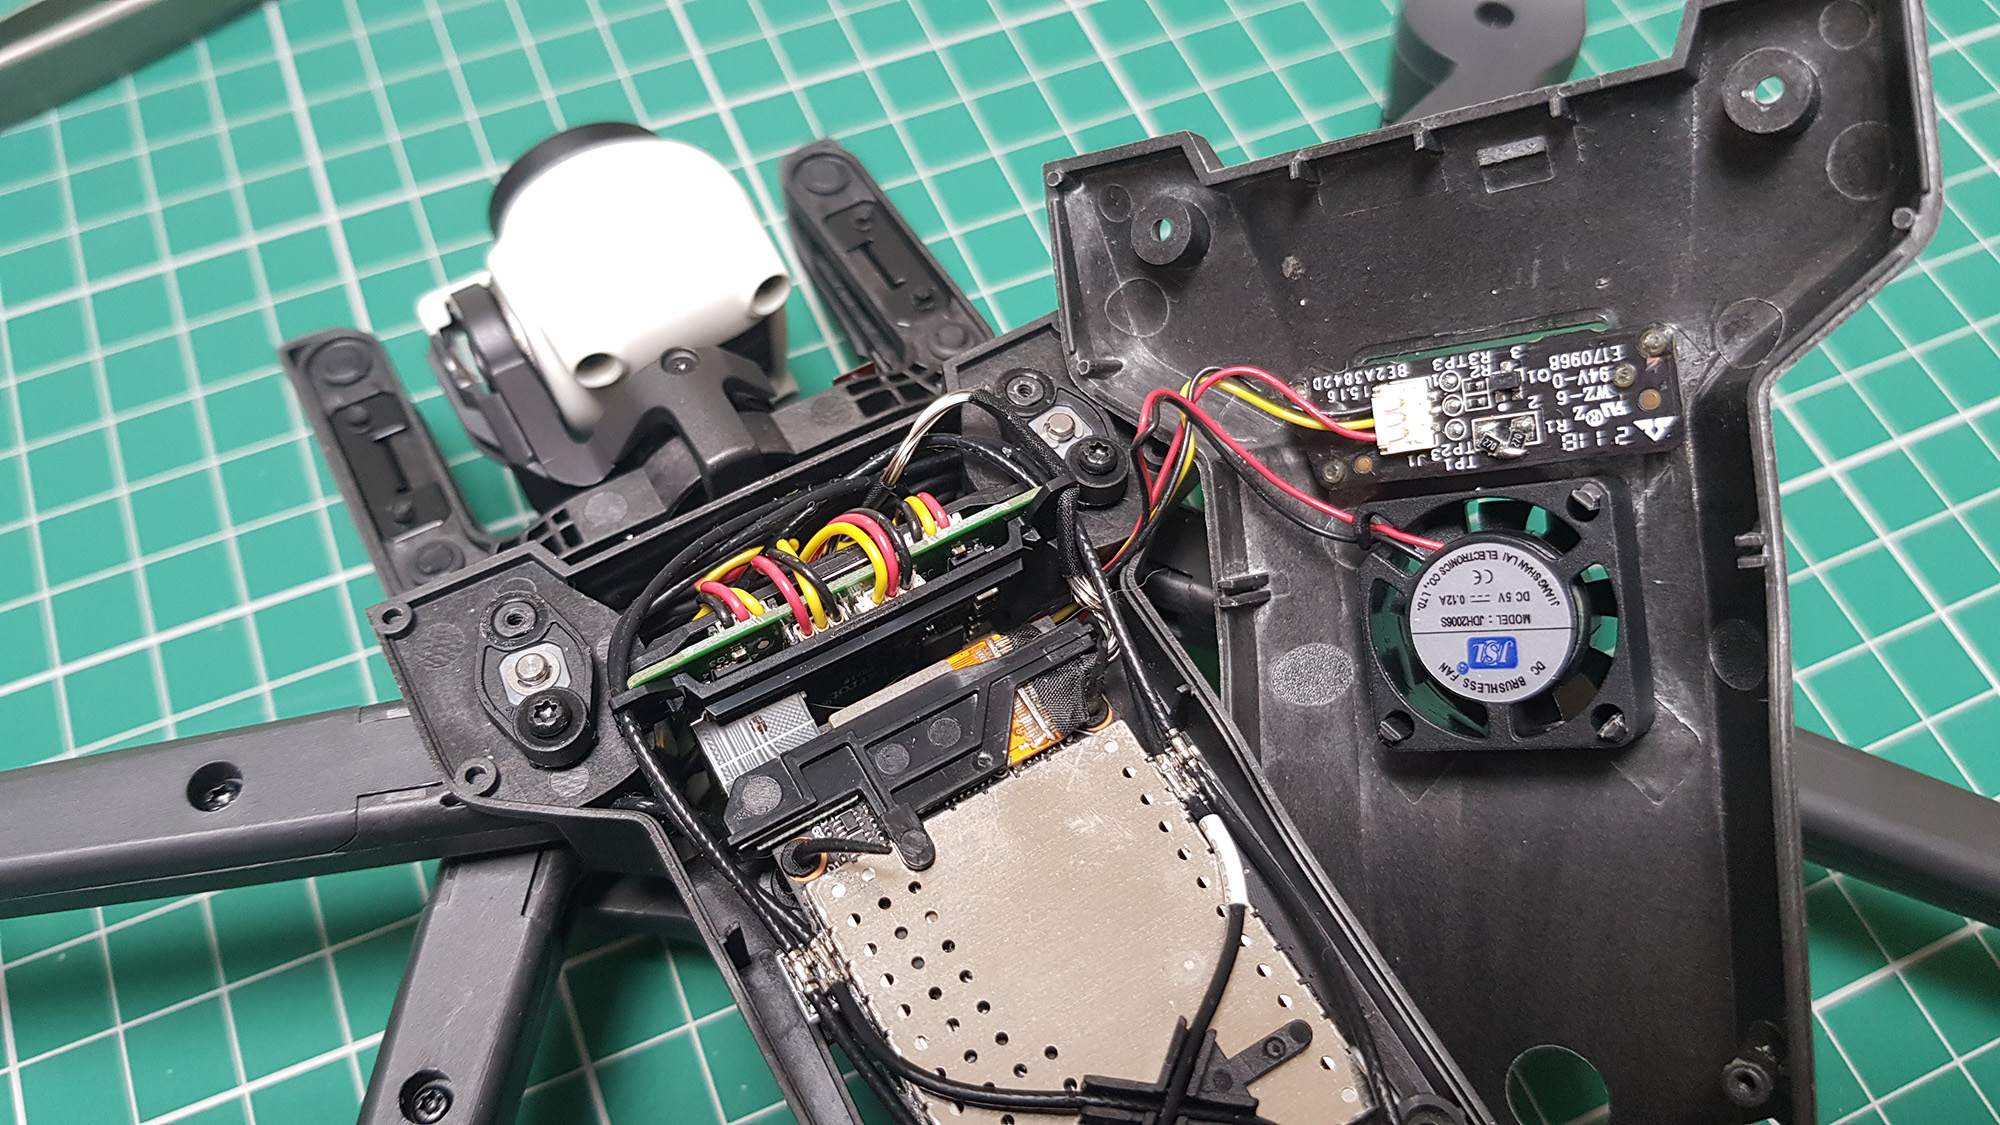
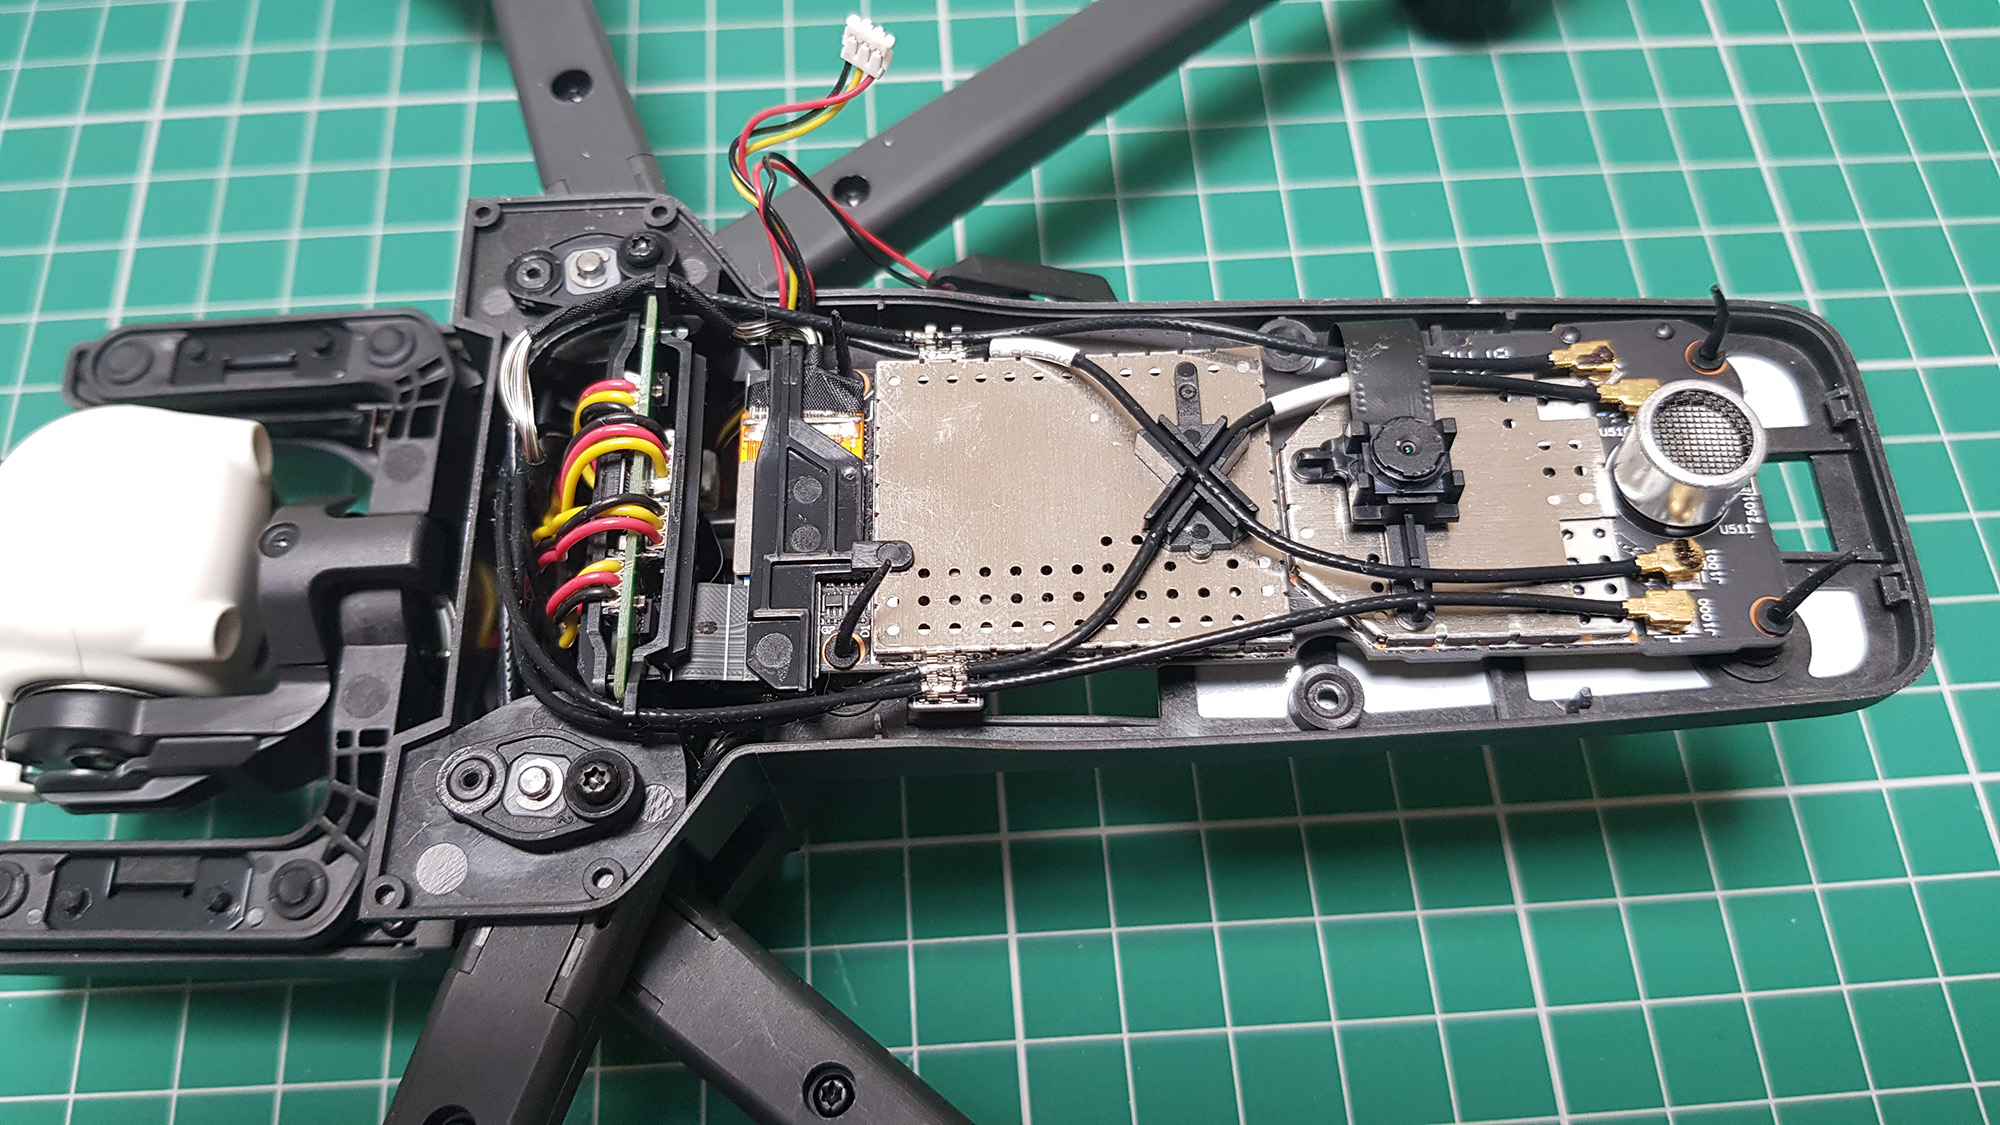
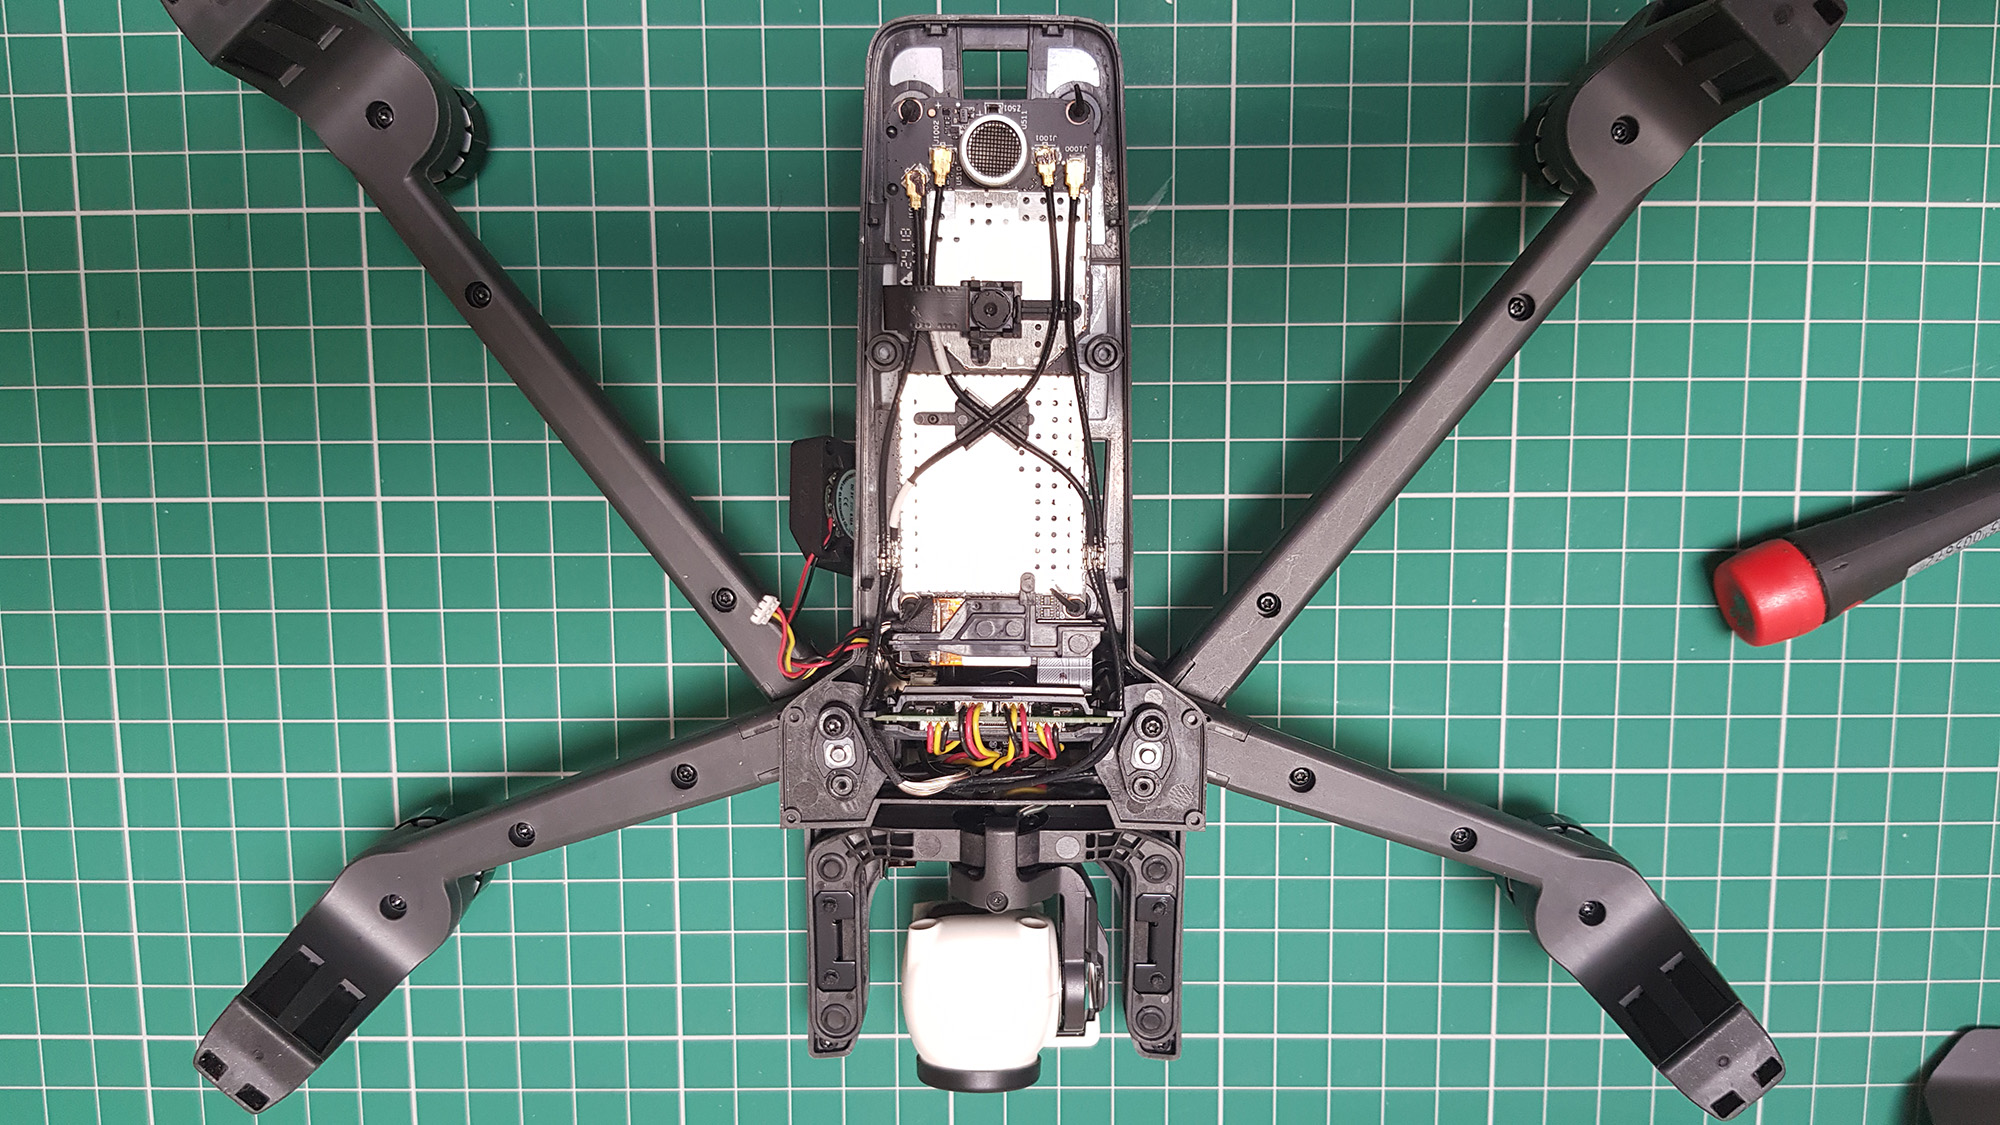
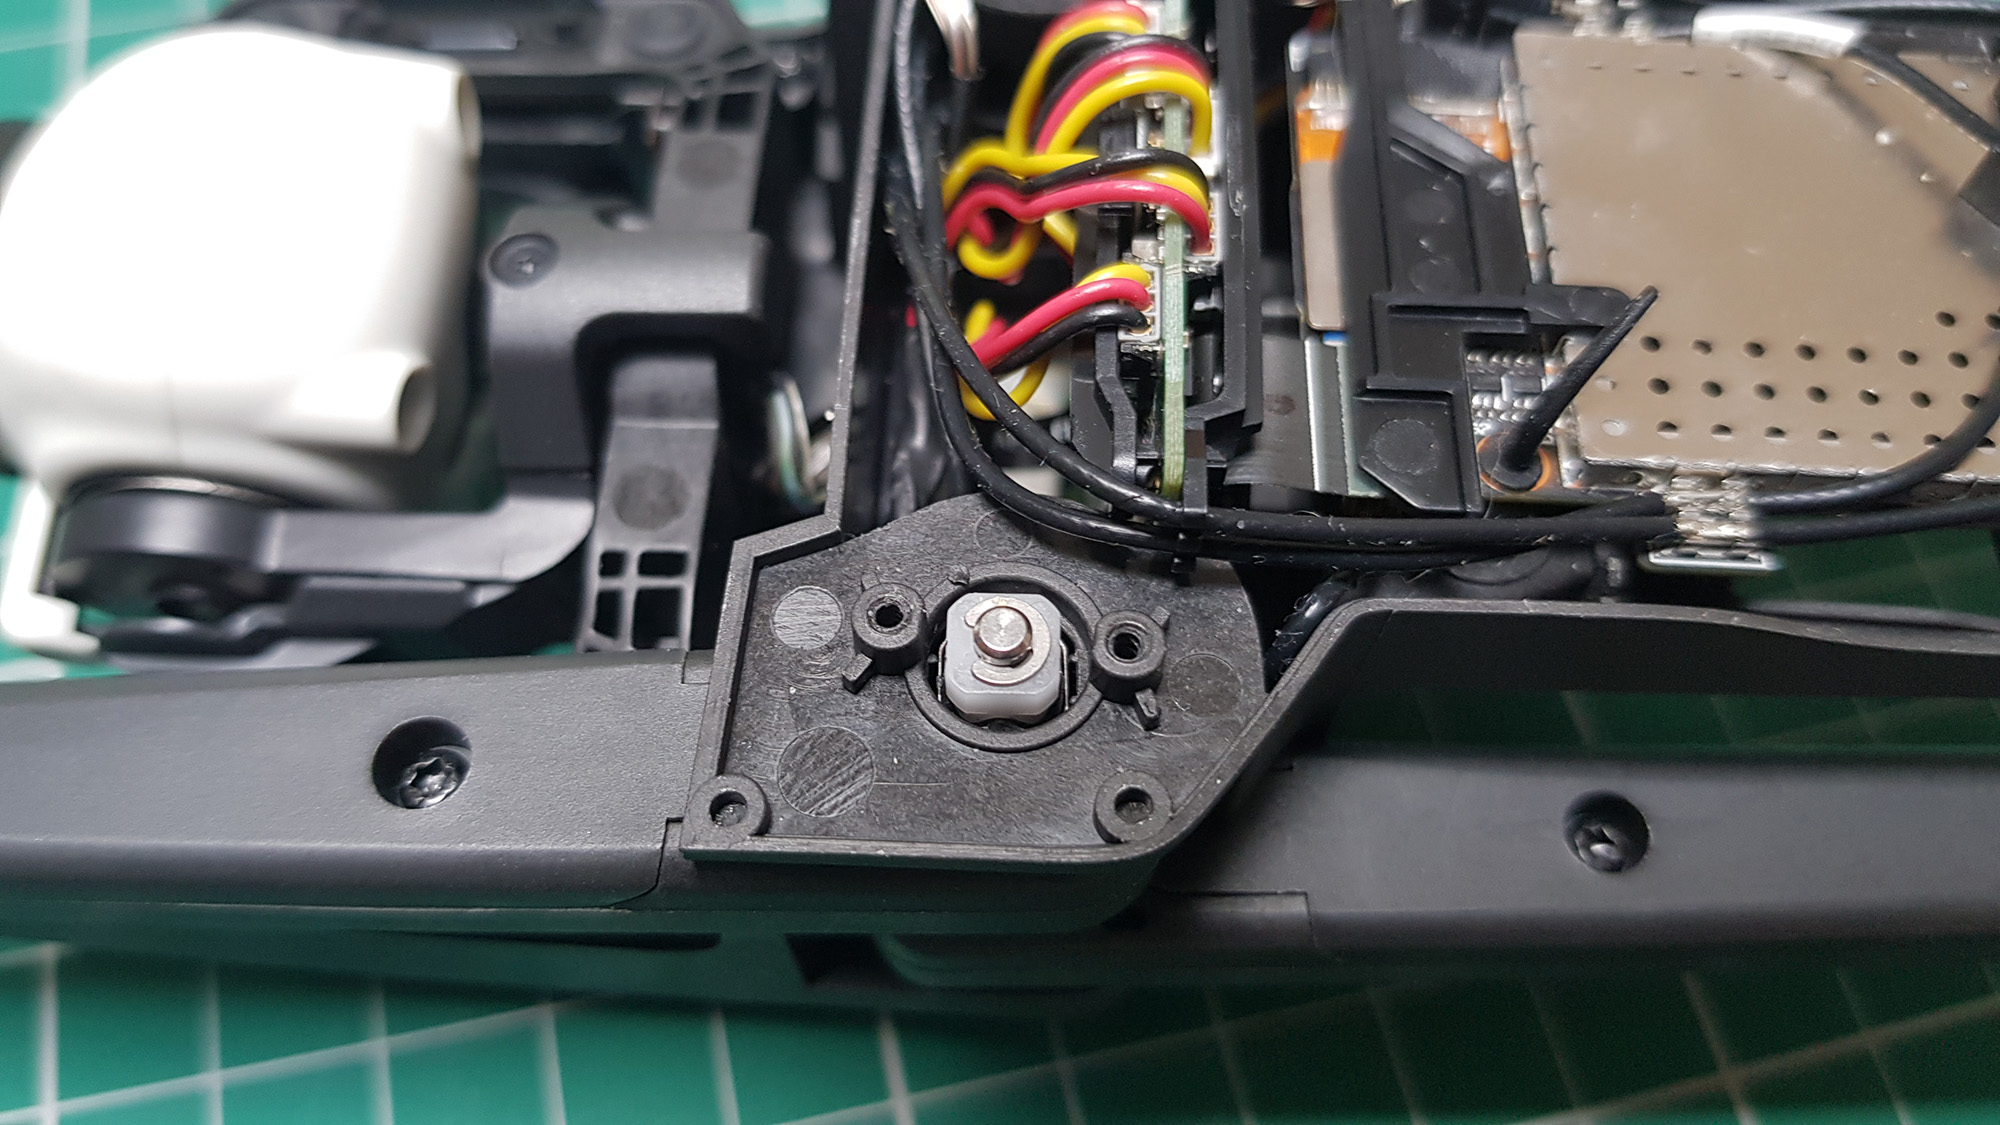
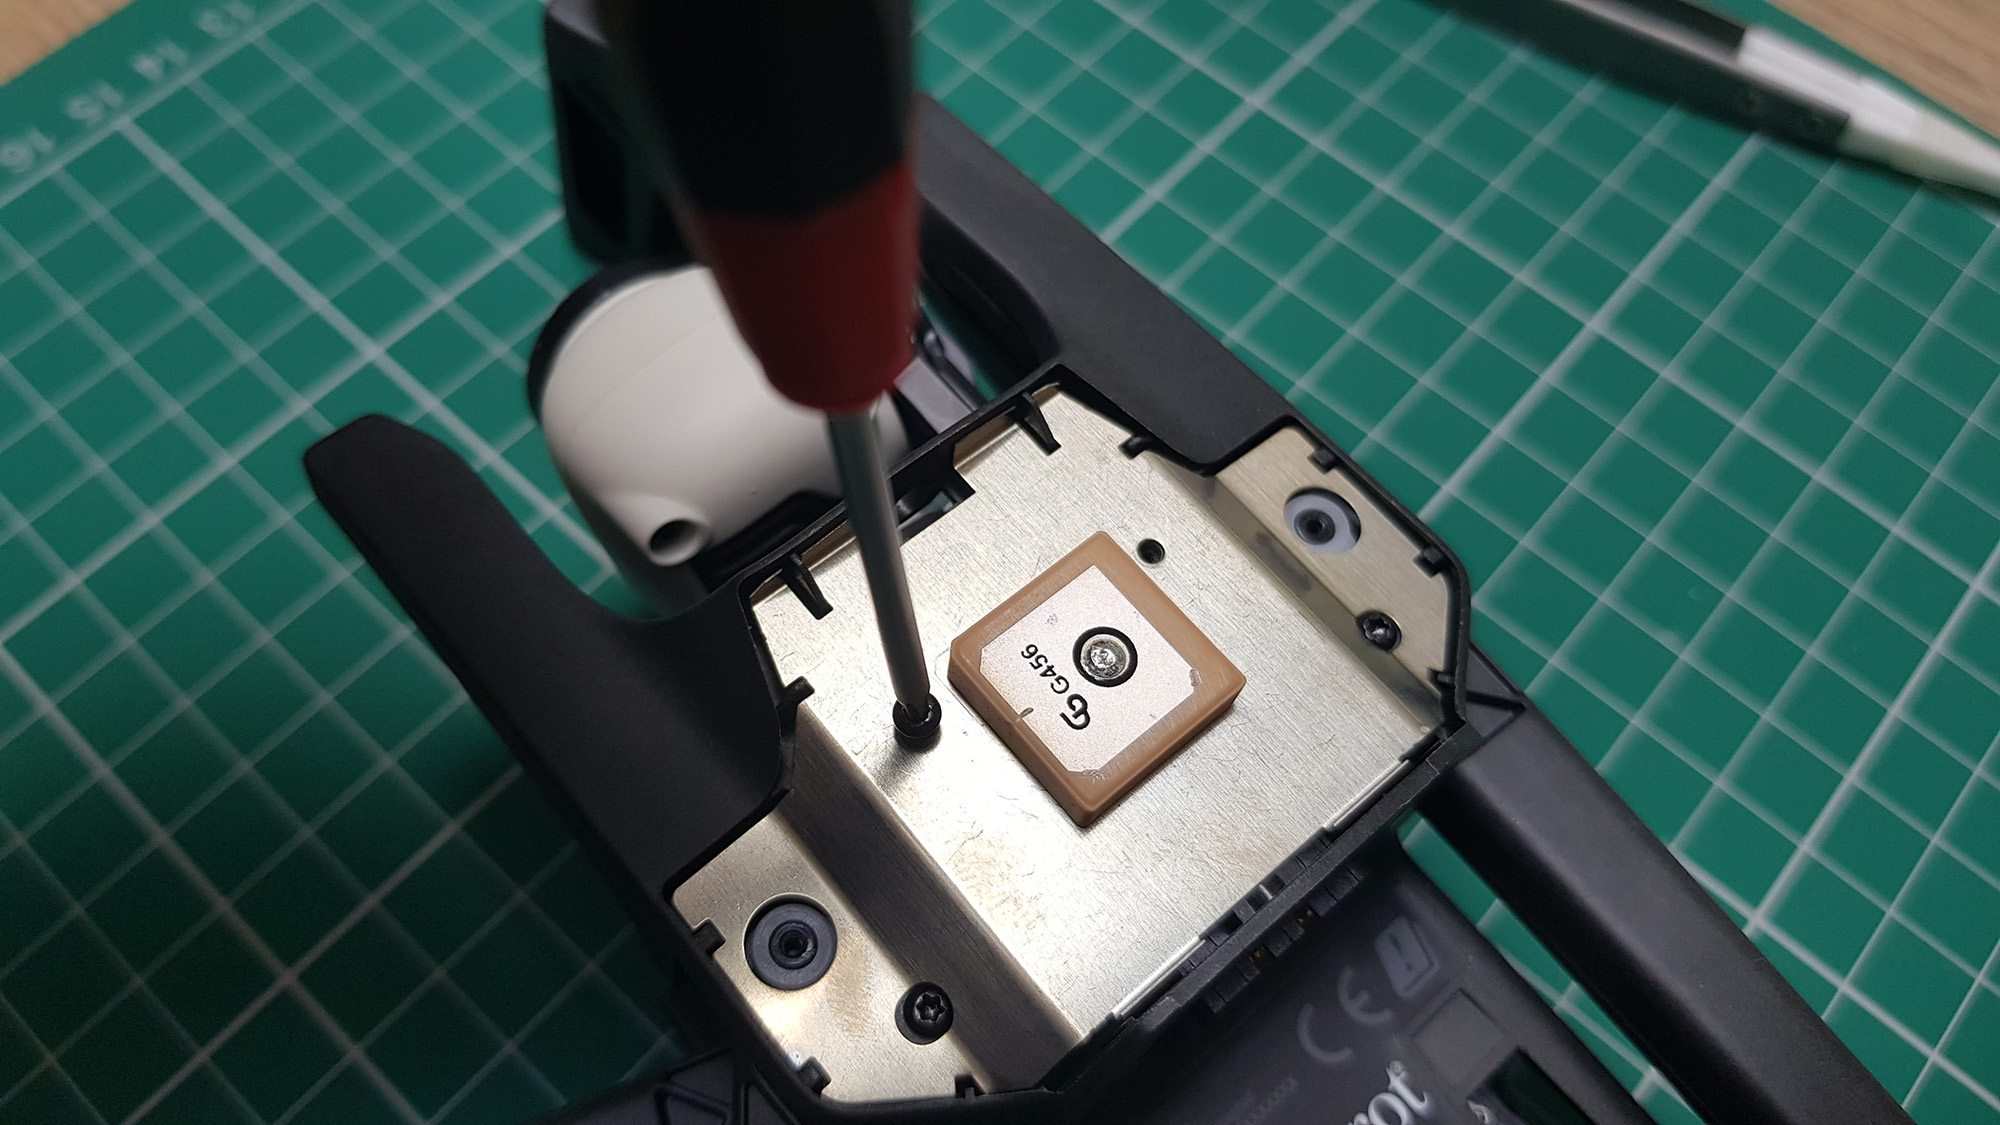
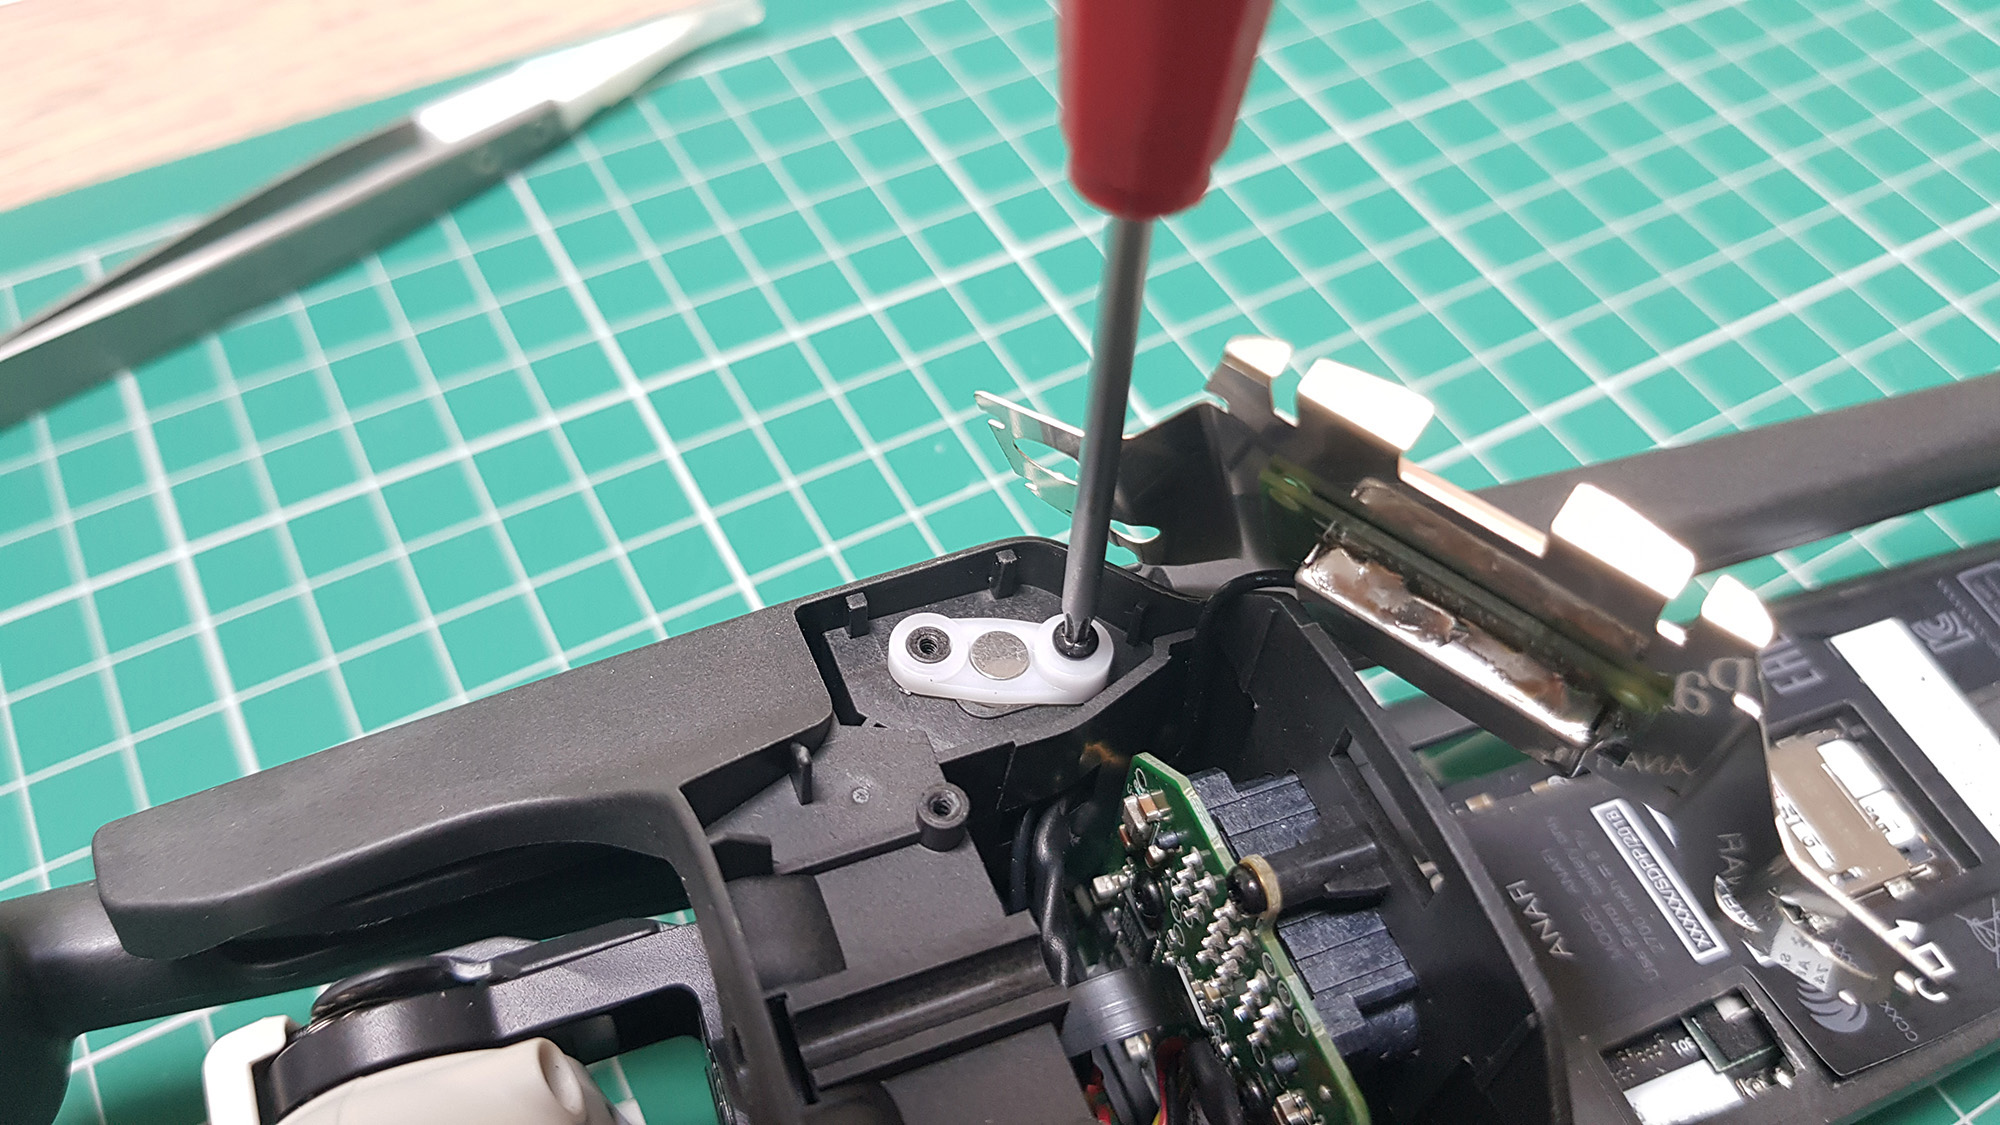
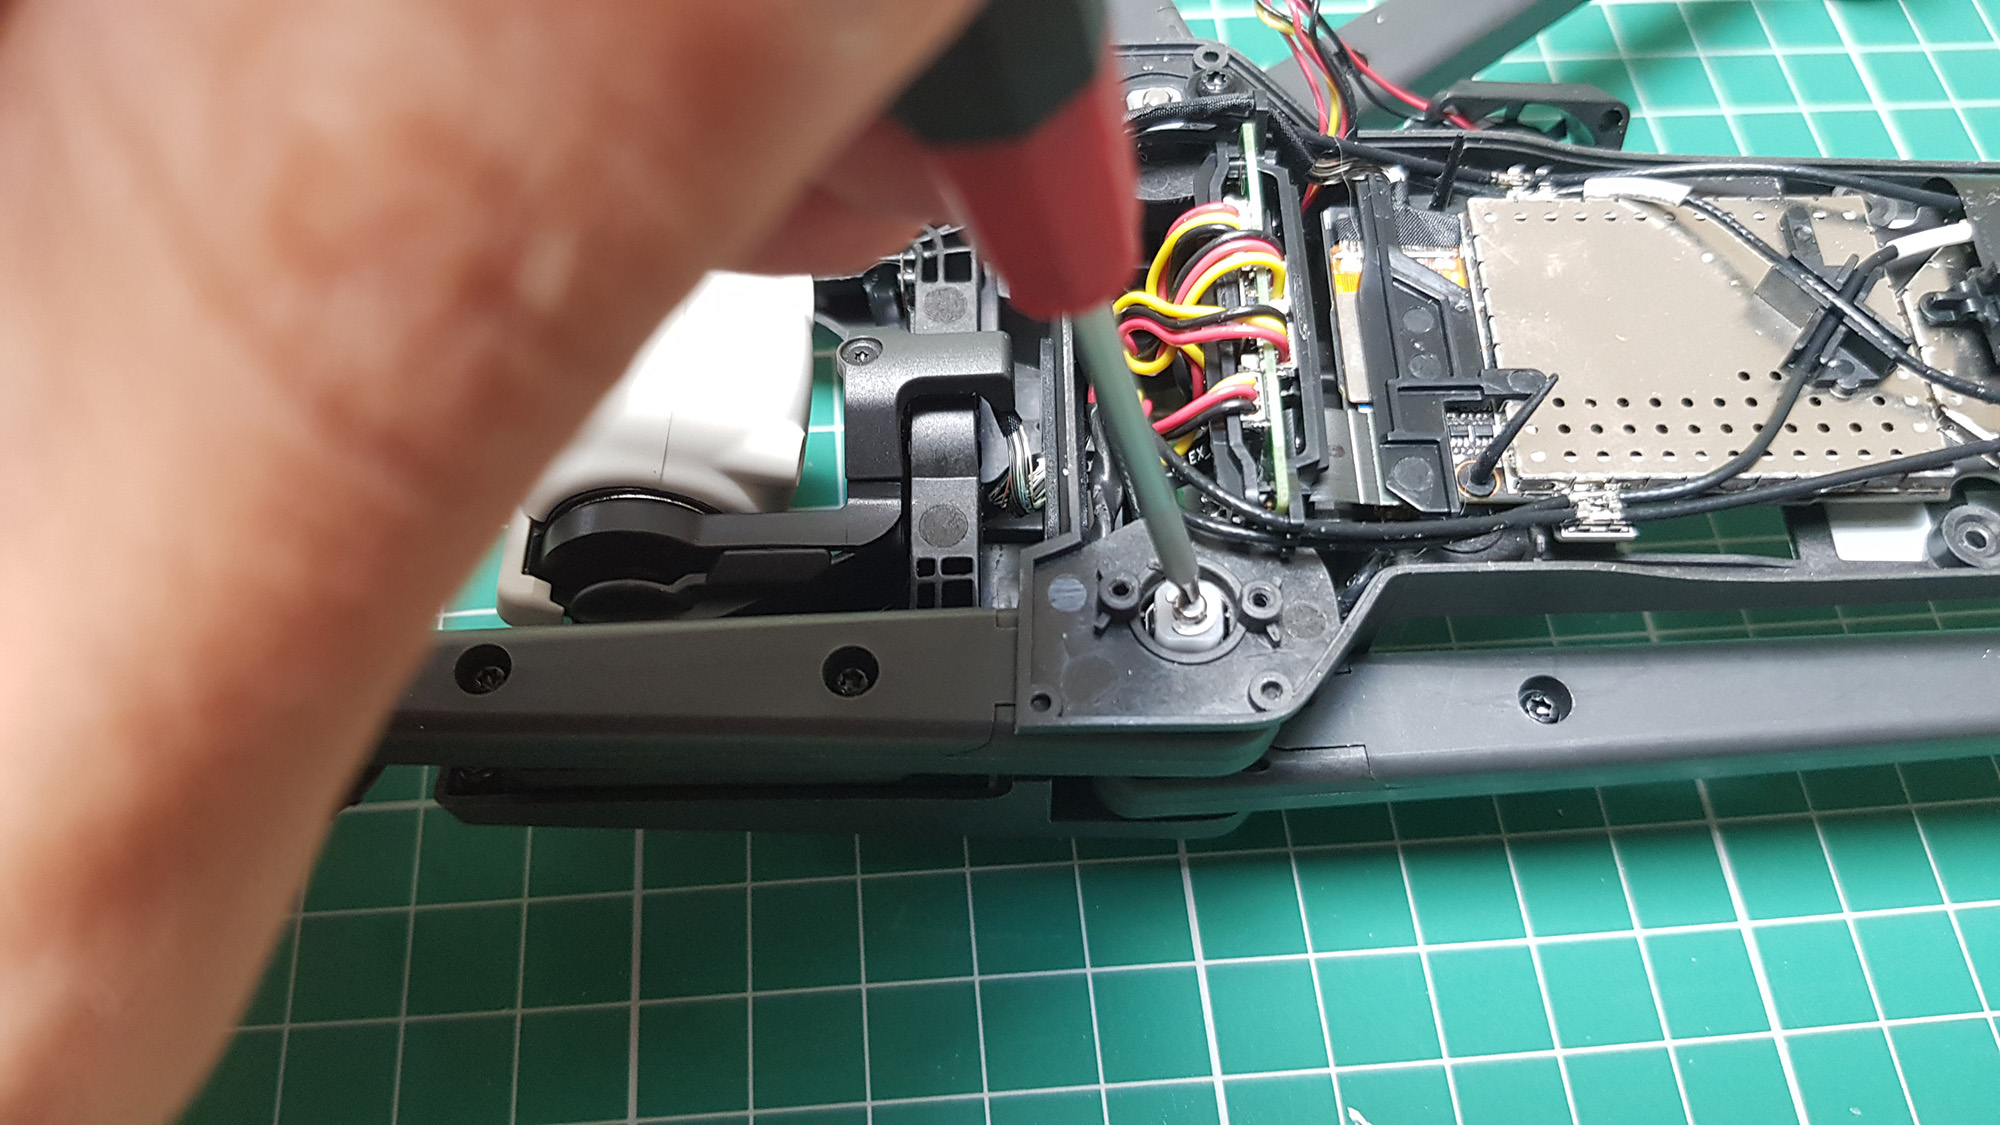
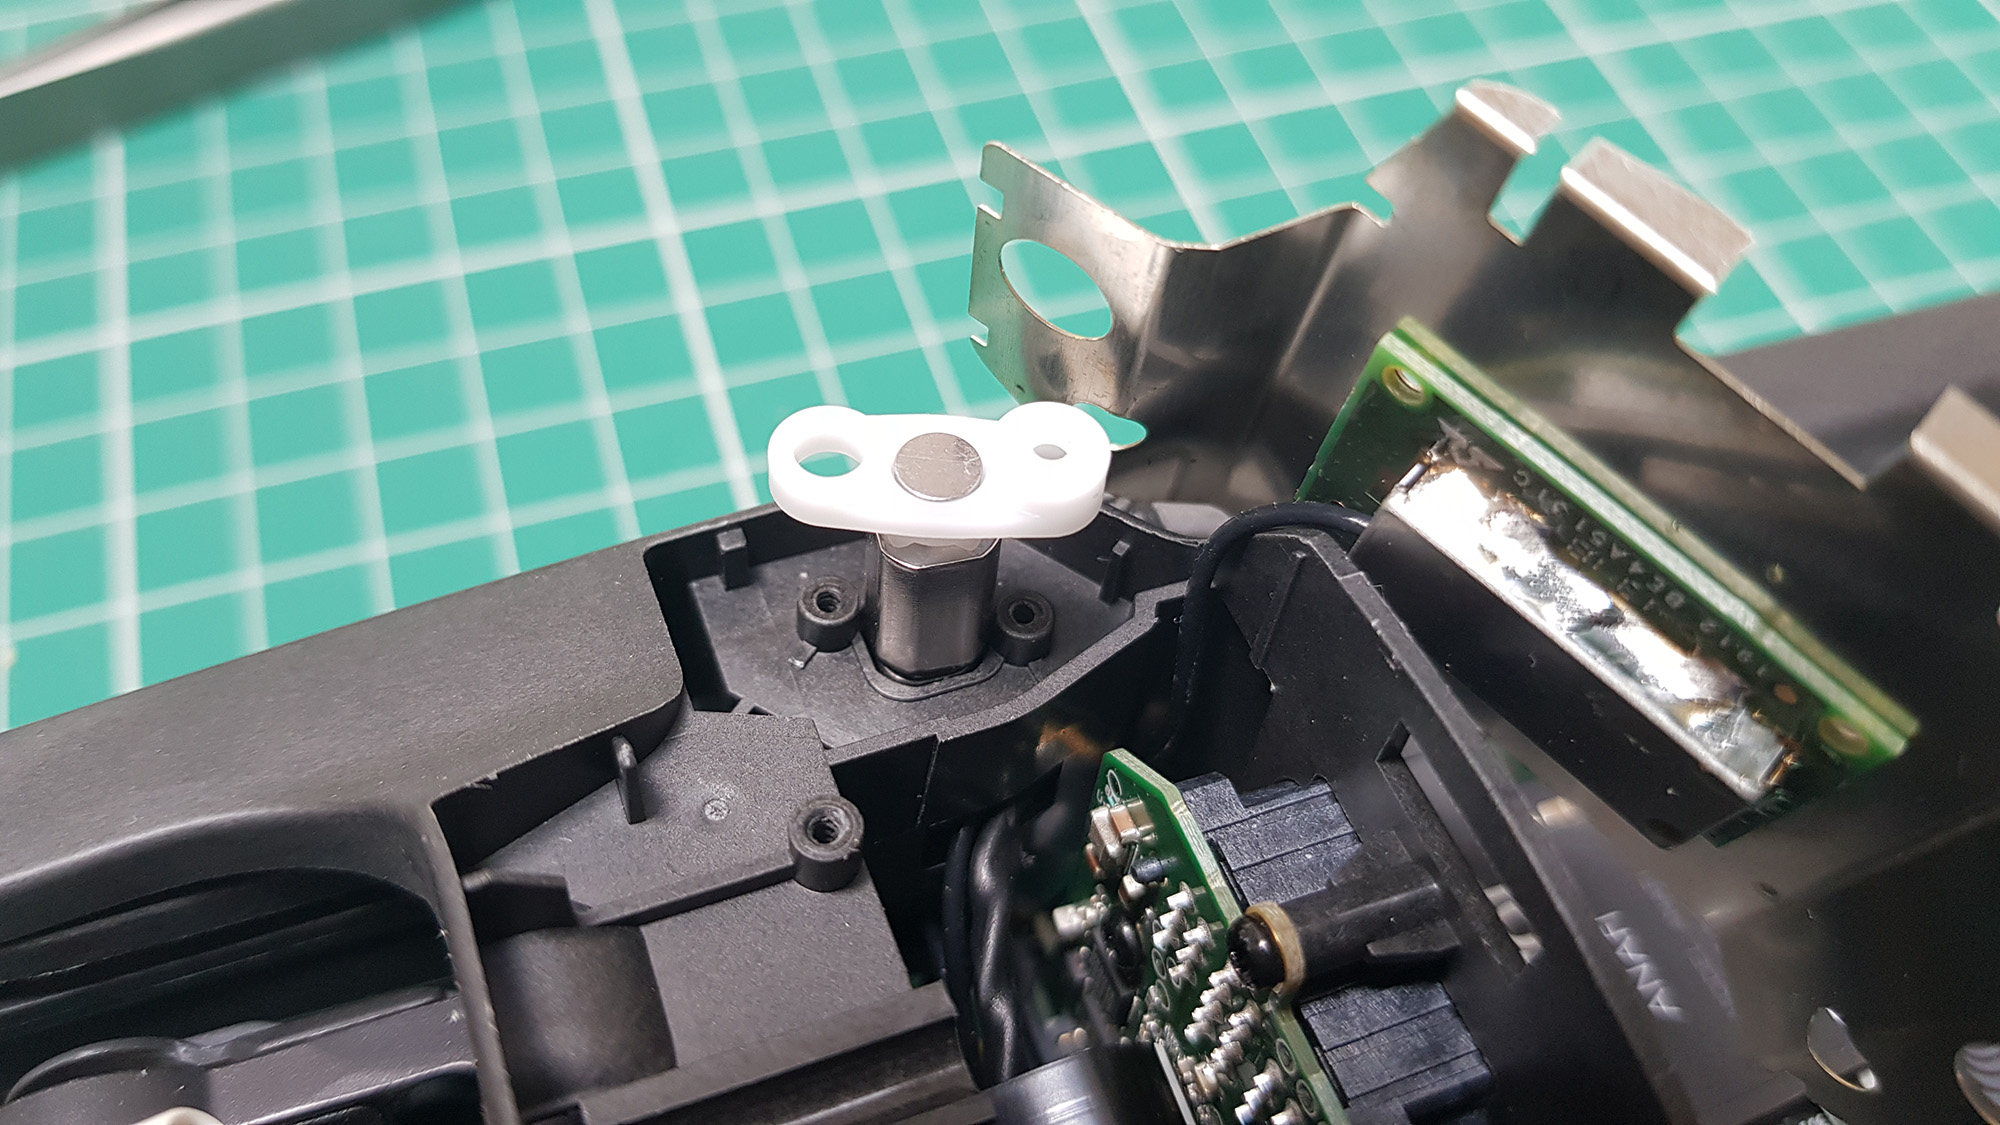
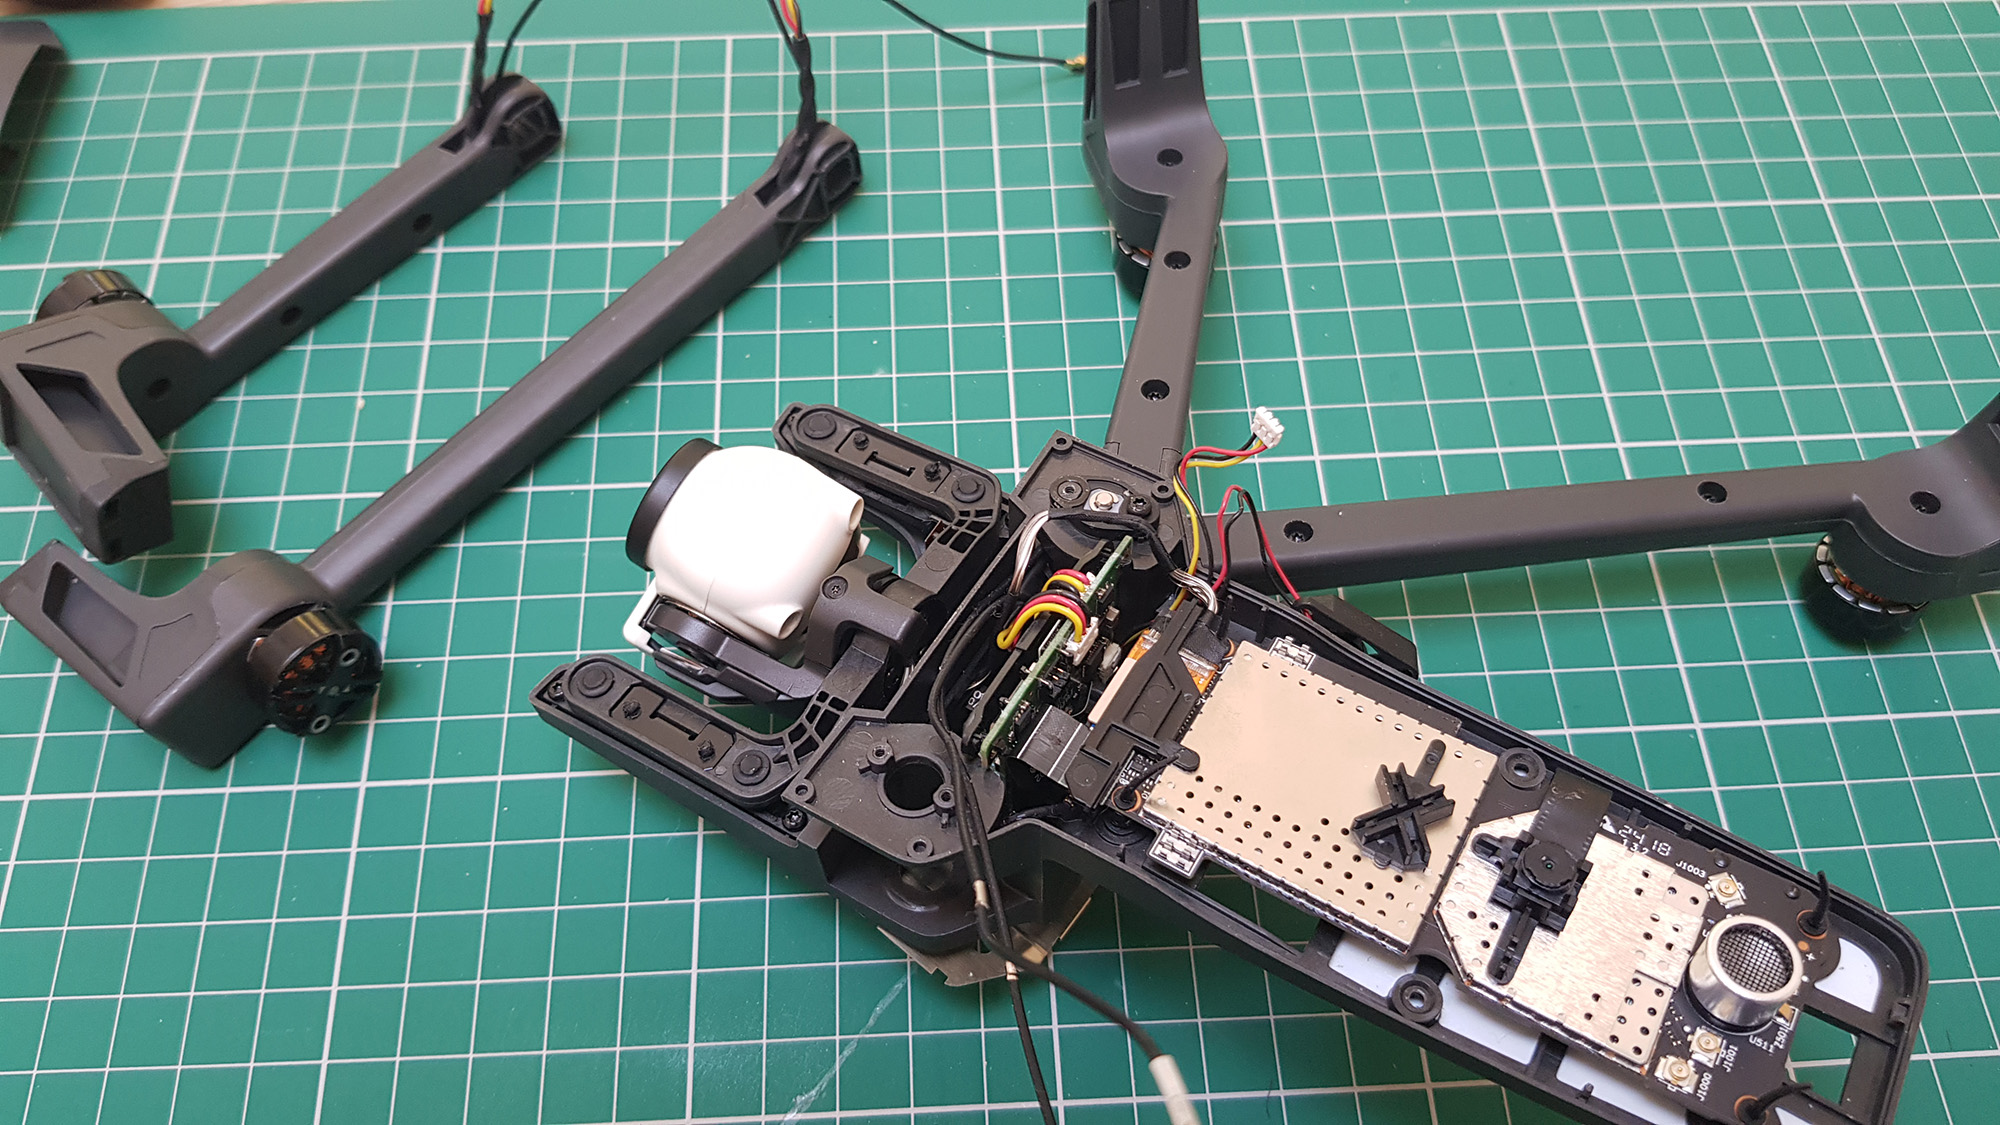
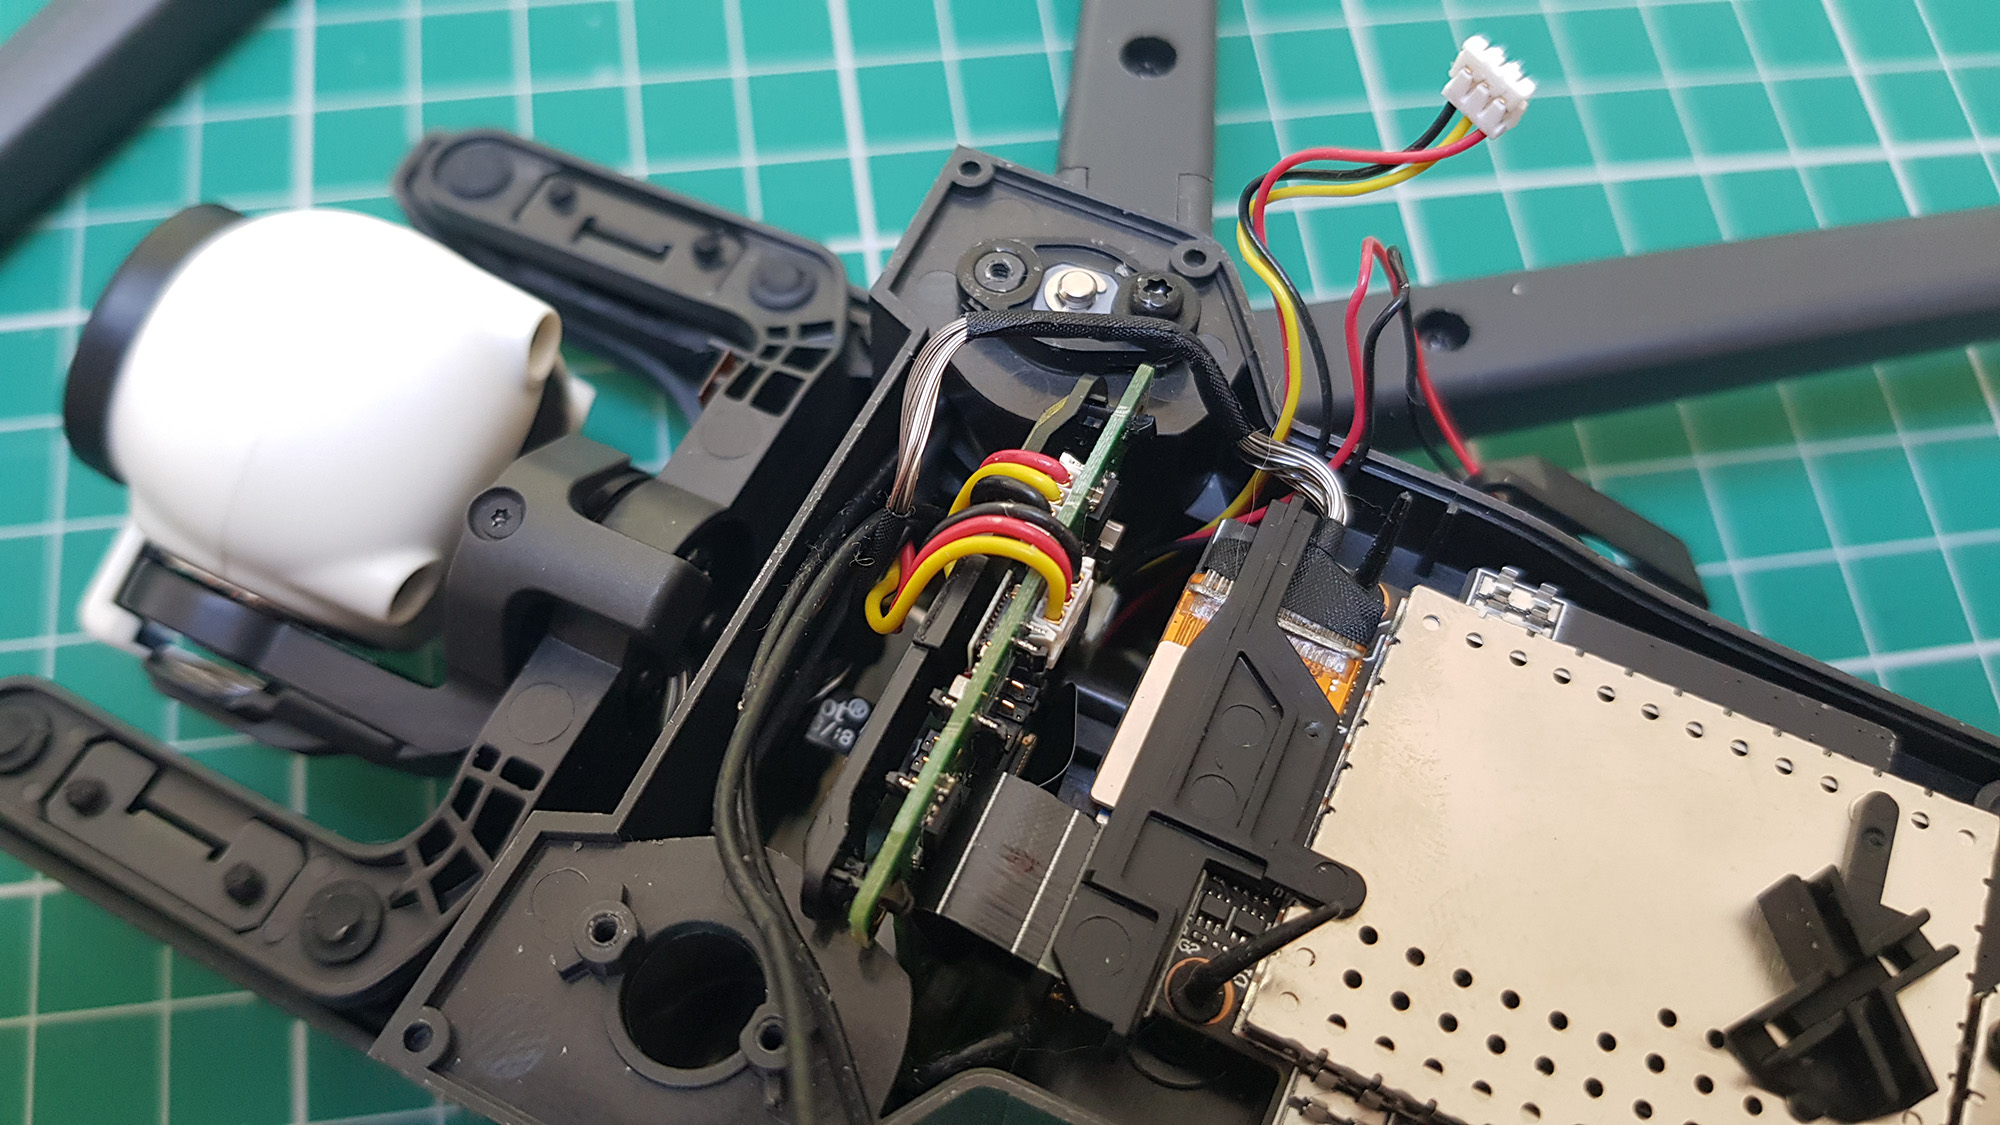
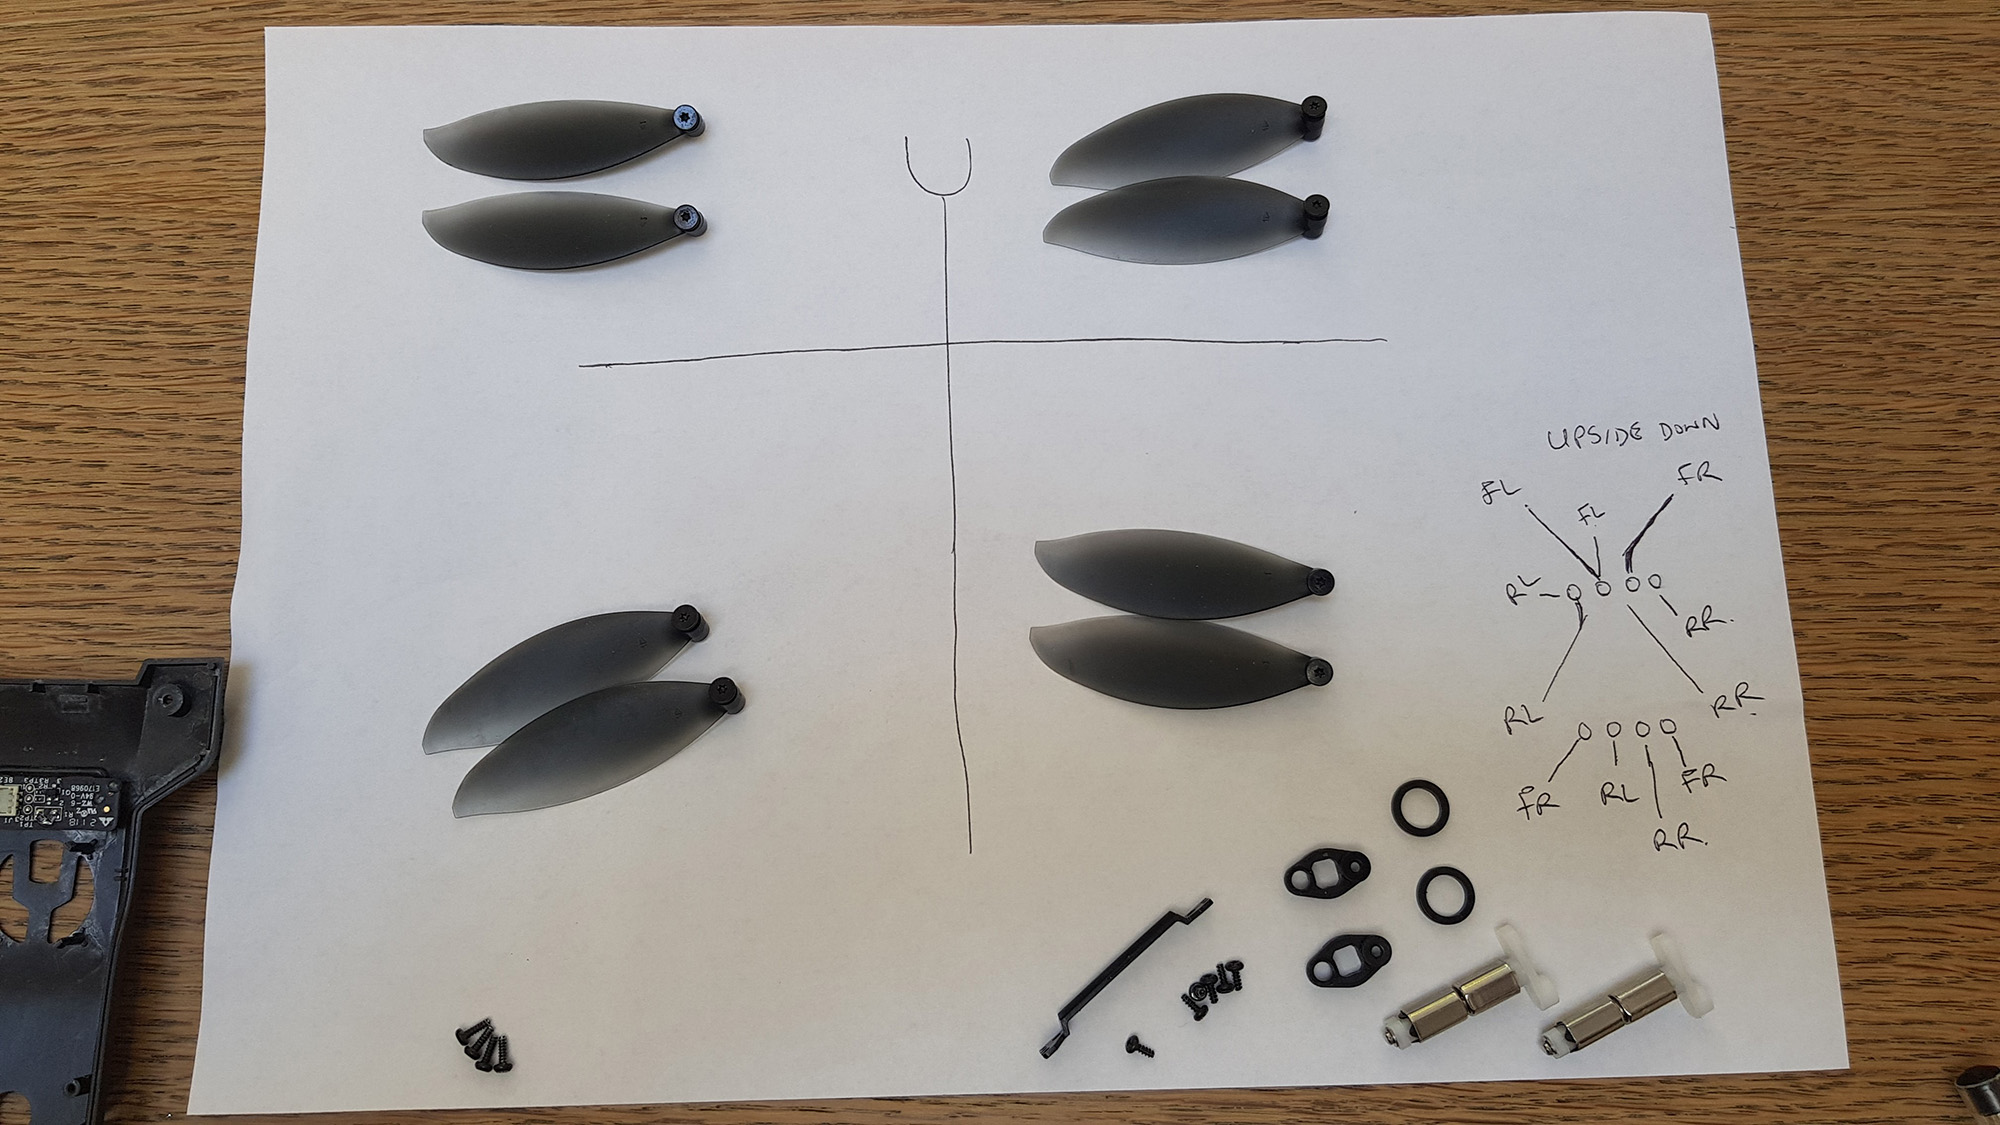
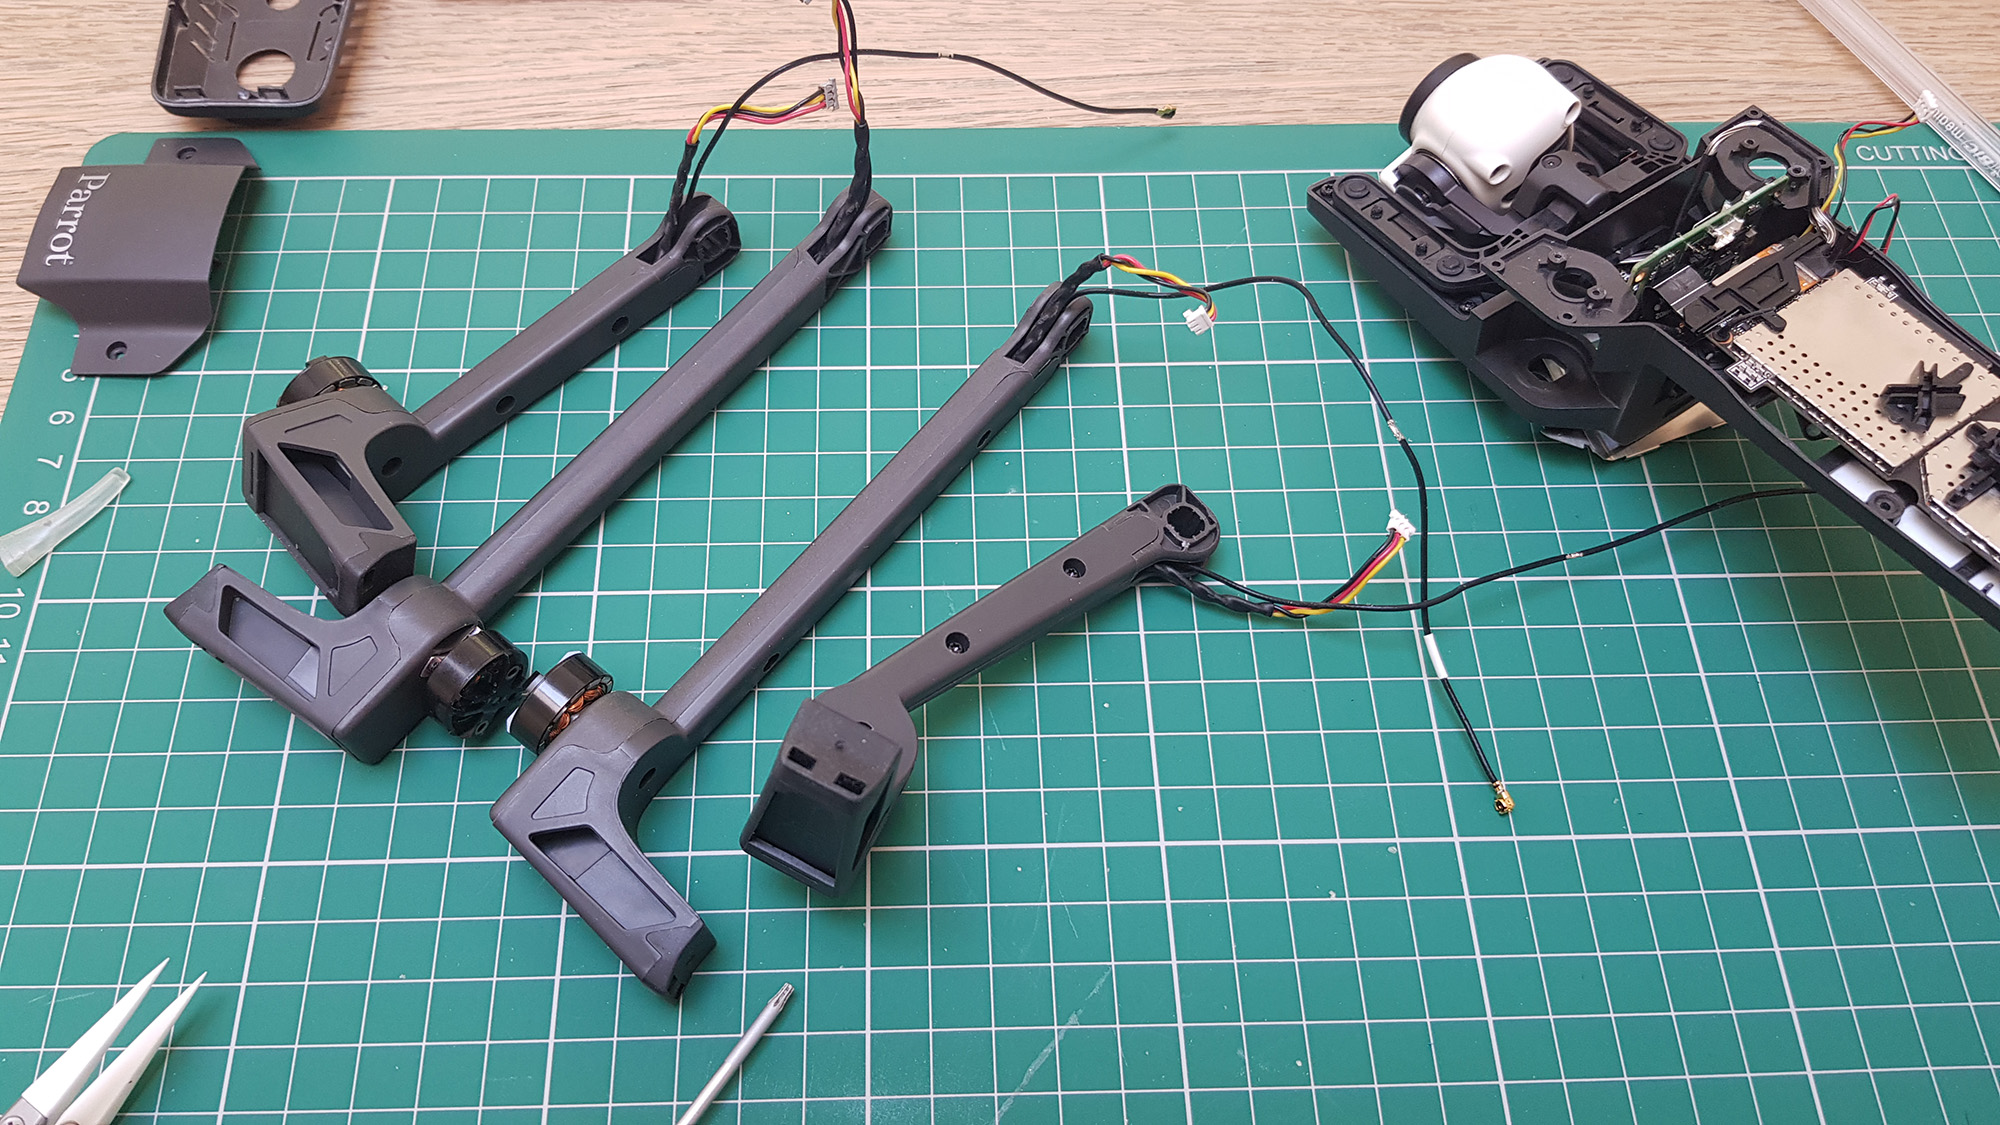
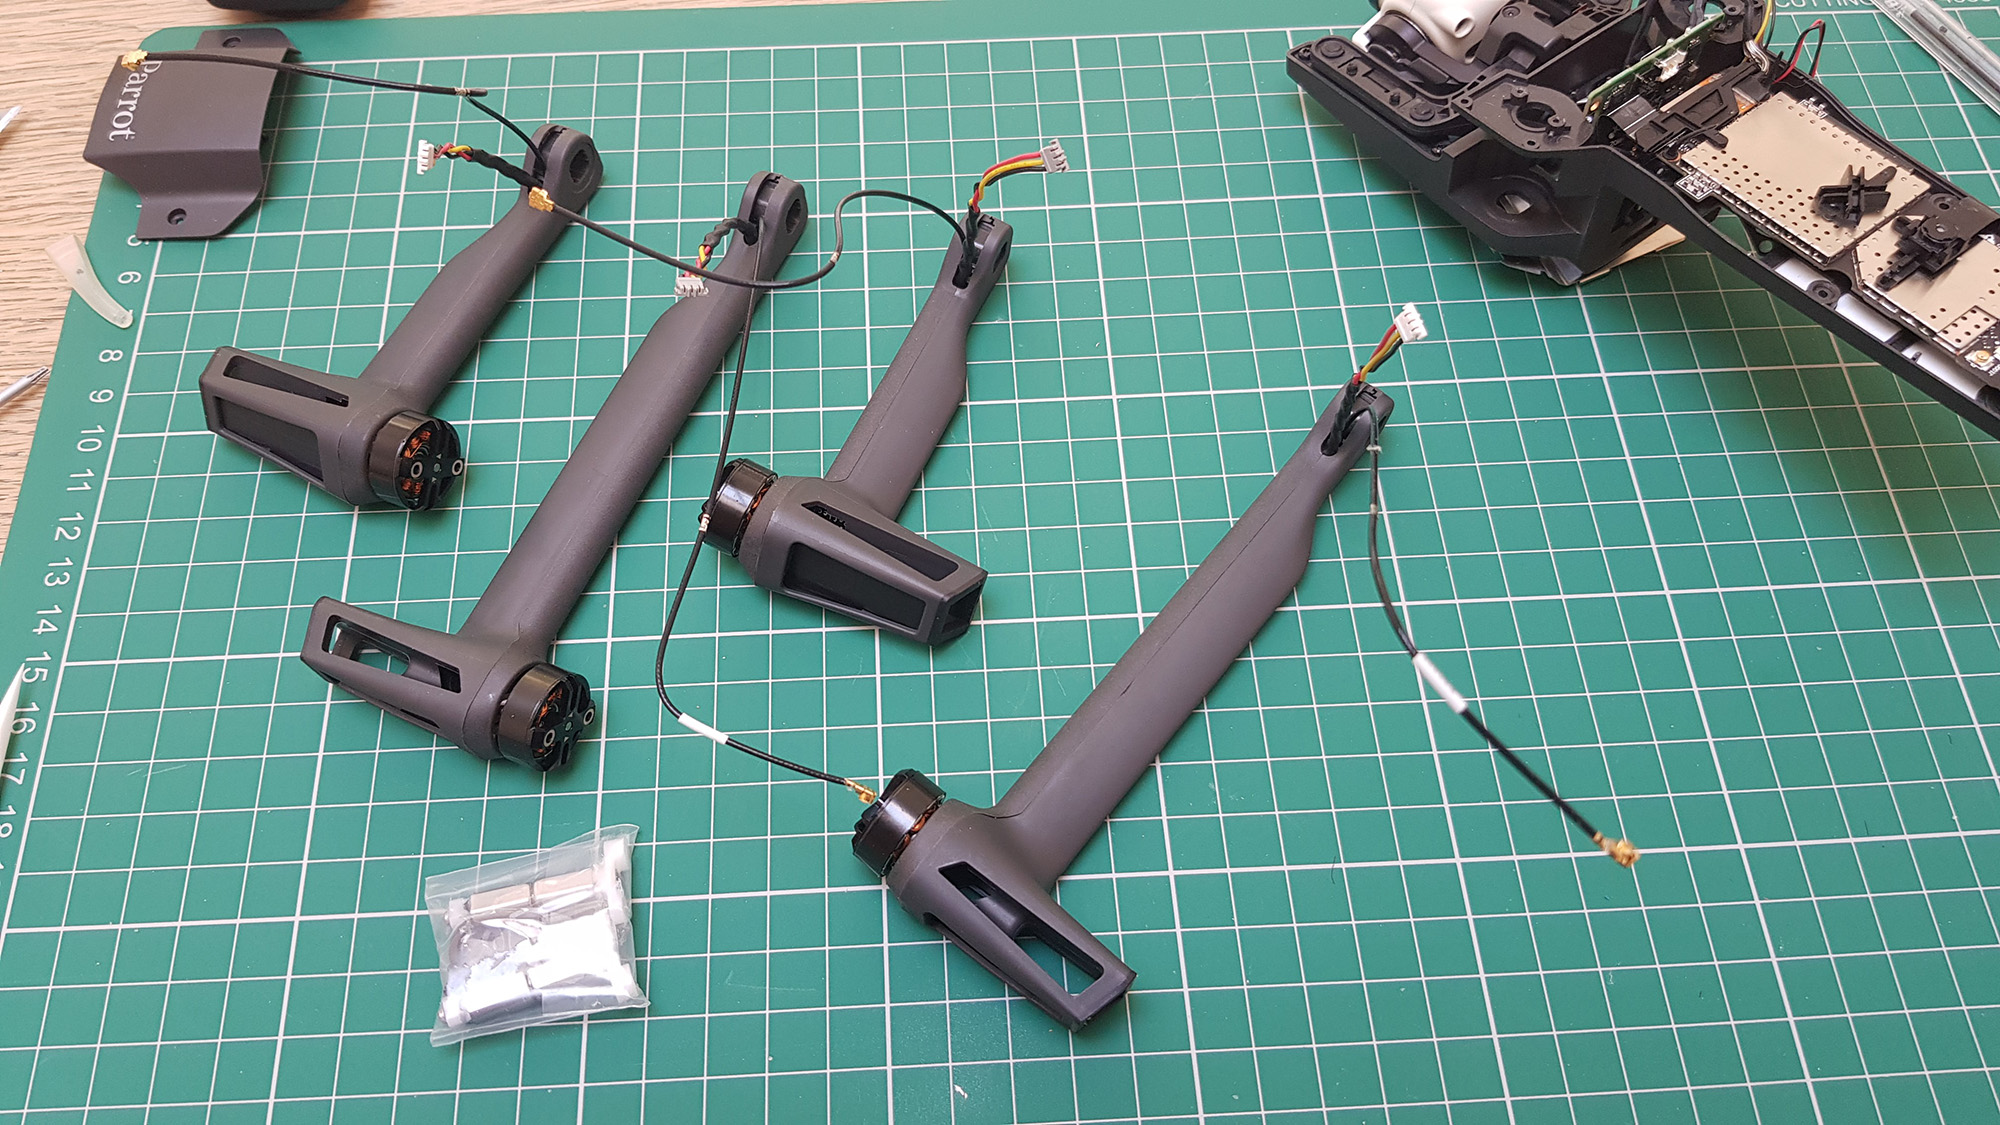
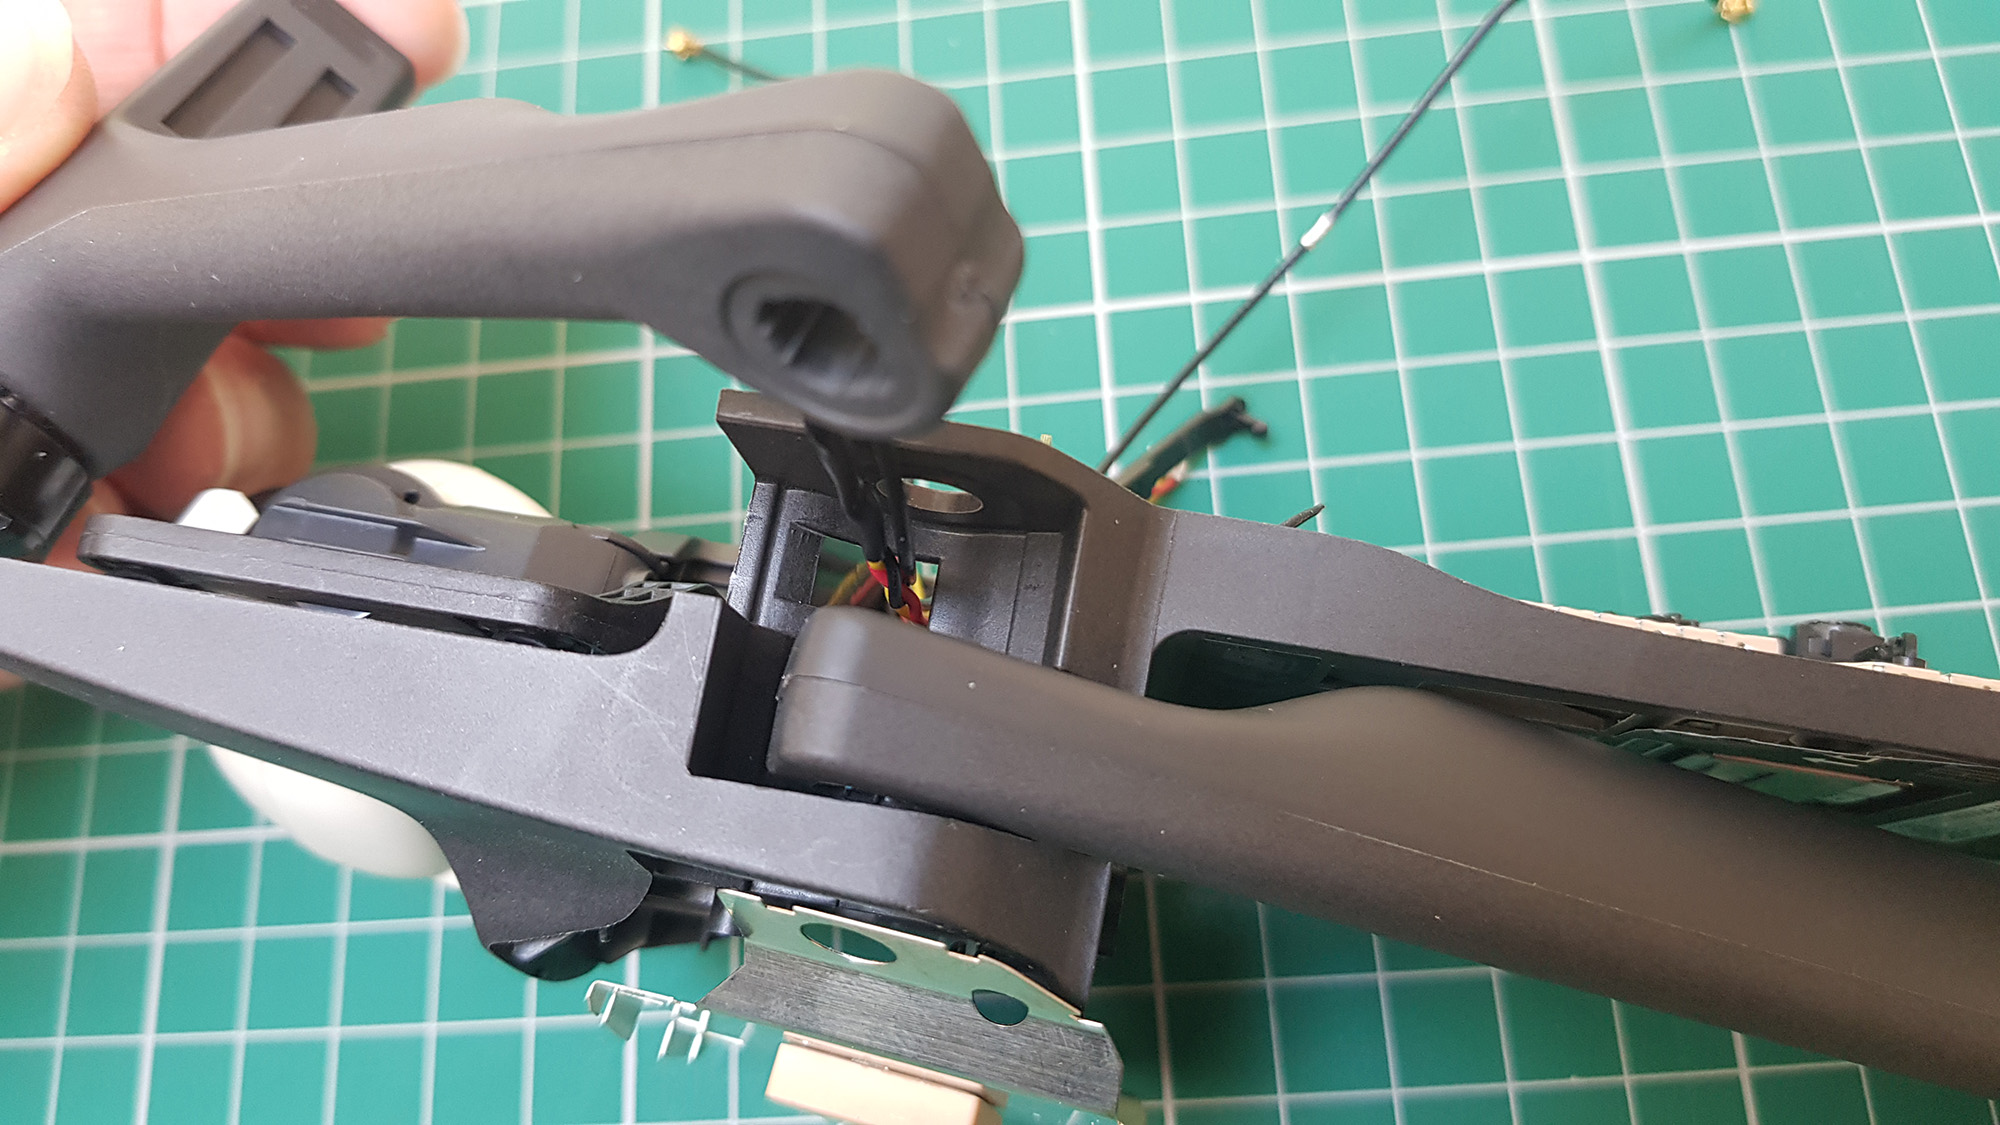
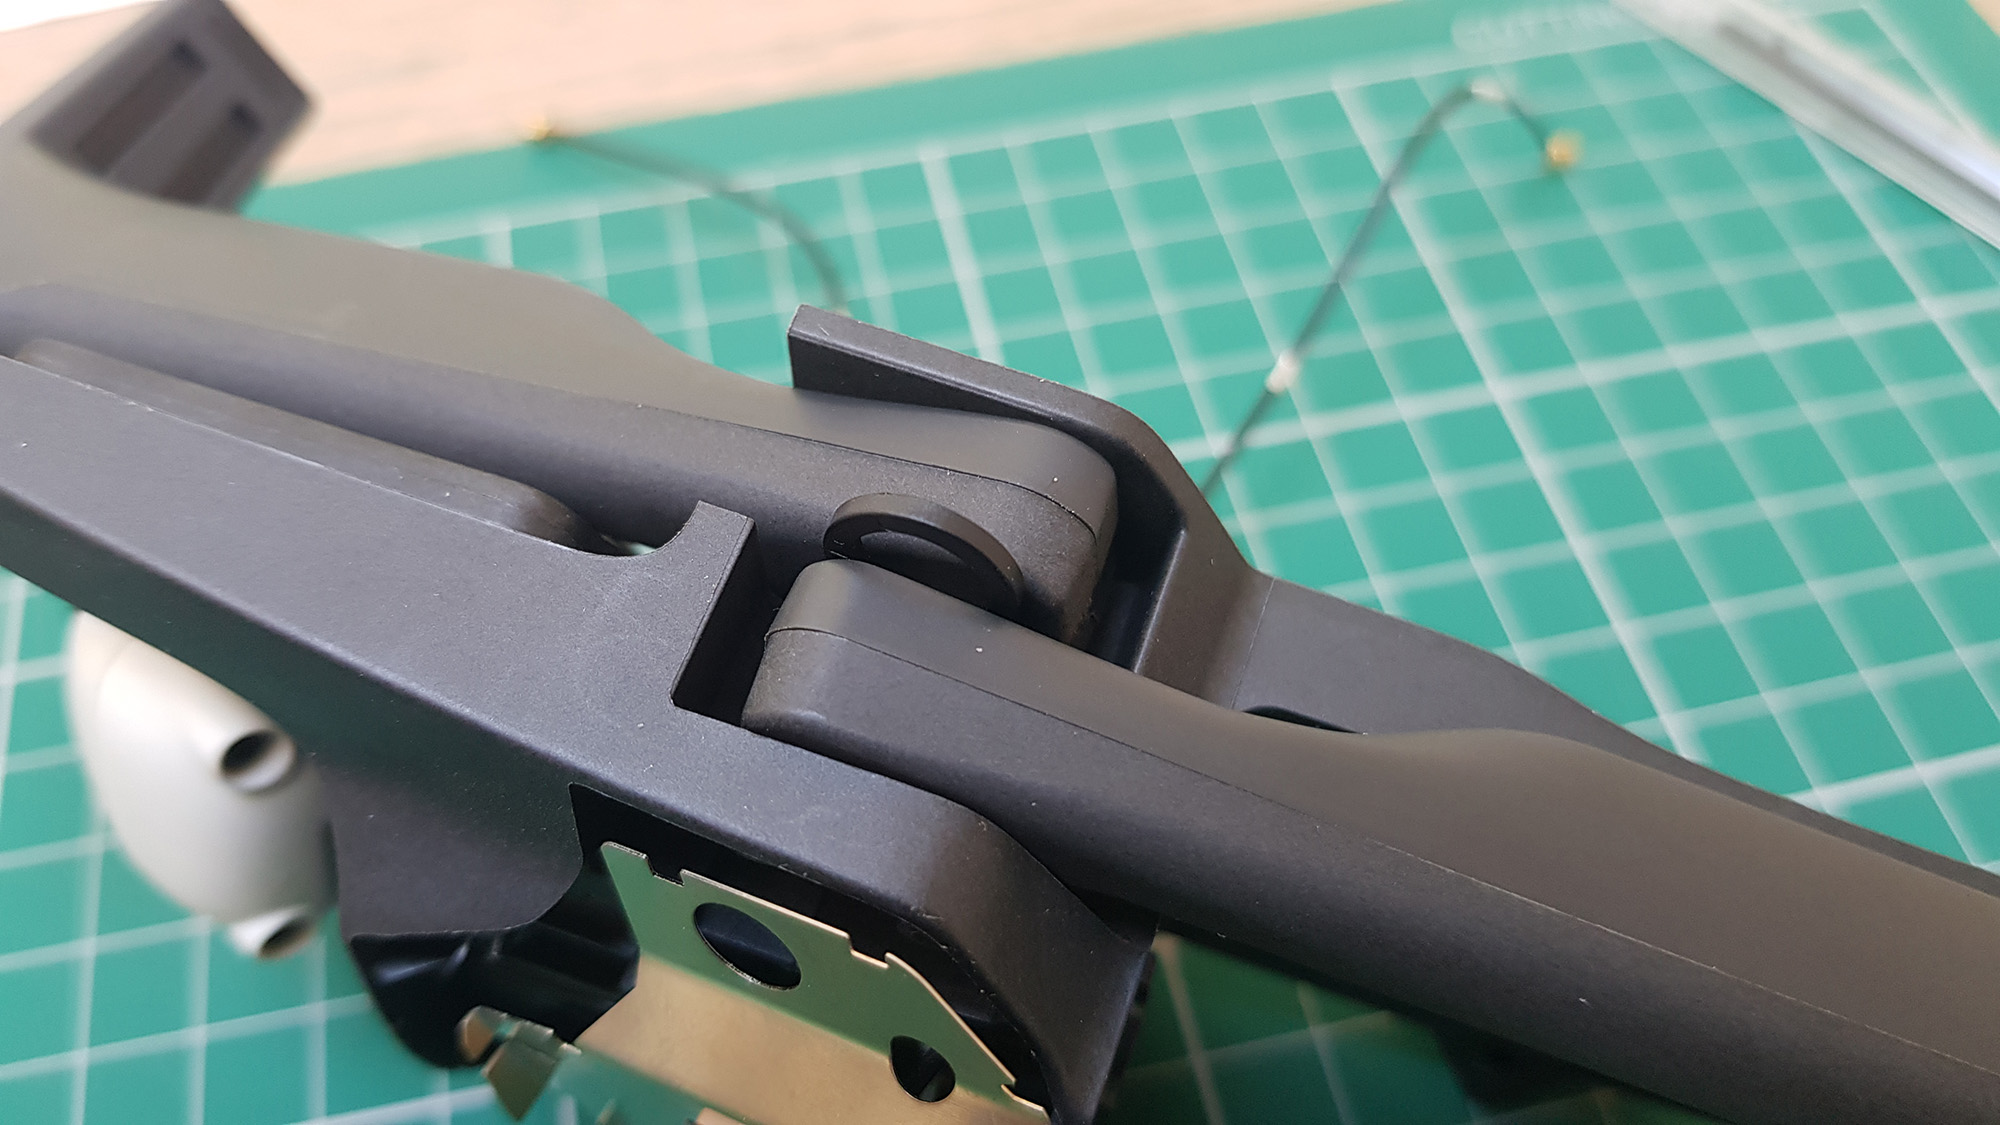
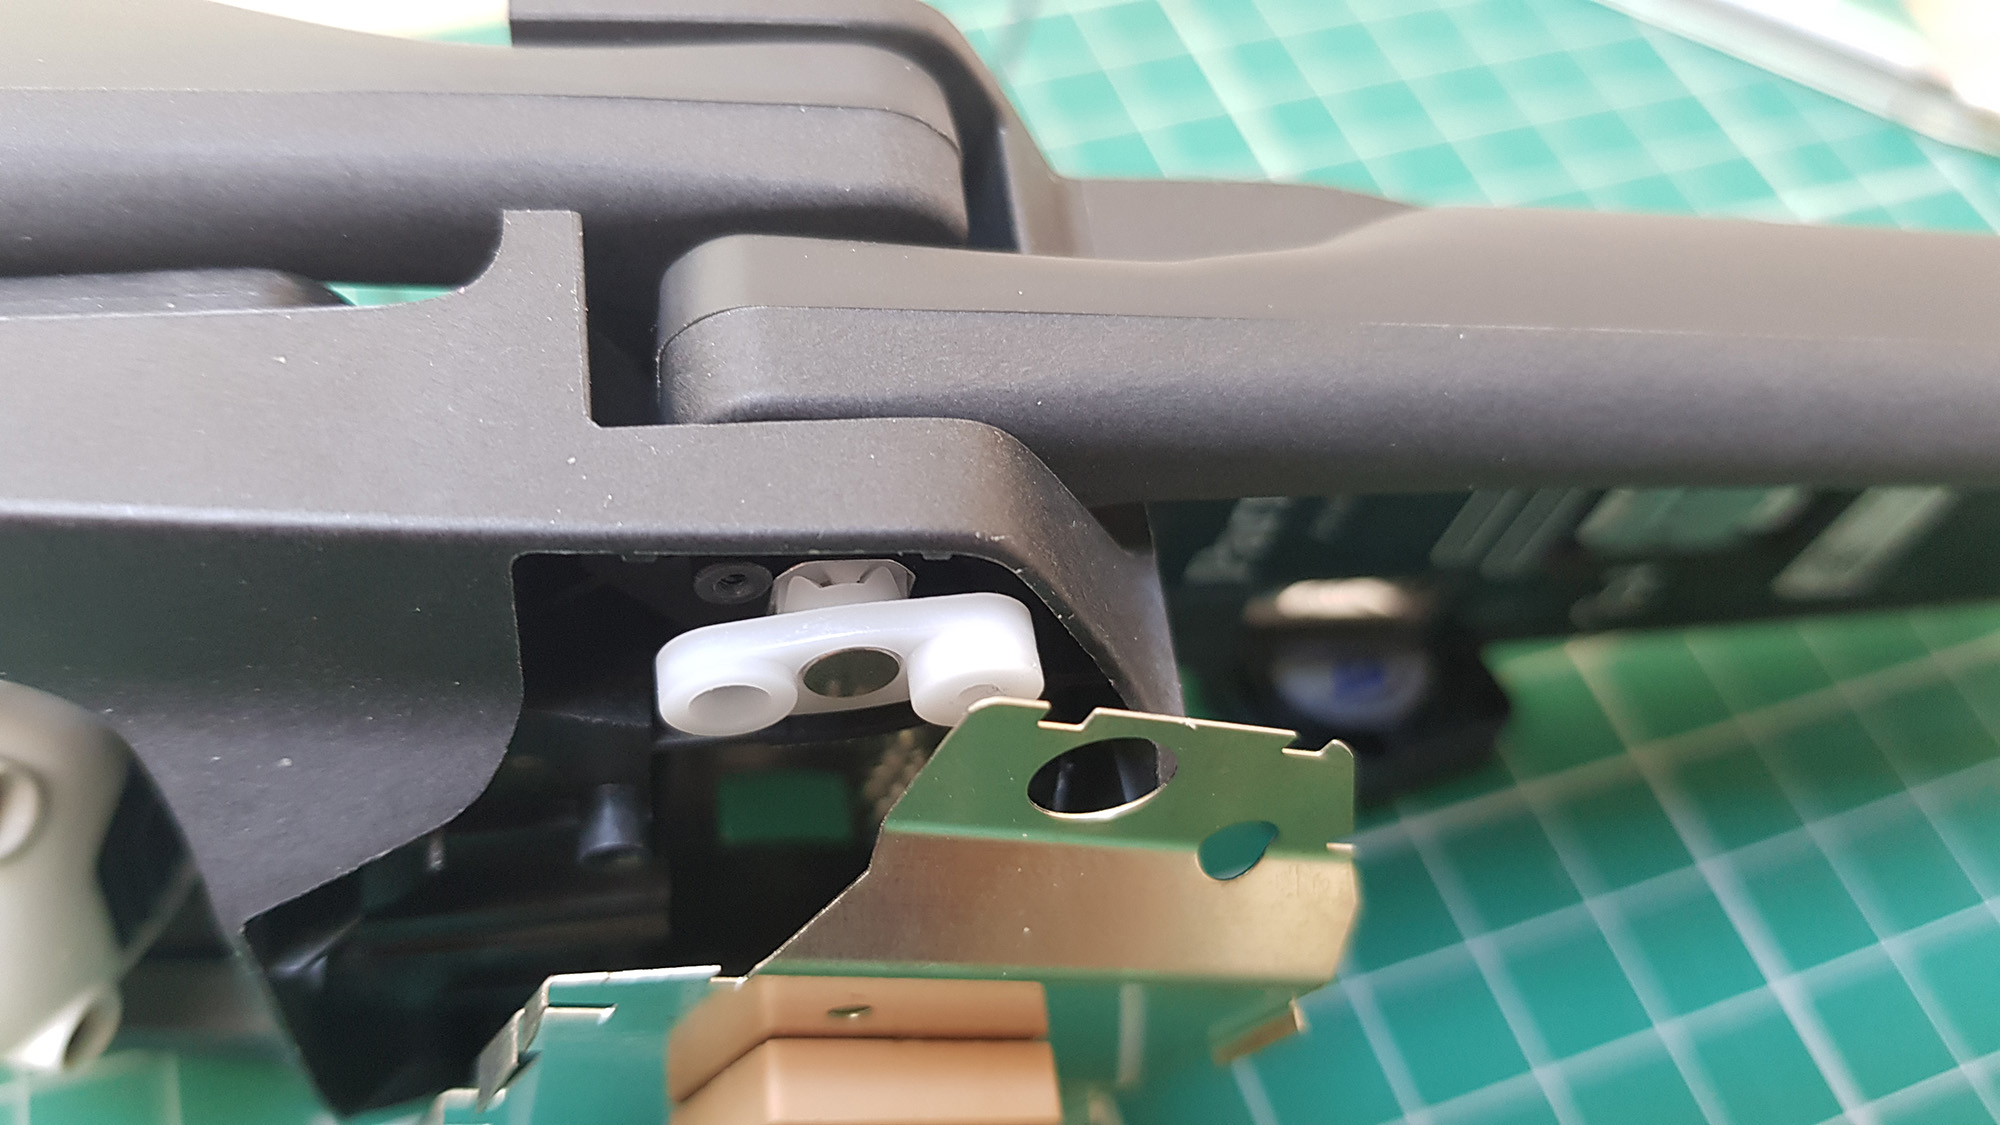
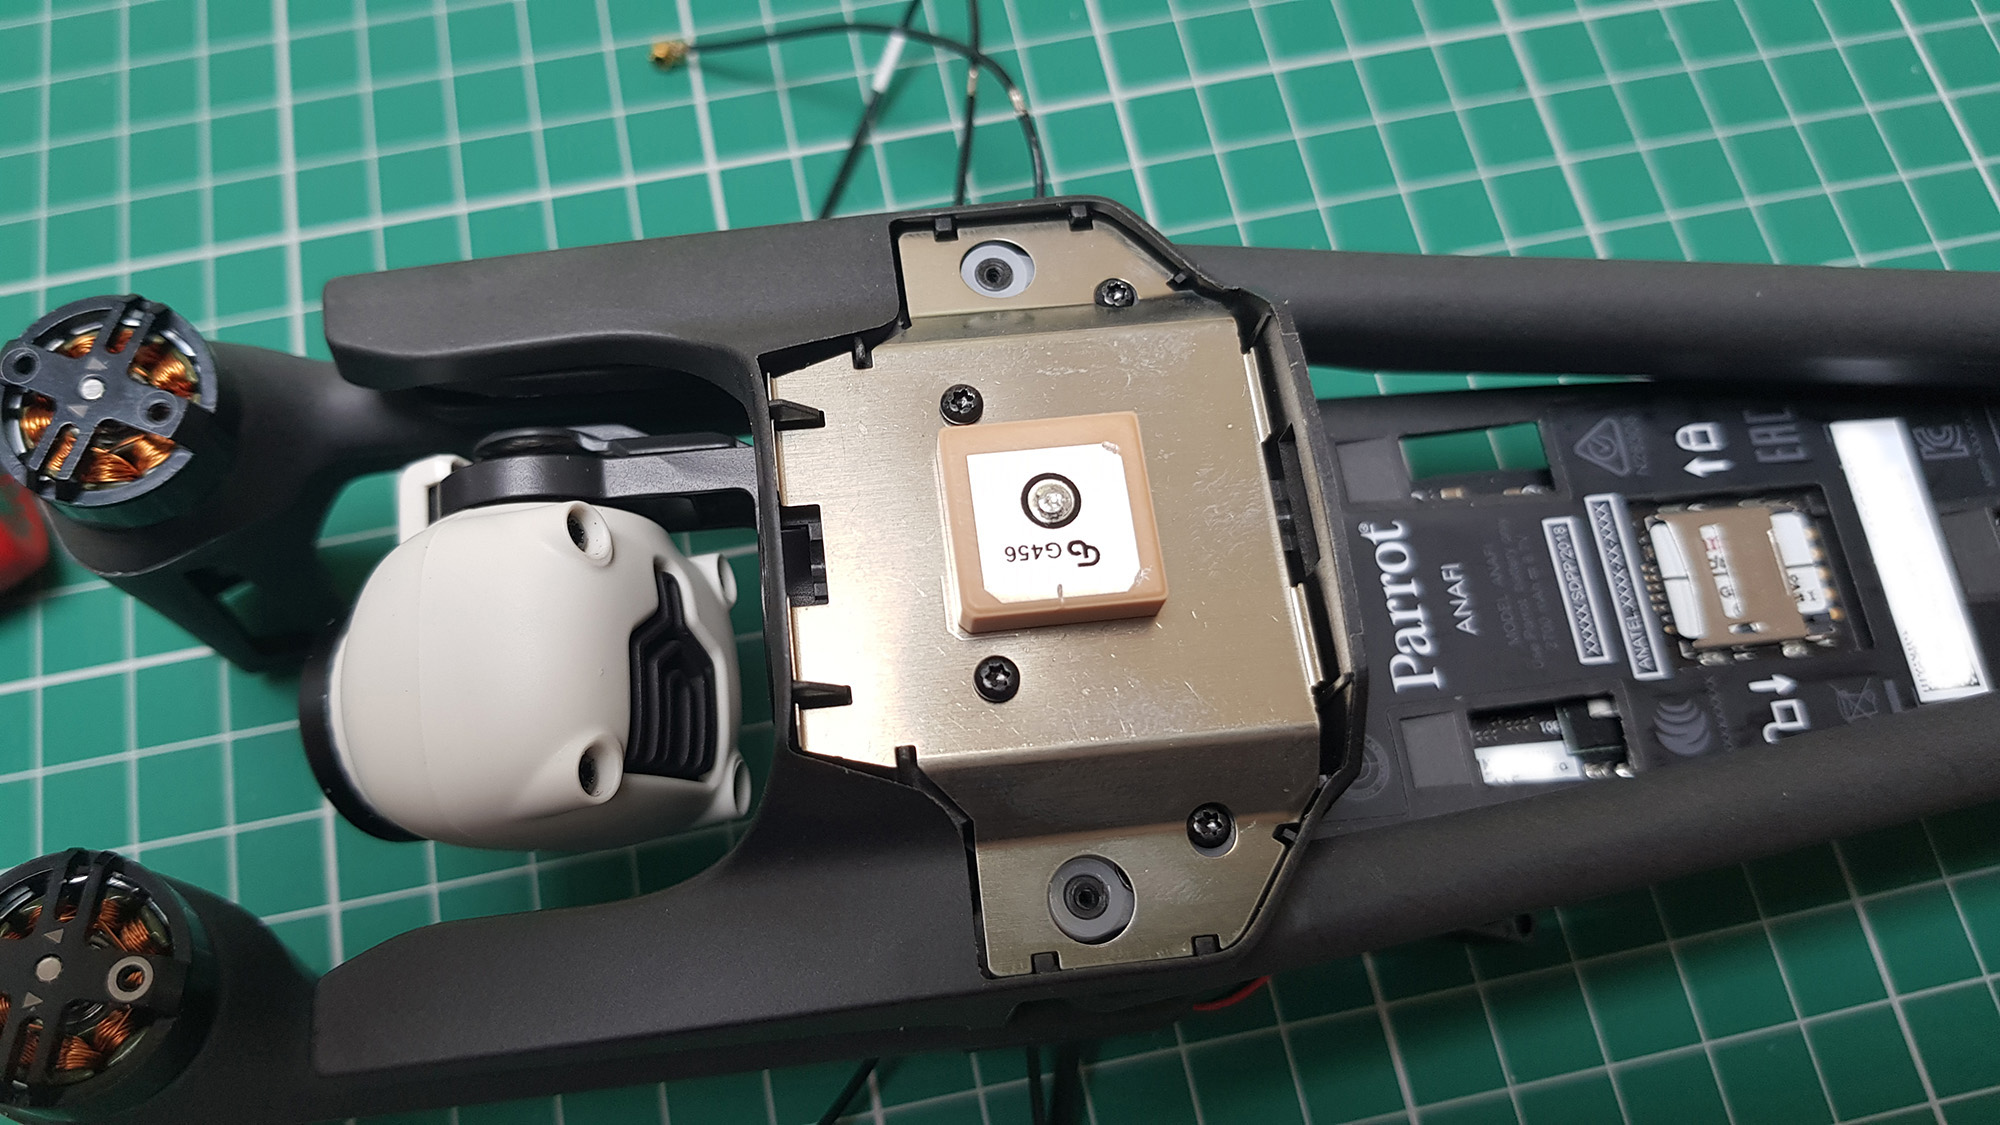
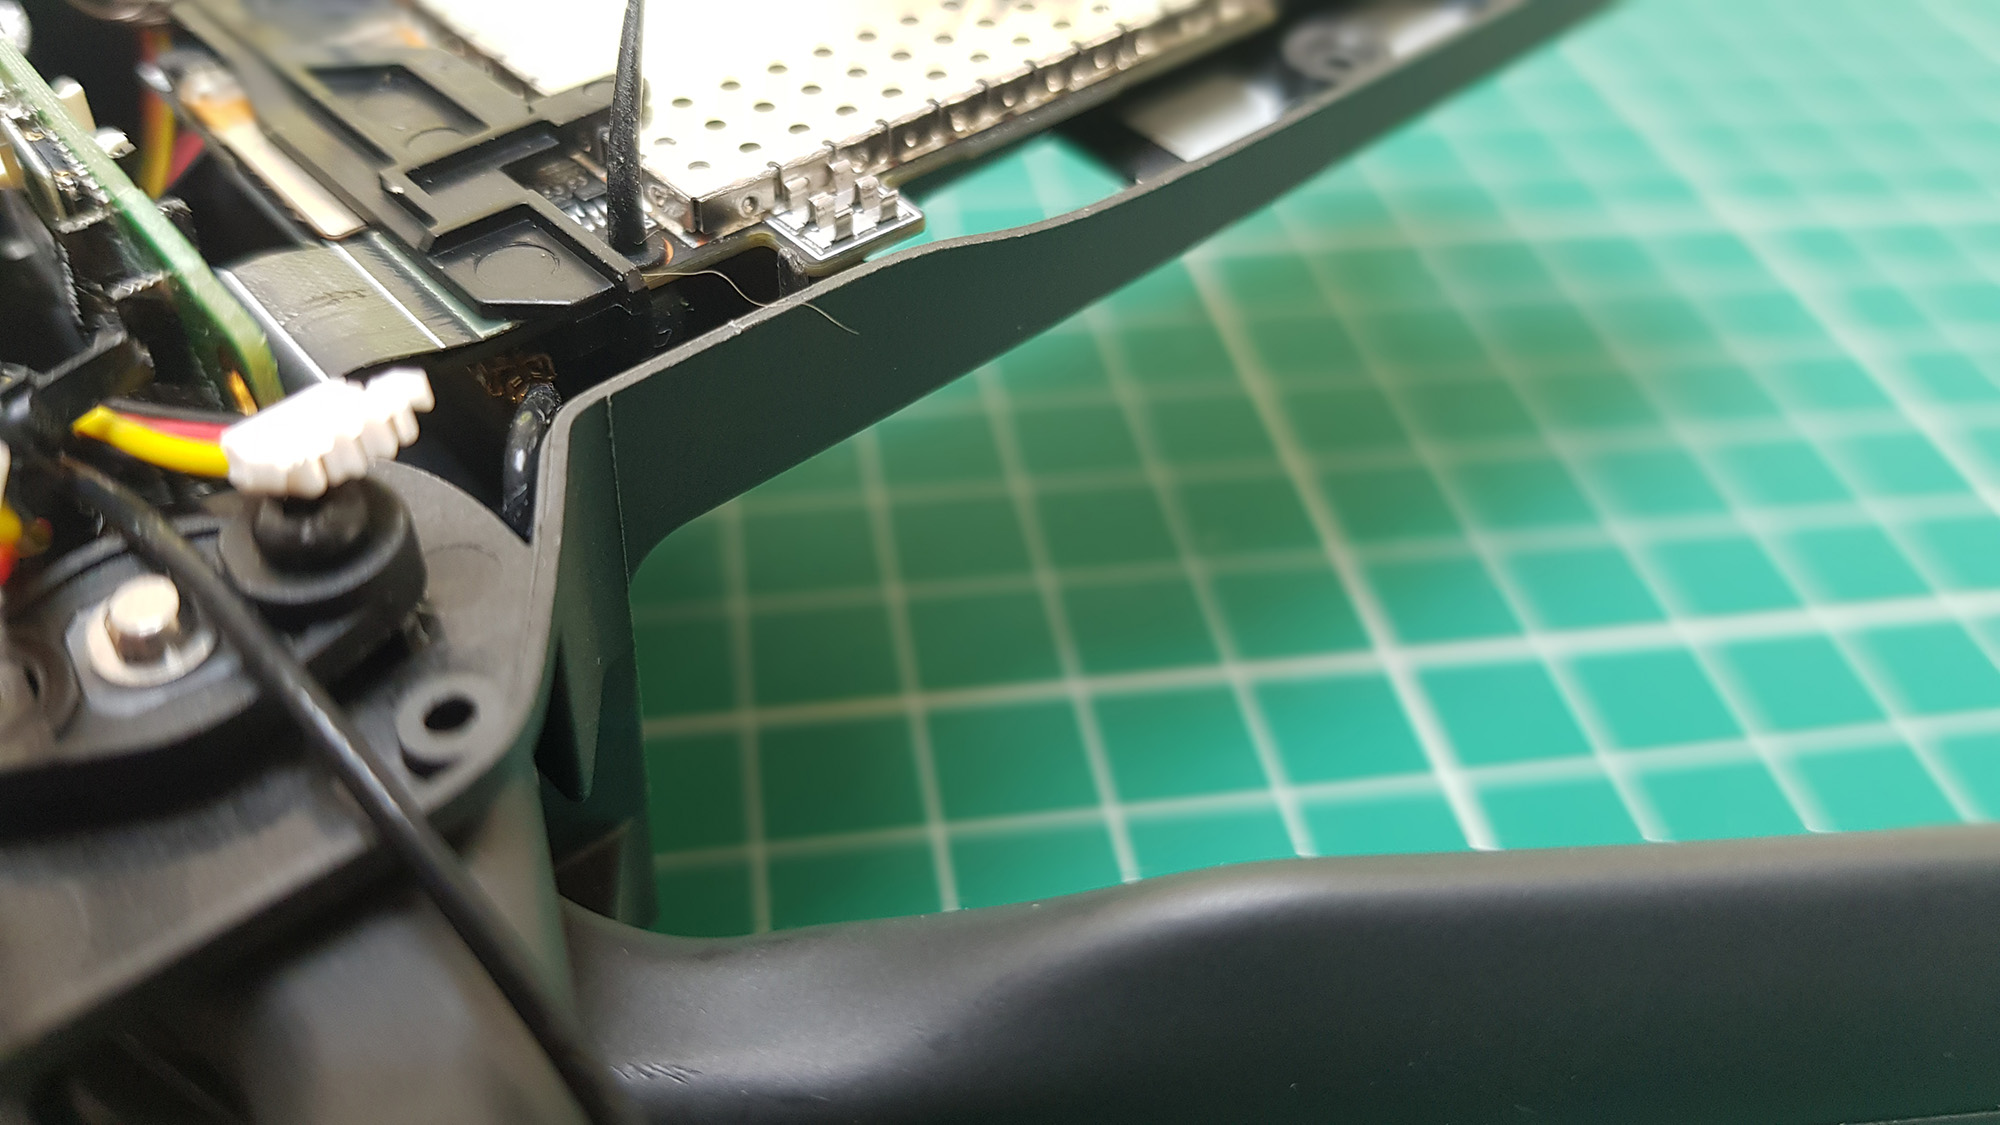
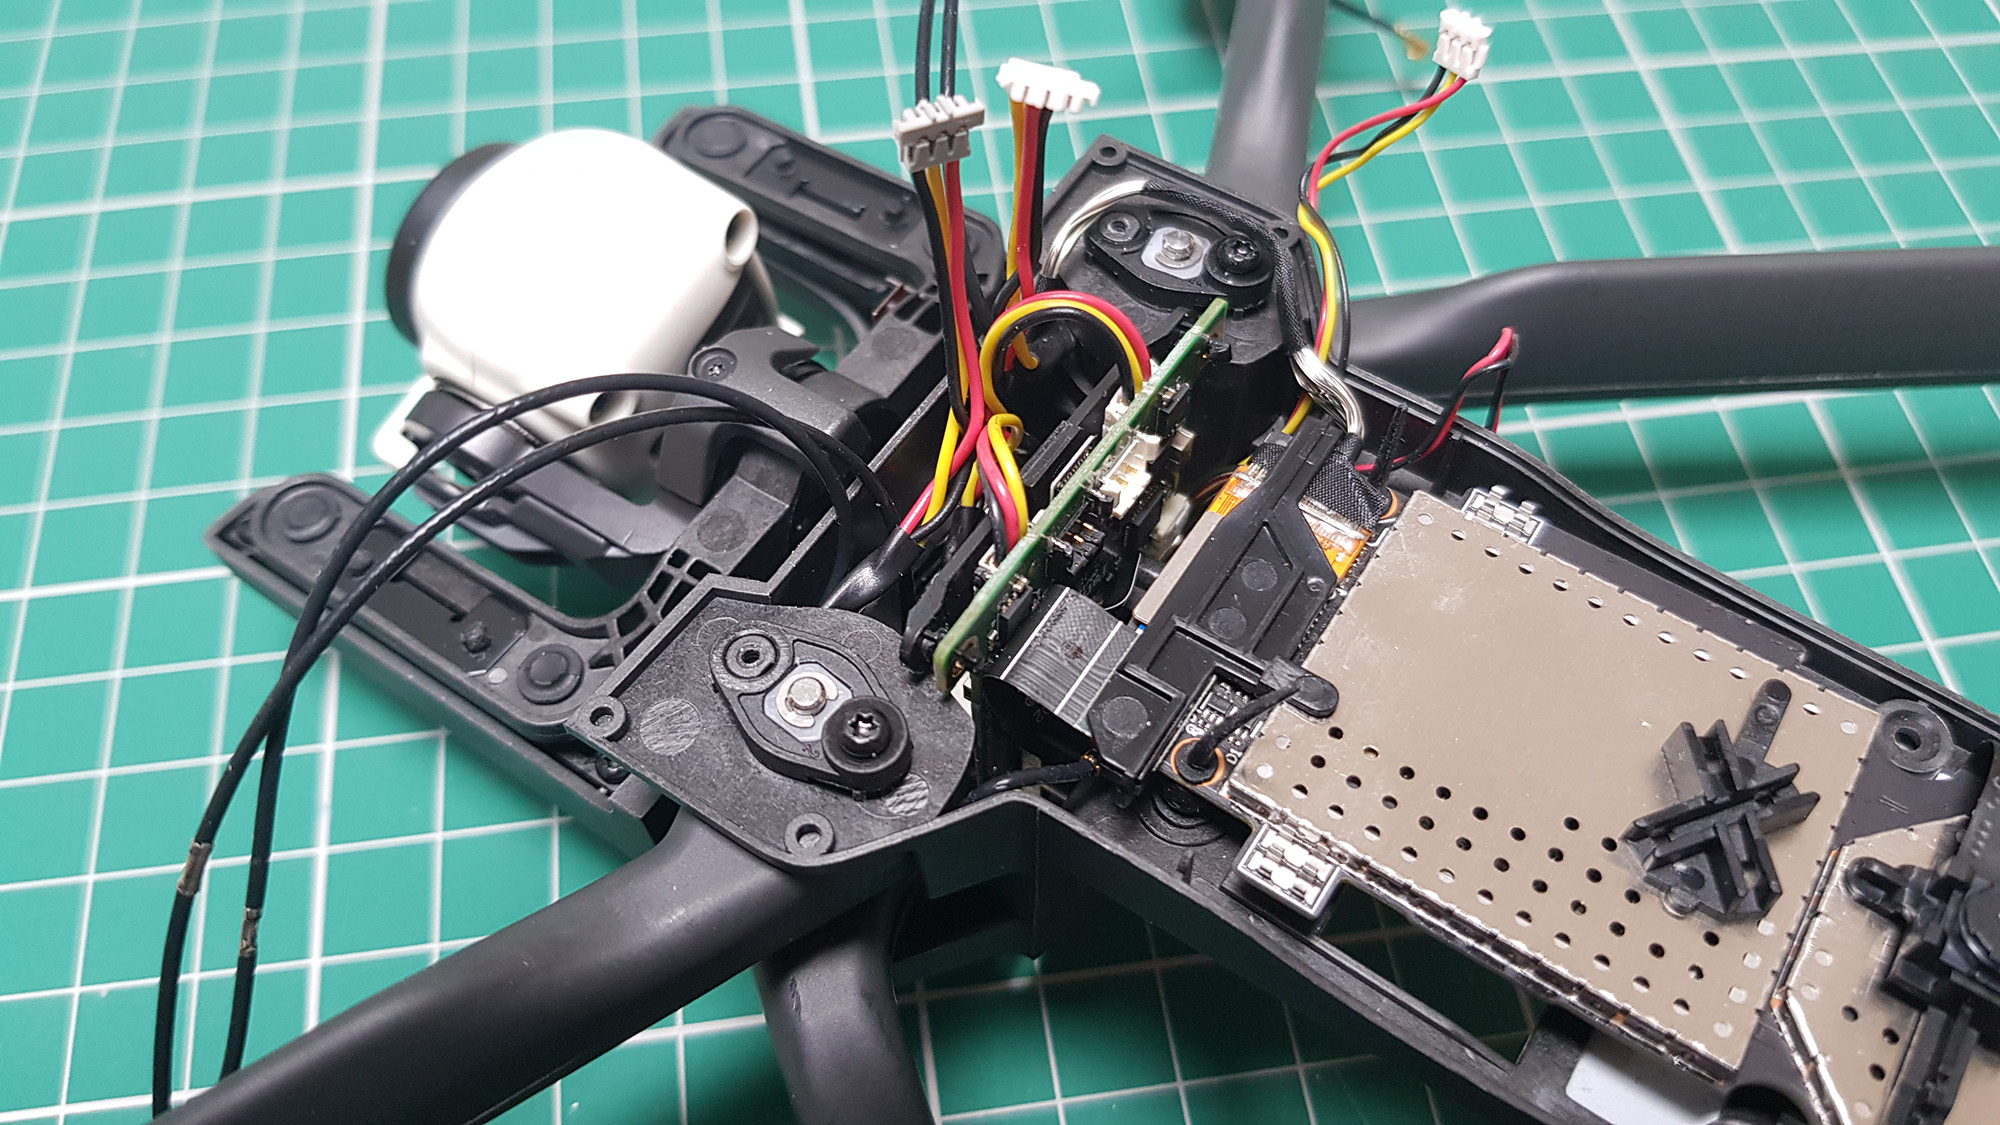
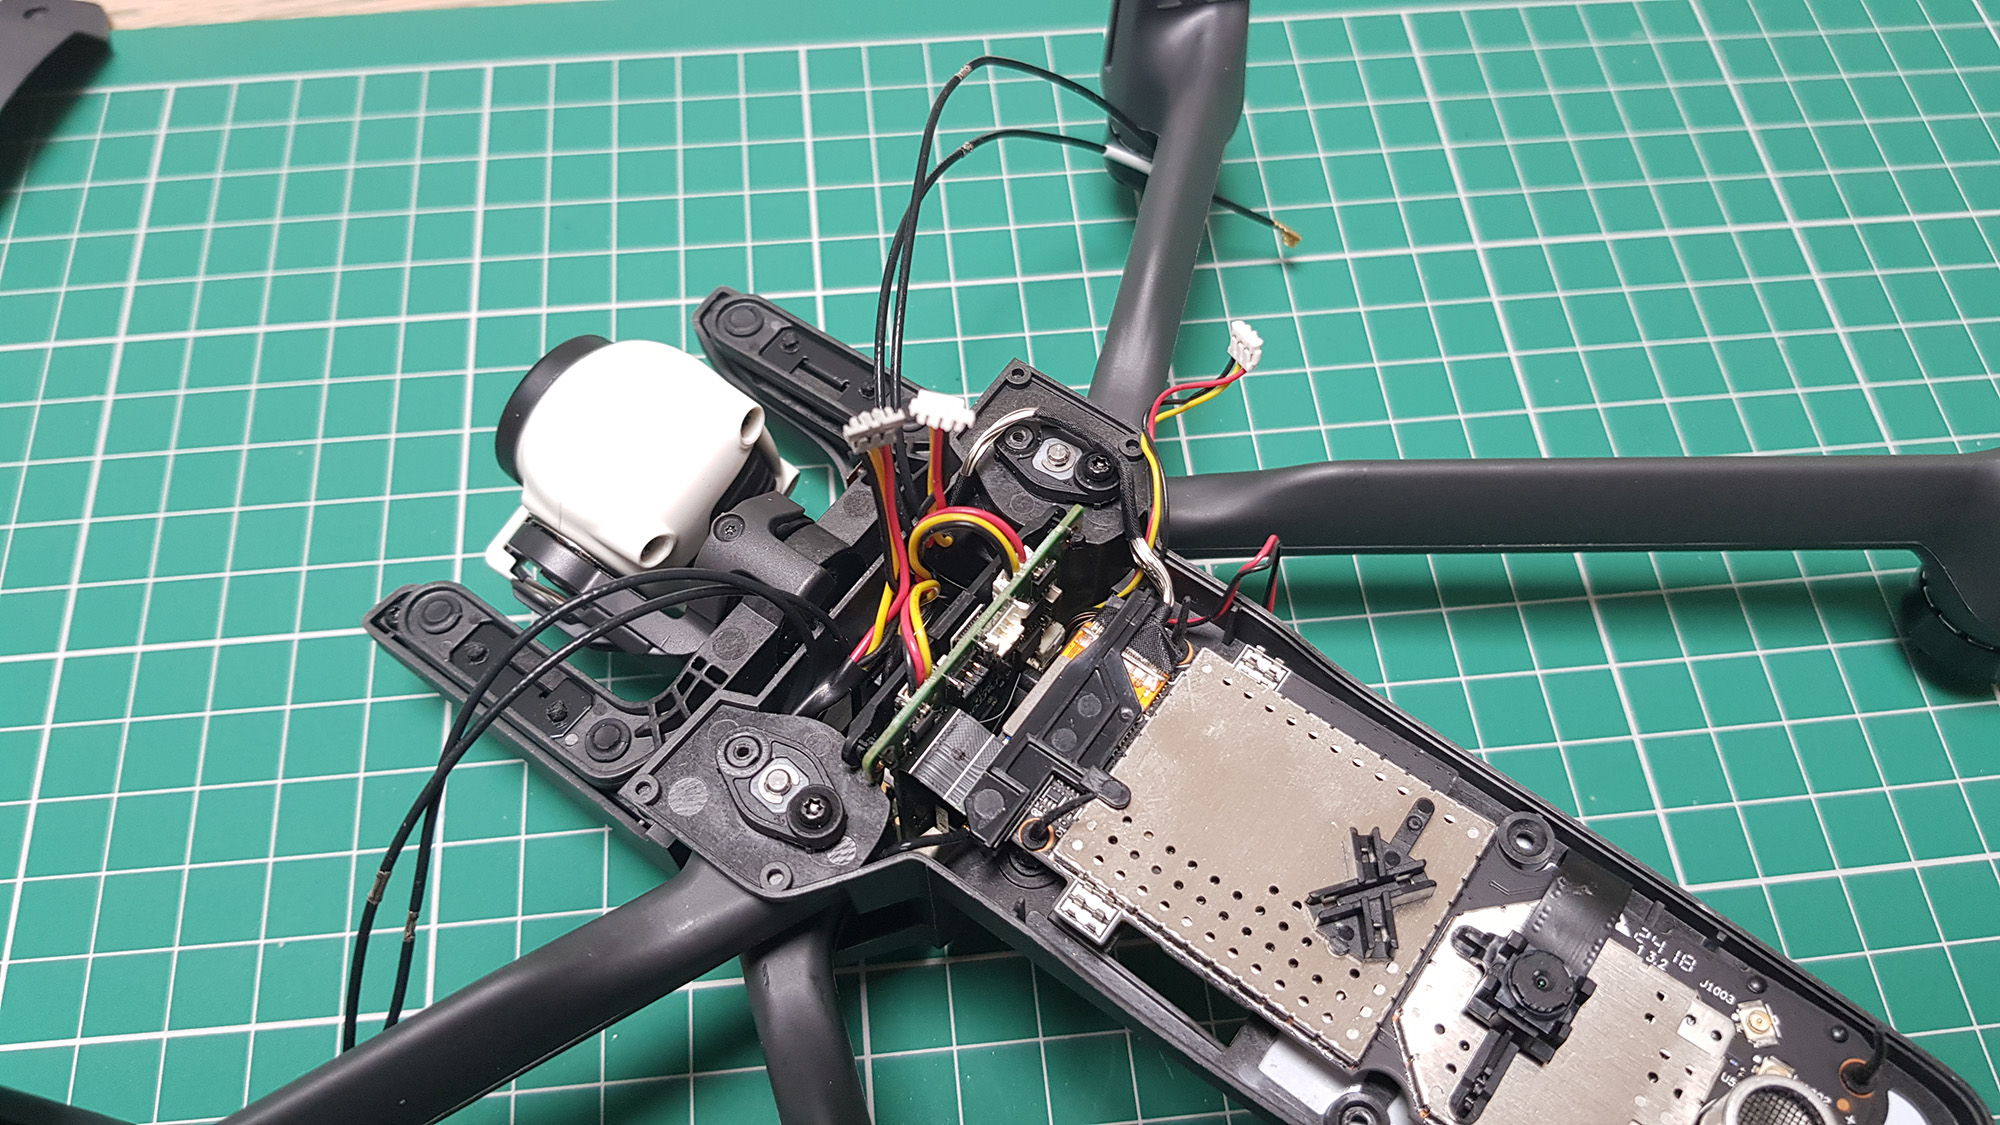
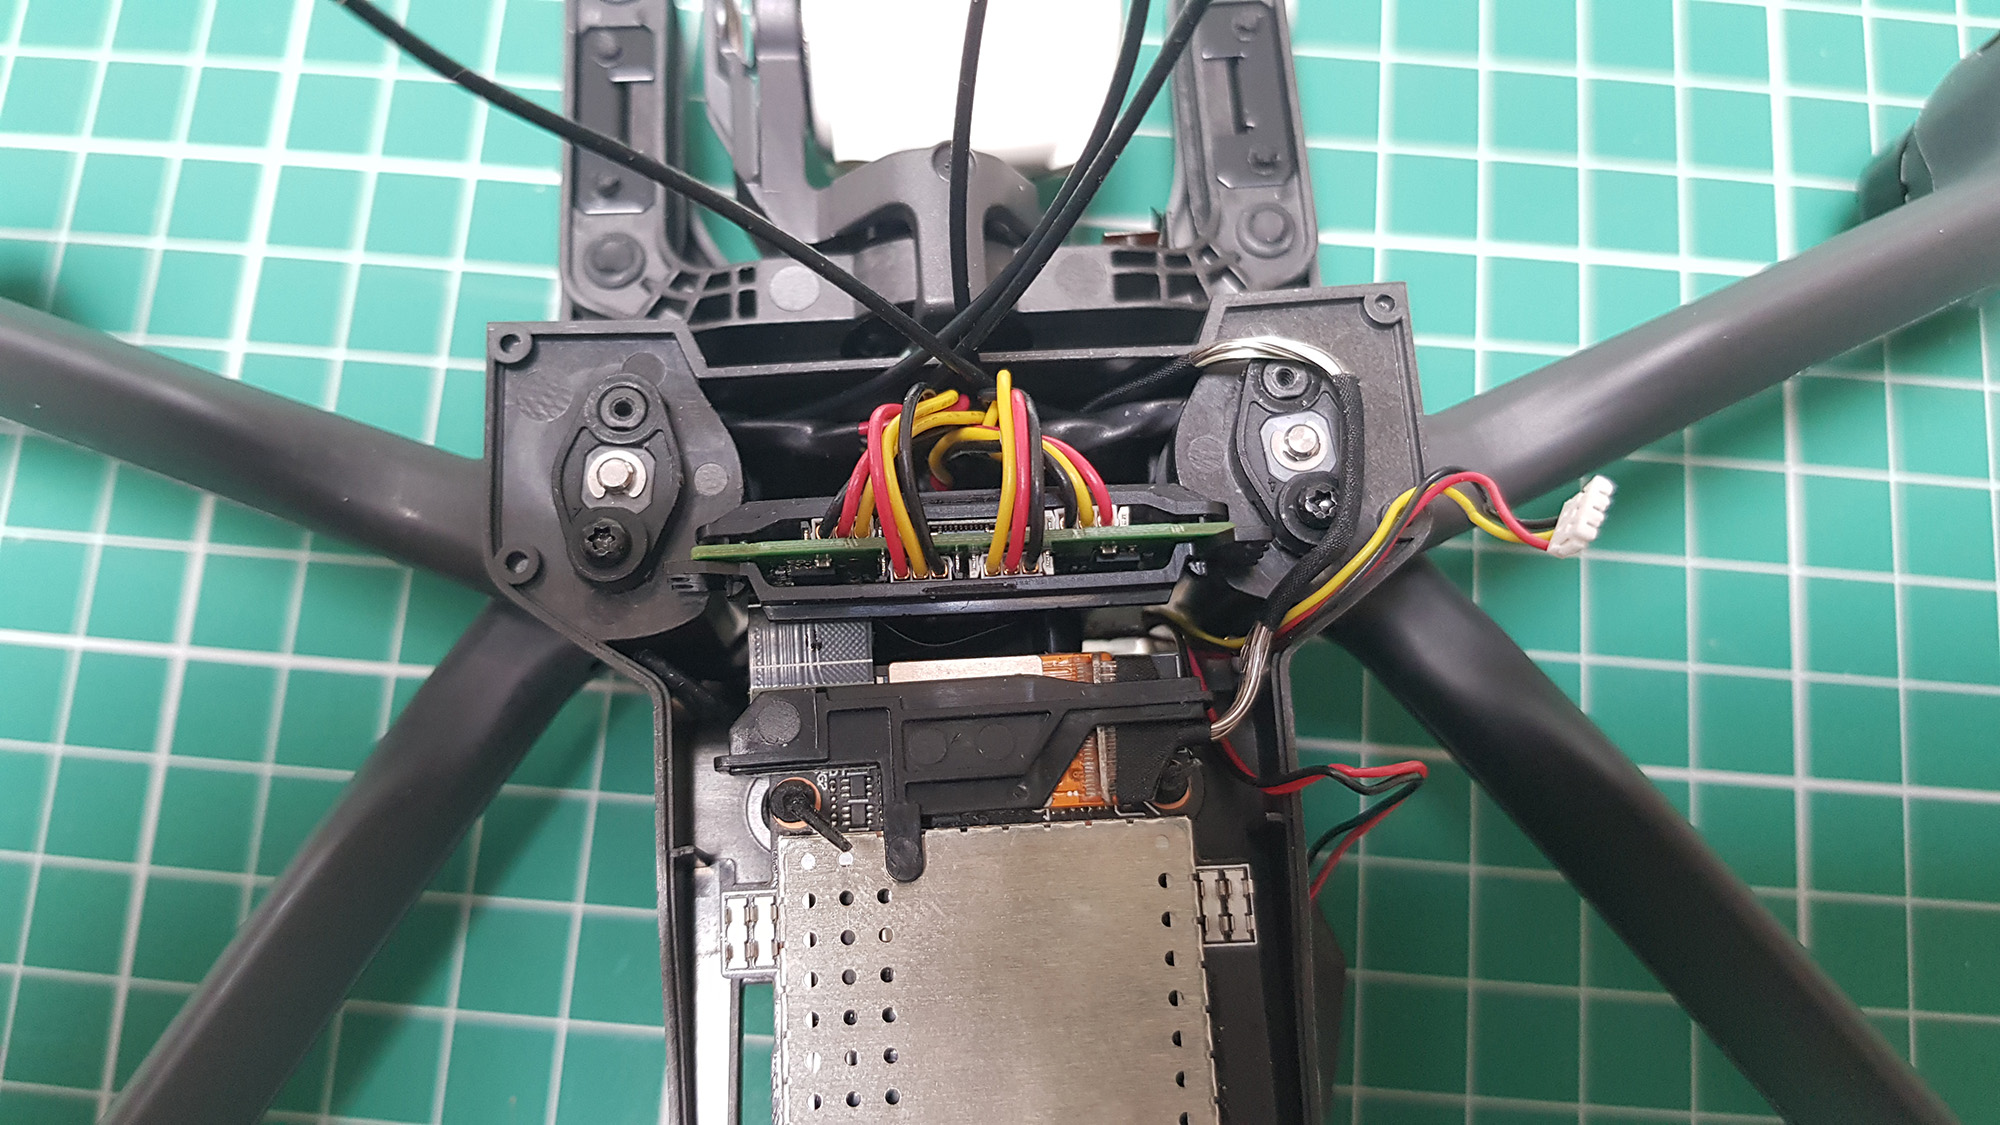
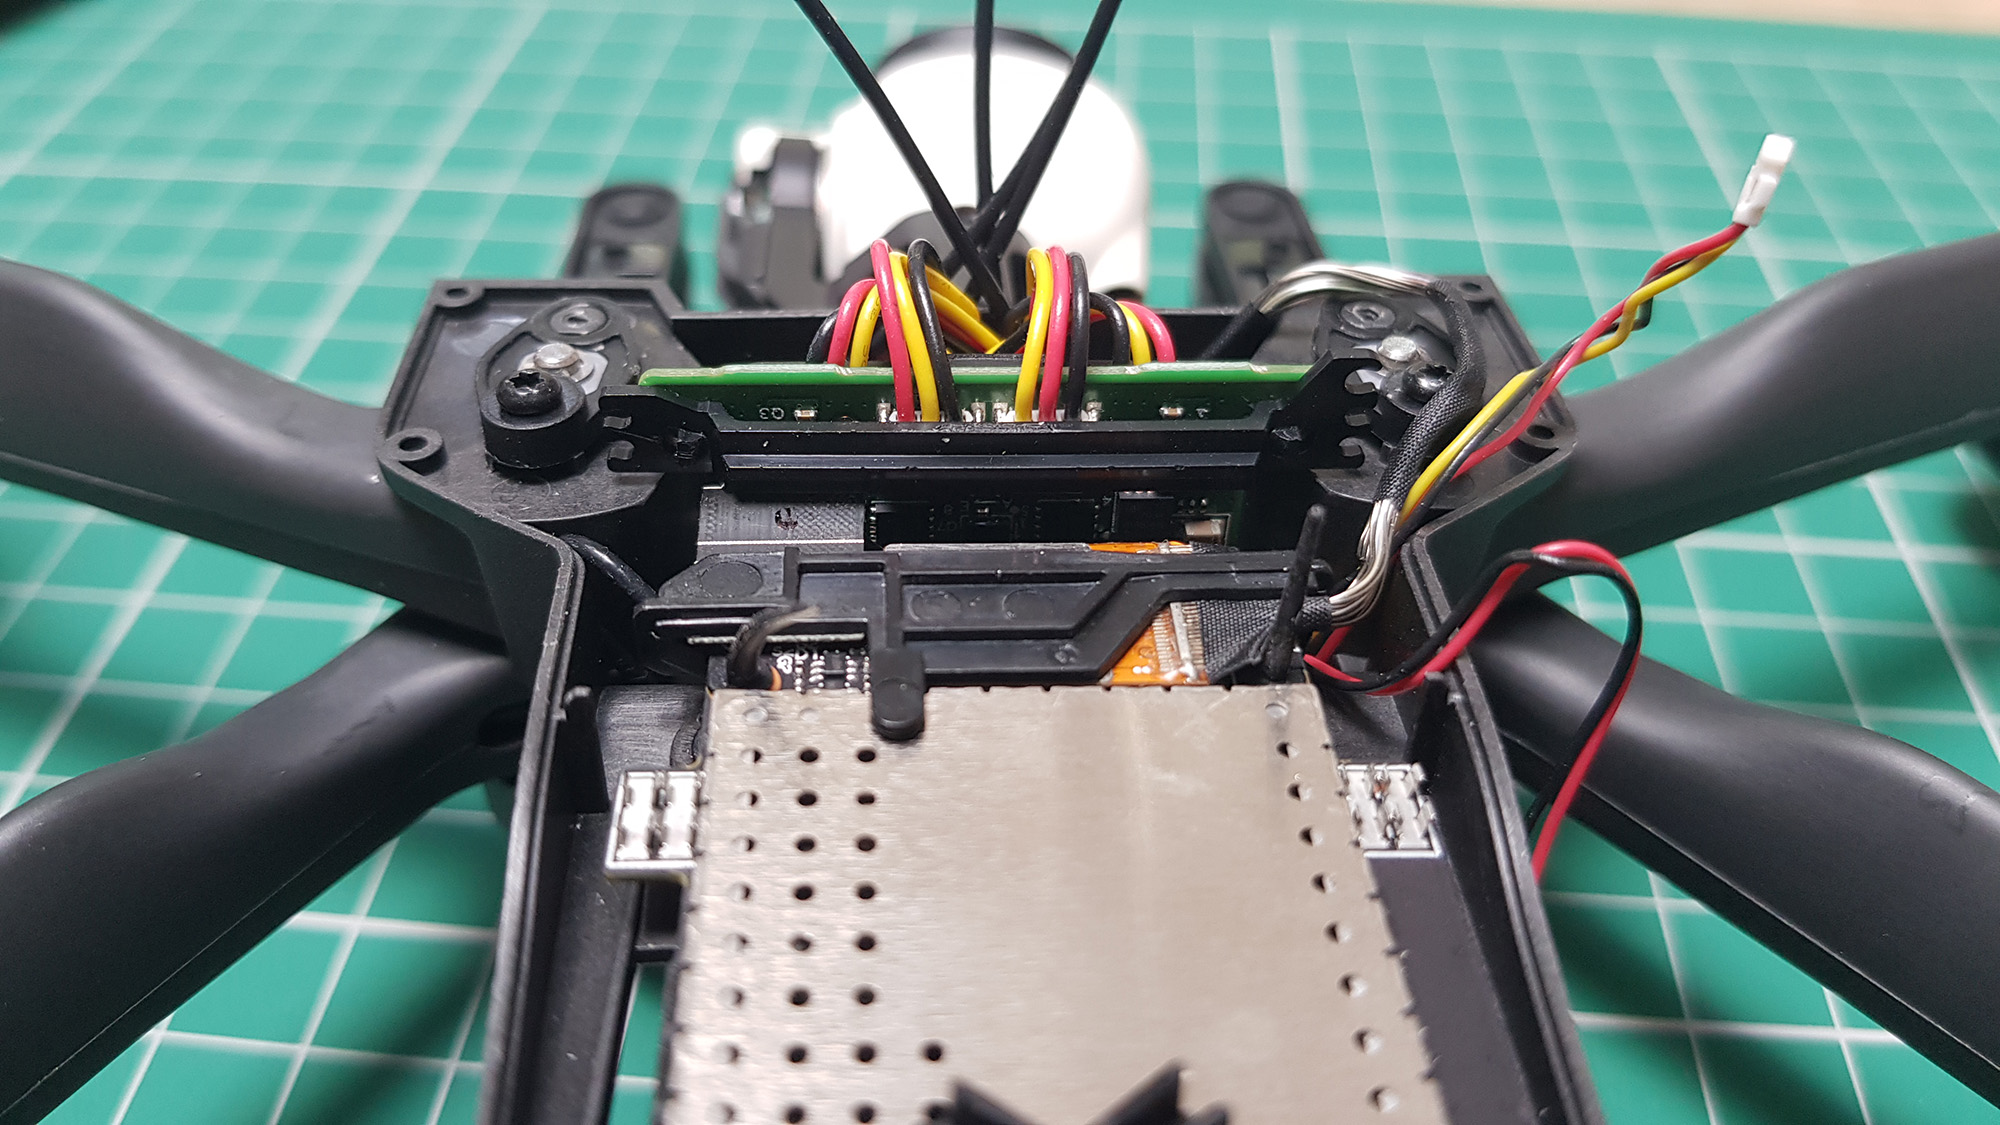
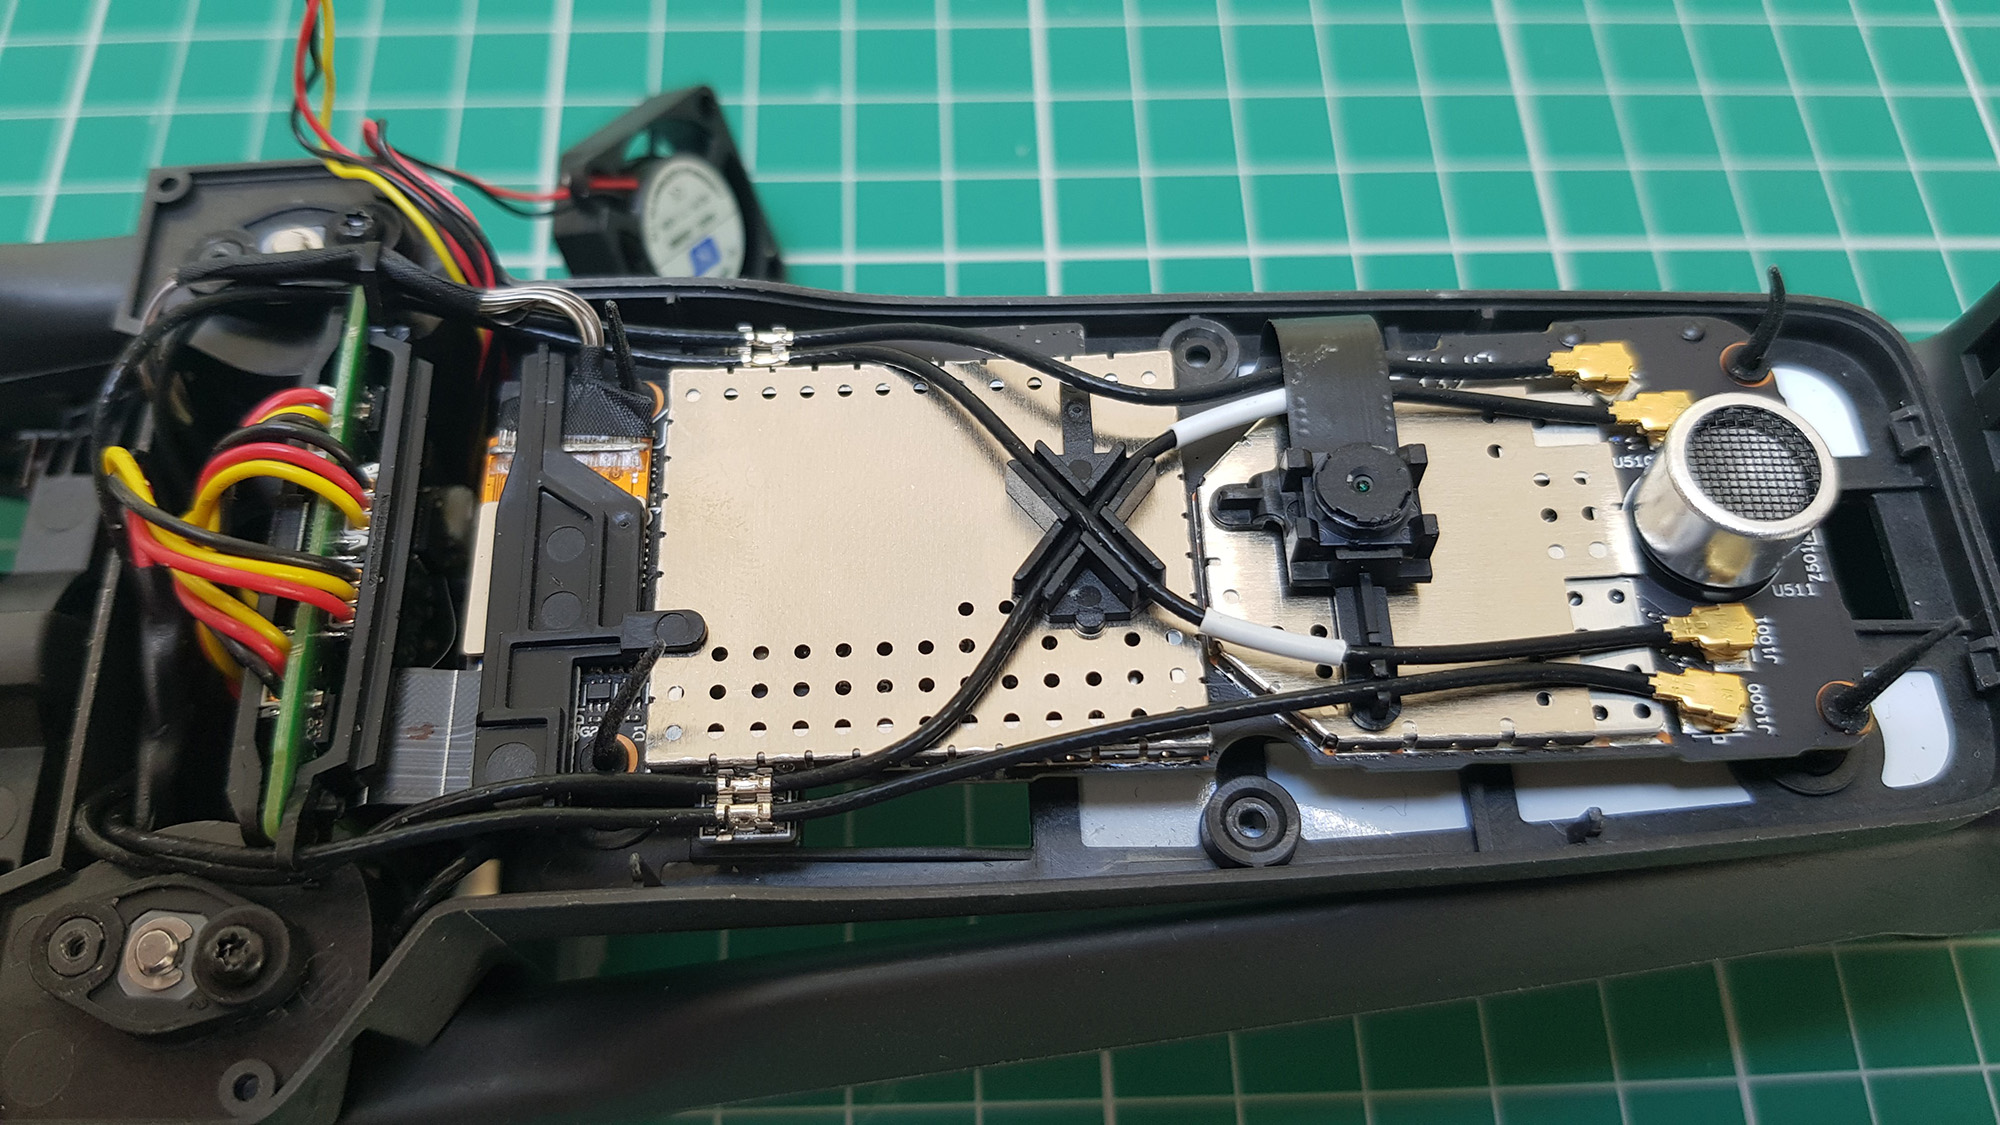
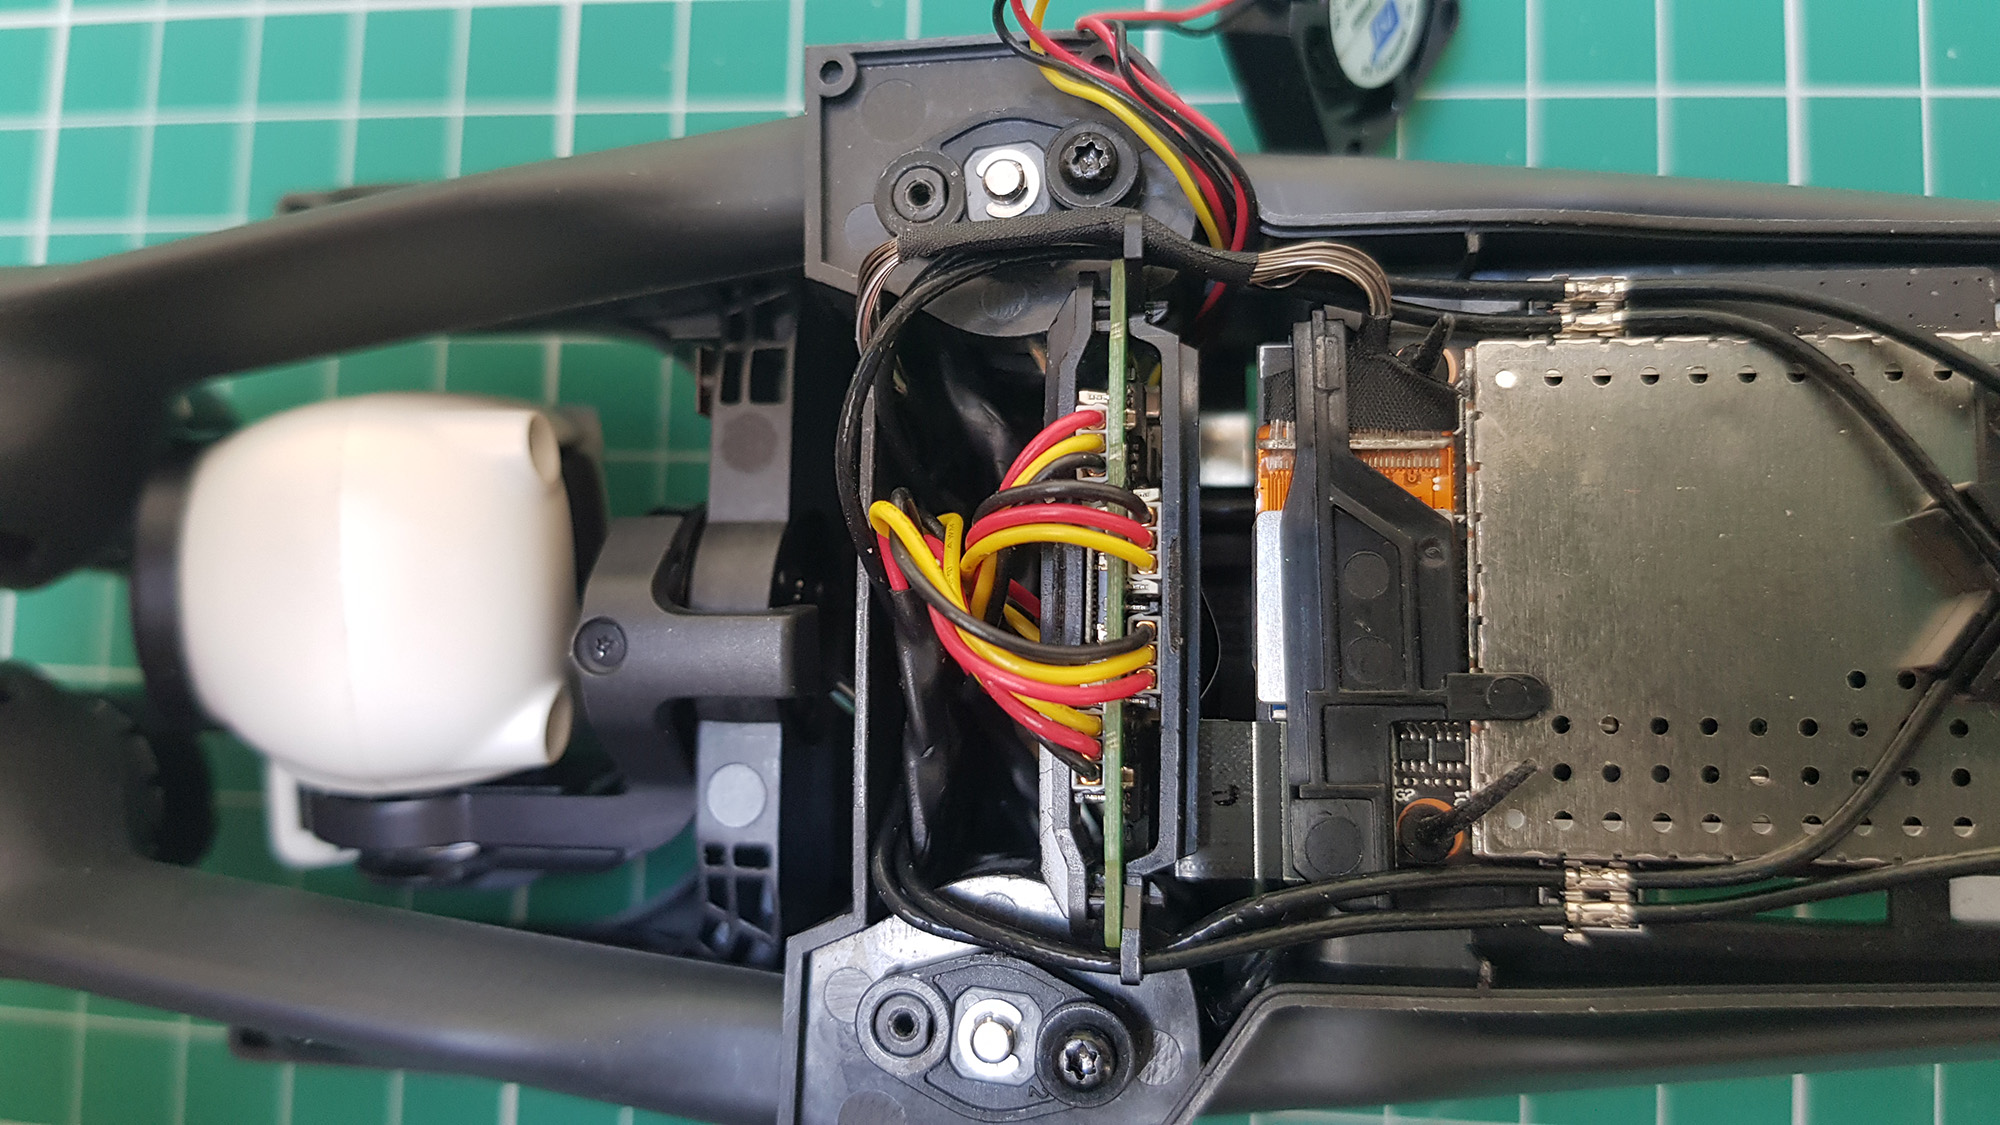
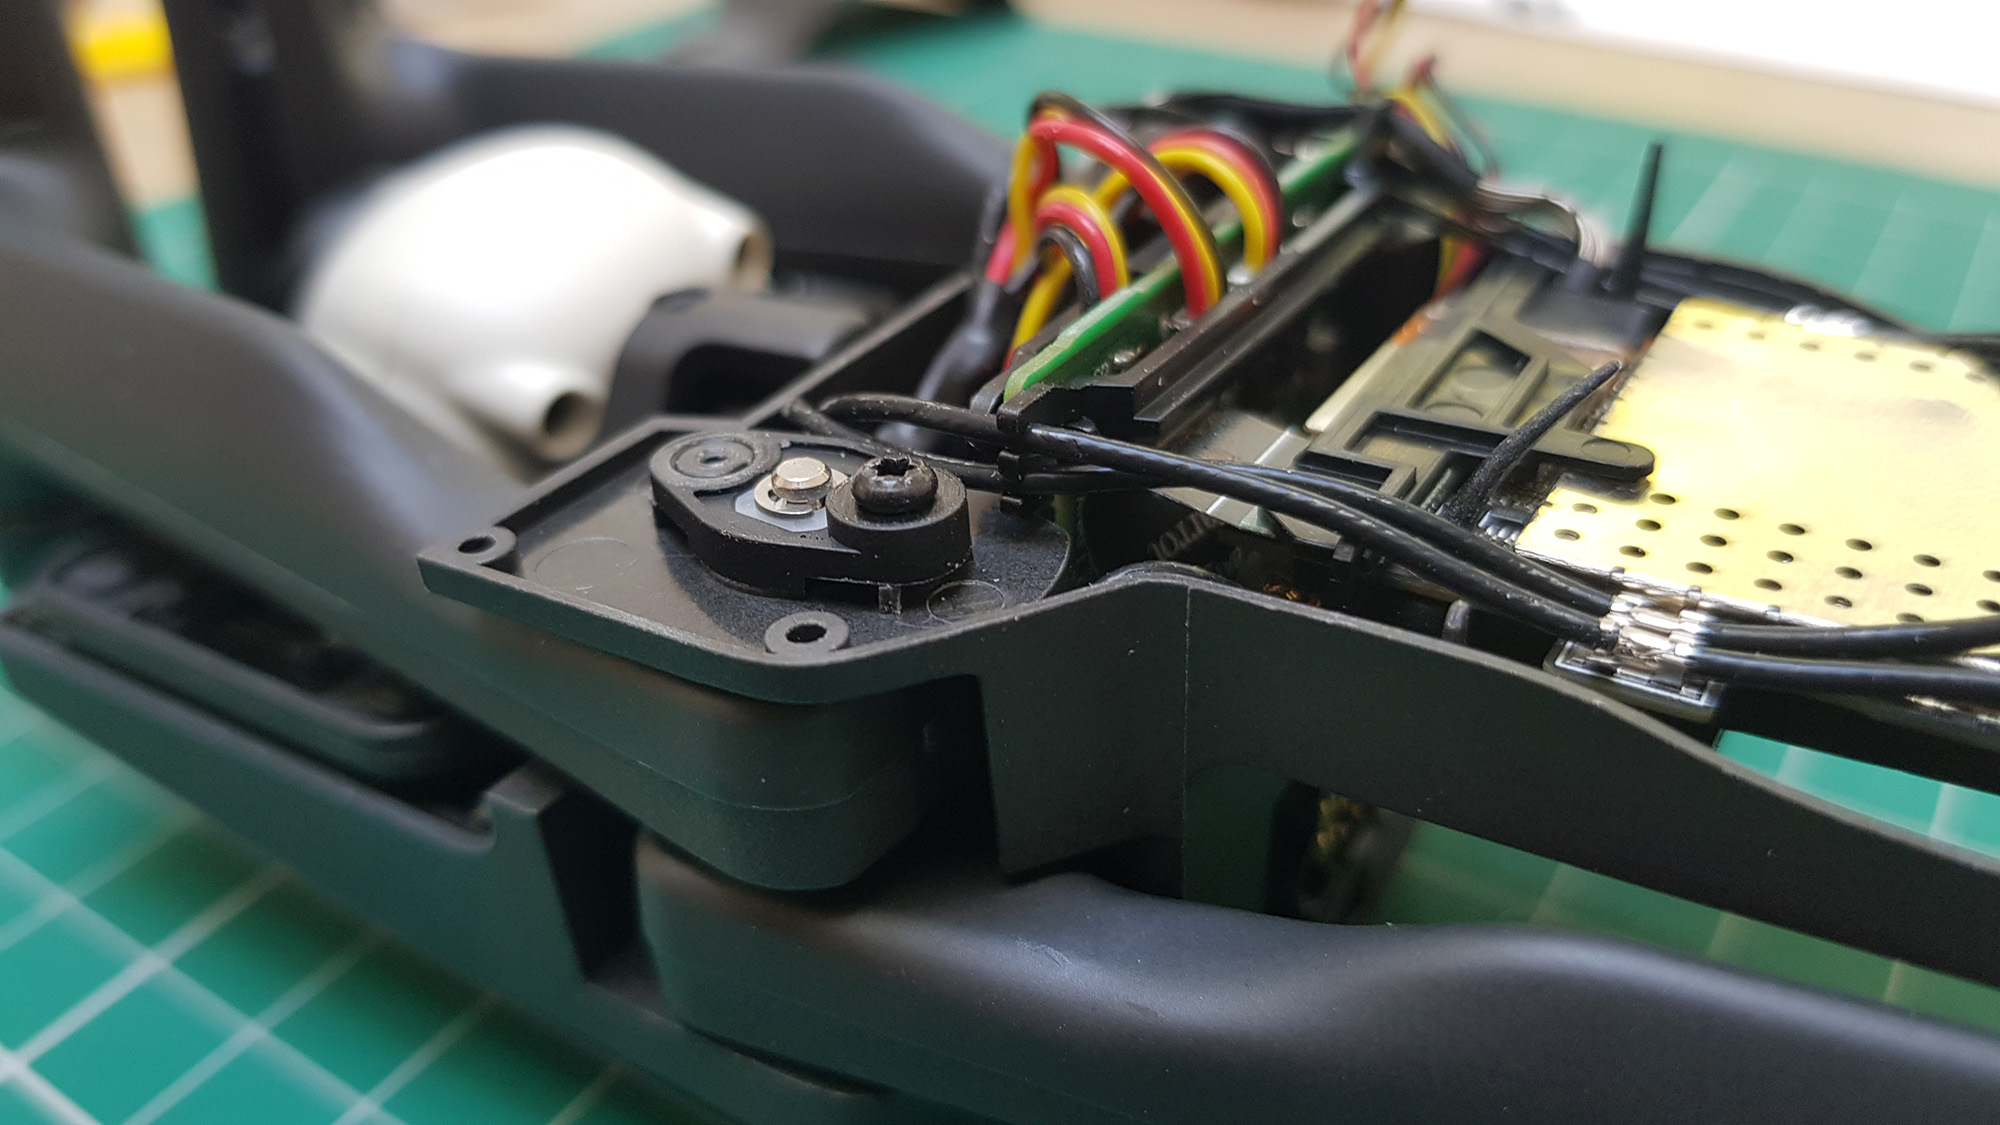
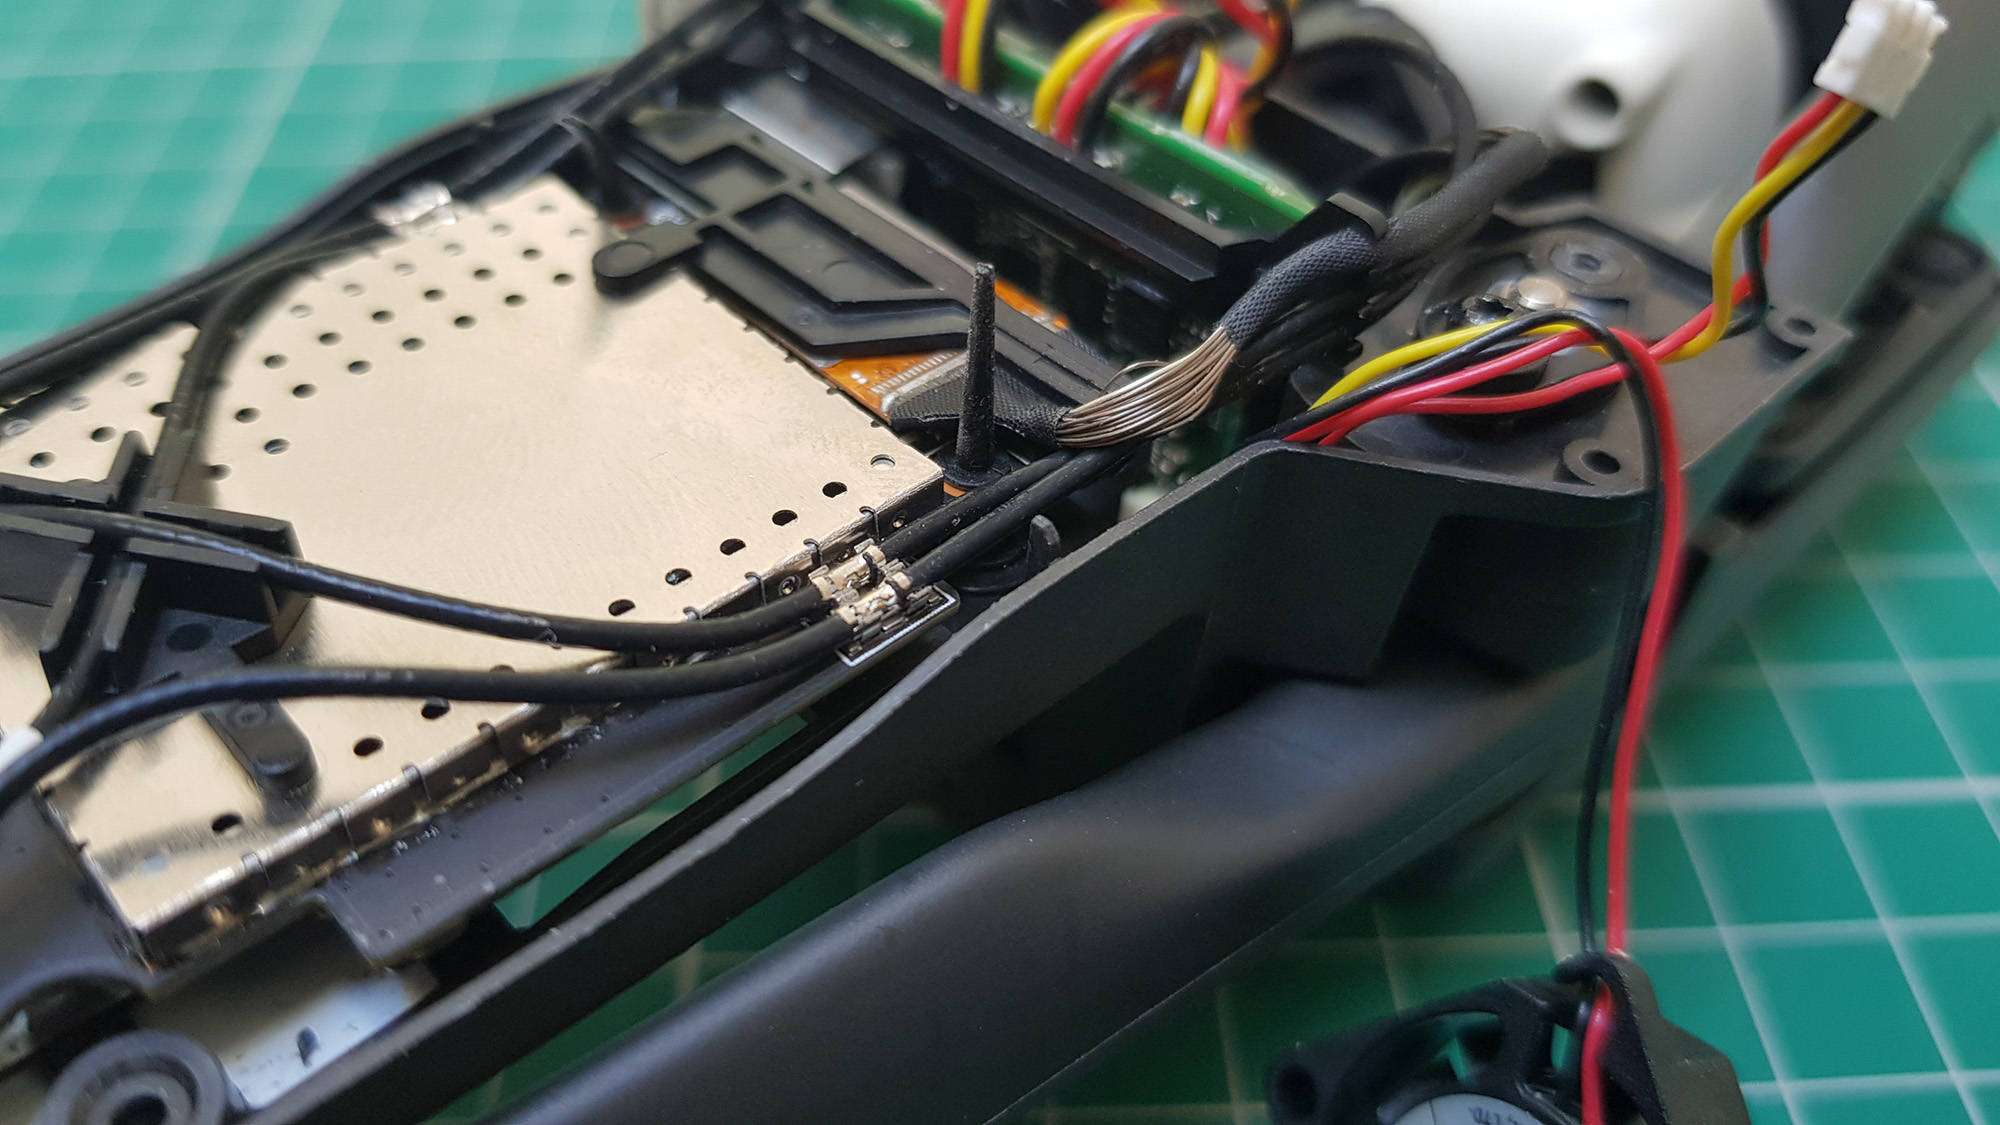
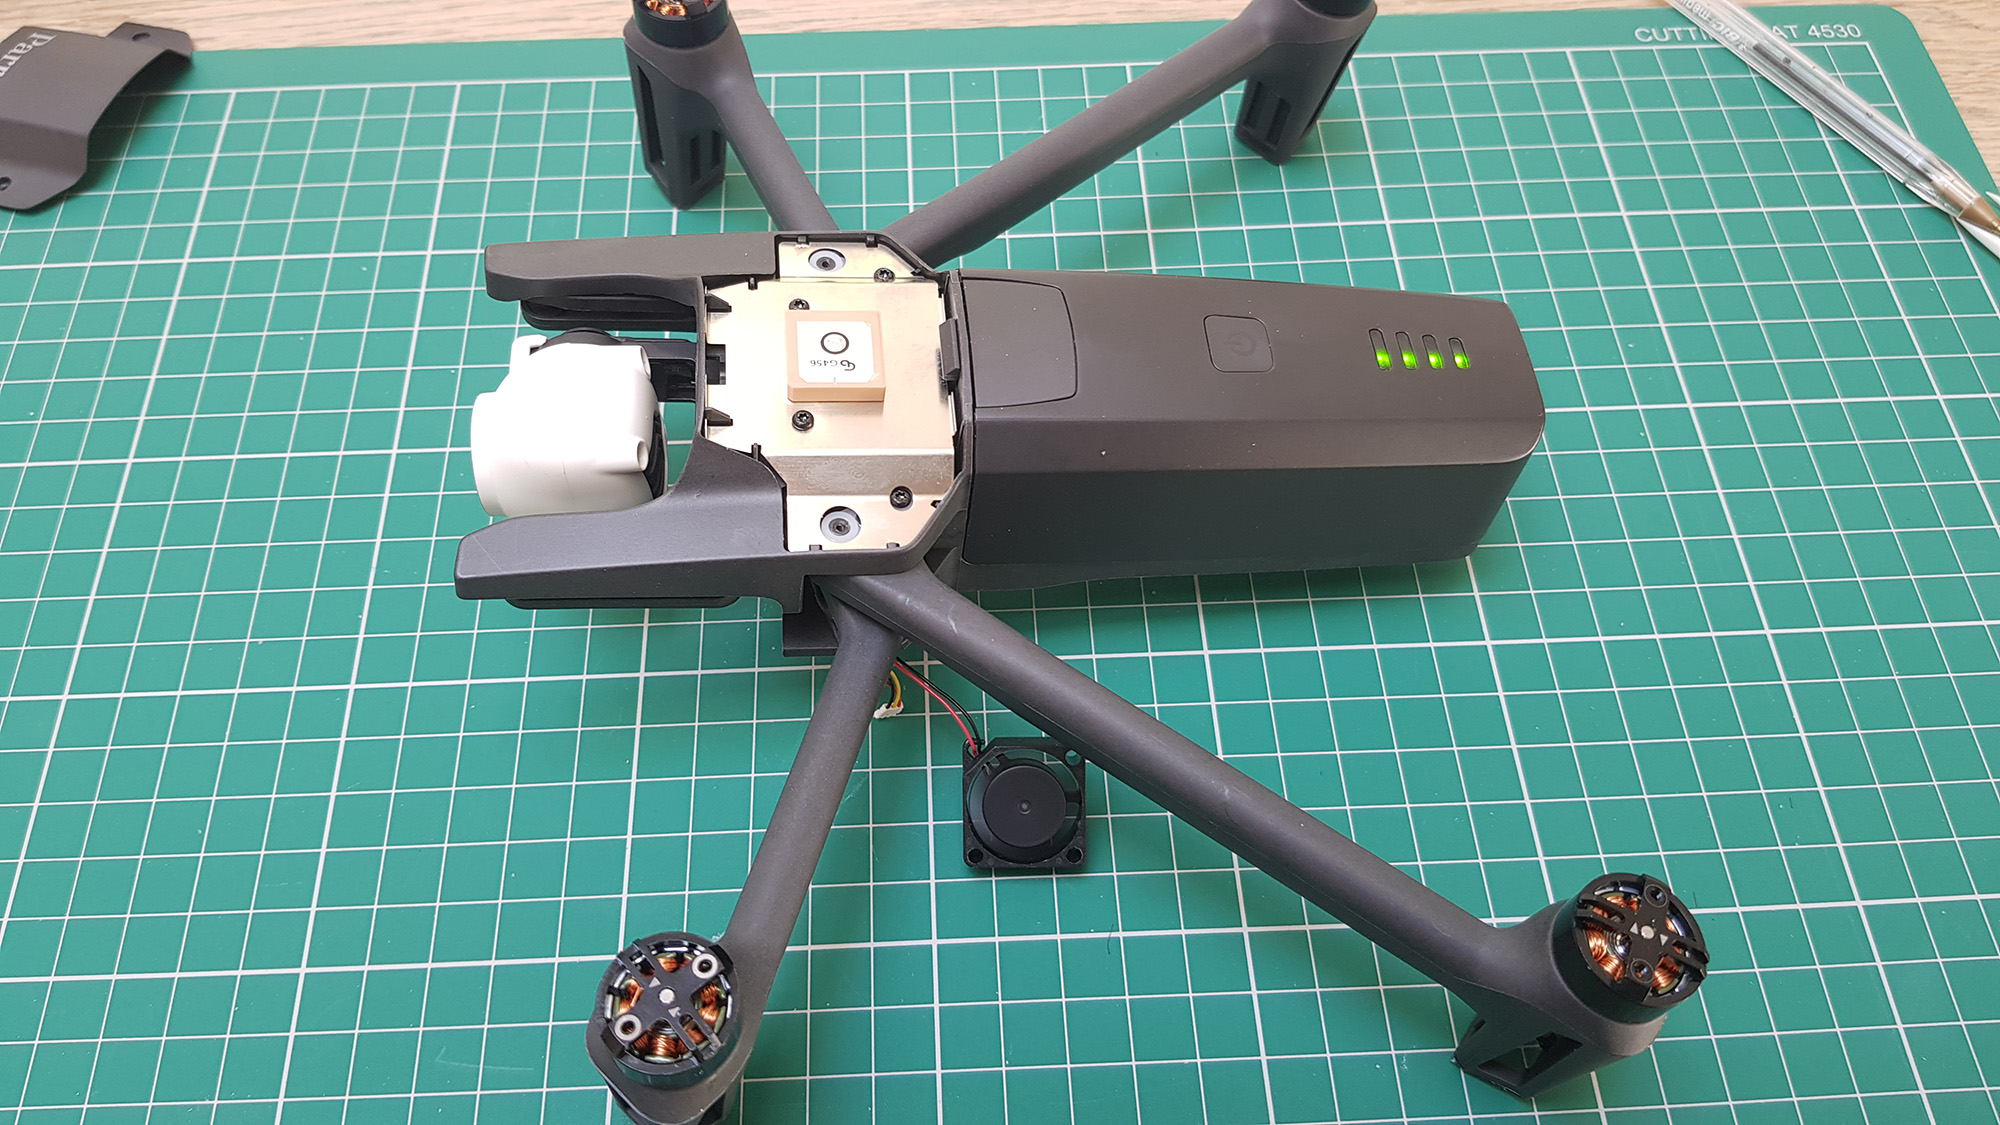
Collect required items – 1x ANAFI, 1x THERMAL/FPV Motor Kit, Torx T6, Tweezers, and a knife.Start by undoing the screws on the GPS Antenna cover.Pop cover off by pushing your screwdriver in to shown hole. NOTE: Some newer Anafi bodies have 2 screws above the battery connector, these will require a Torx T4.Remove the props.My props are pretty new – so I will be re-using them.Undo the 2 screws under the product label.Undo the 2 screws on the underside of the ANAFI.Remove bottom cover.Disconnect LED connector and remove Fan to get the back cover free.Take a few reference pictures, so you can remember where things go and how they are routed.Undo screws which hold the hinge clamps and remove clamp.Undo 2 screws holding down the GPS Antenna. Careful the antenna is still connected.Undo screws holding the hinge.Close the legs and push the hinge out.Pull the hinge clear out of the ANAFI.Disconnect the motor and antenna lead. Withdraw the legs out of the body.Now repeat for the other side. Note you will have to remove the plastic 2 part clamp holding the connectors.And here are the screws and parts removed. Useful to keep note of which motor and antenna leads go where!!Old legs.New legs – Motor kits come with new hinges, washers, clamps and screws. This is all the same as the original, so I used my original hinge hardware.Thread motor and antenna leads in to the ANAFI.Push washer down between the legs.Carefully push in the hinge. This will be easier with the legs in the closed position (inline with each other). Also check the washer is correctly positioned.Washer. Check!Hinge fully pushed home.Install hinge clamp and screw down.Repeat for other side.Install 2 screws that hold the hinges in place.Finally re-position the GPS Antenna and 2 screws to hold it down.Confirm that GPS Antenna is correctly connected to the motherboard and has not been disconnected.Arrange all the motor and antenna leads.First connect the motor leads closest to Camera, re-attach plastic clamp for that side.Install motor leads for the other side.You can now fit the 2nd part of the plastic clamp, and lock it together.Take your time to inspect that the gimbal lead is still connected ok.Route all the antenna leads. Start by first connecting them, then work backwards.Make sure to attach the grounding clips and leads, you can squeeze them together slightly if they do not hold very well.Finish up by clipping the leads in to the correct places.And on this side. Note which lead is clipped where.Quick power up test. Everything looks ok!Finally props back on and ready for final testing.
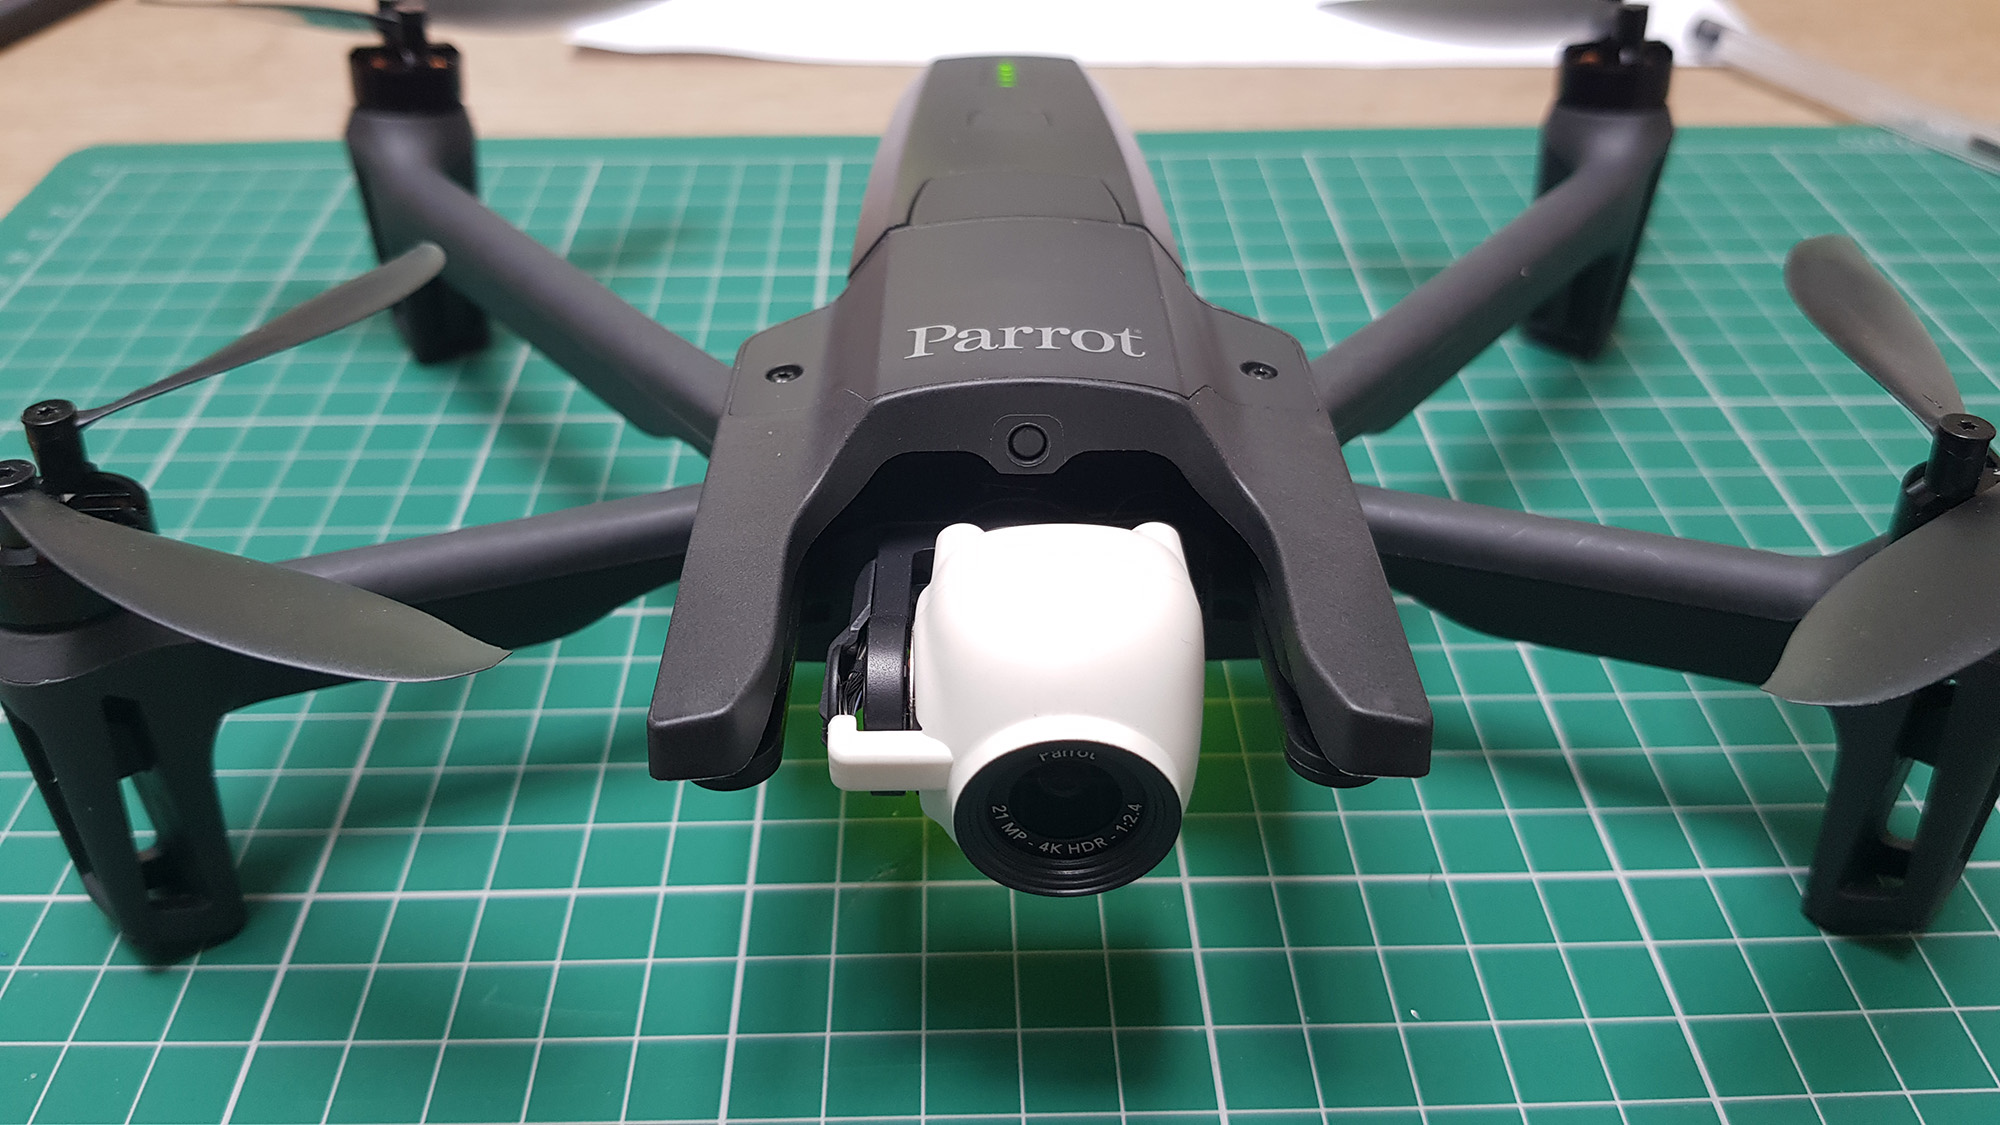
So the new legs are installed. Make final checks to the props and screws – make sure they are all attached securely!
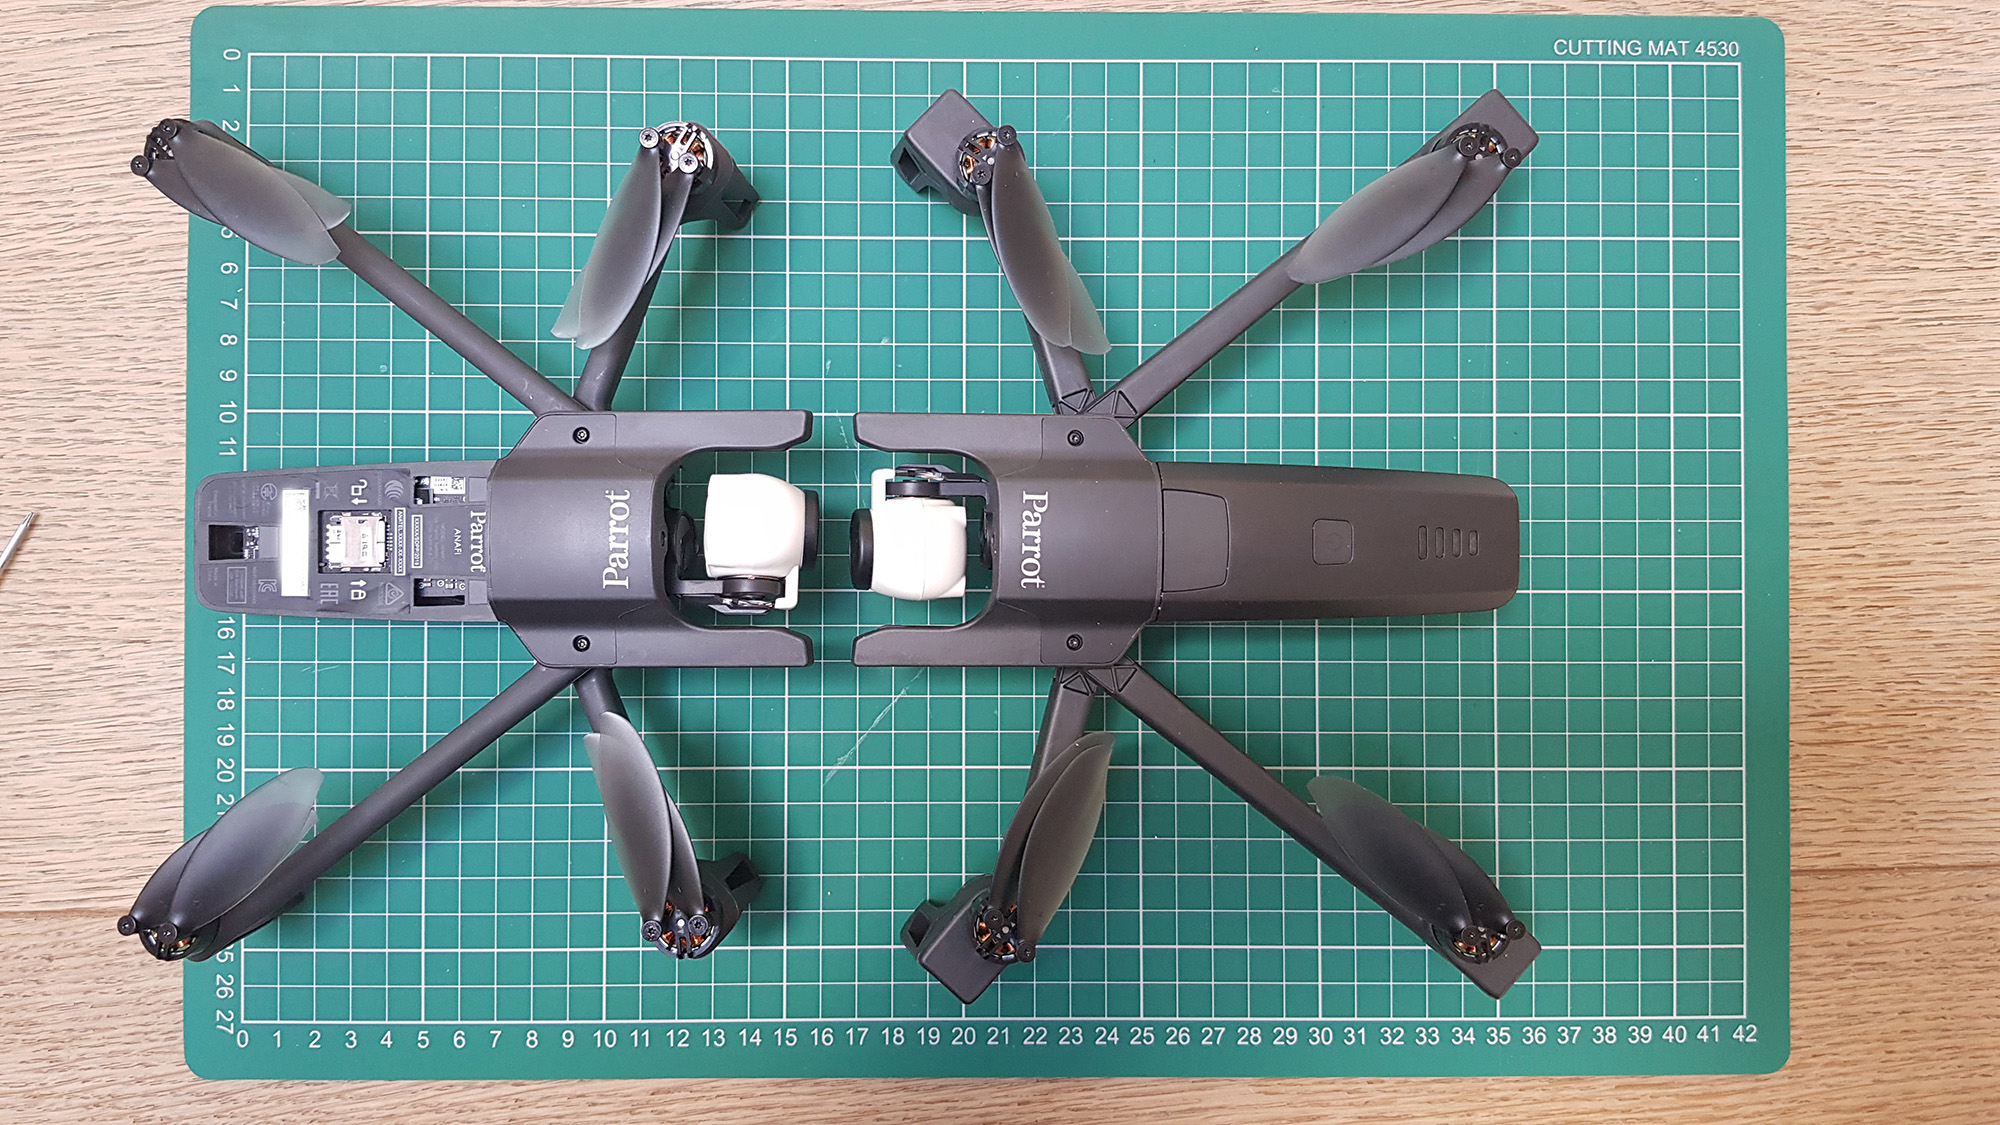
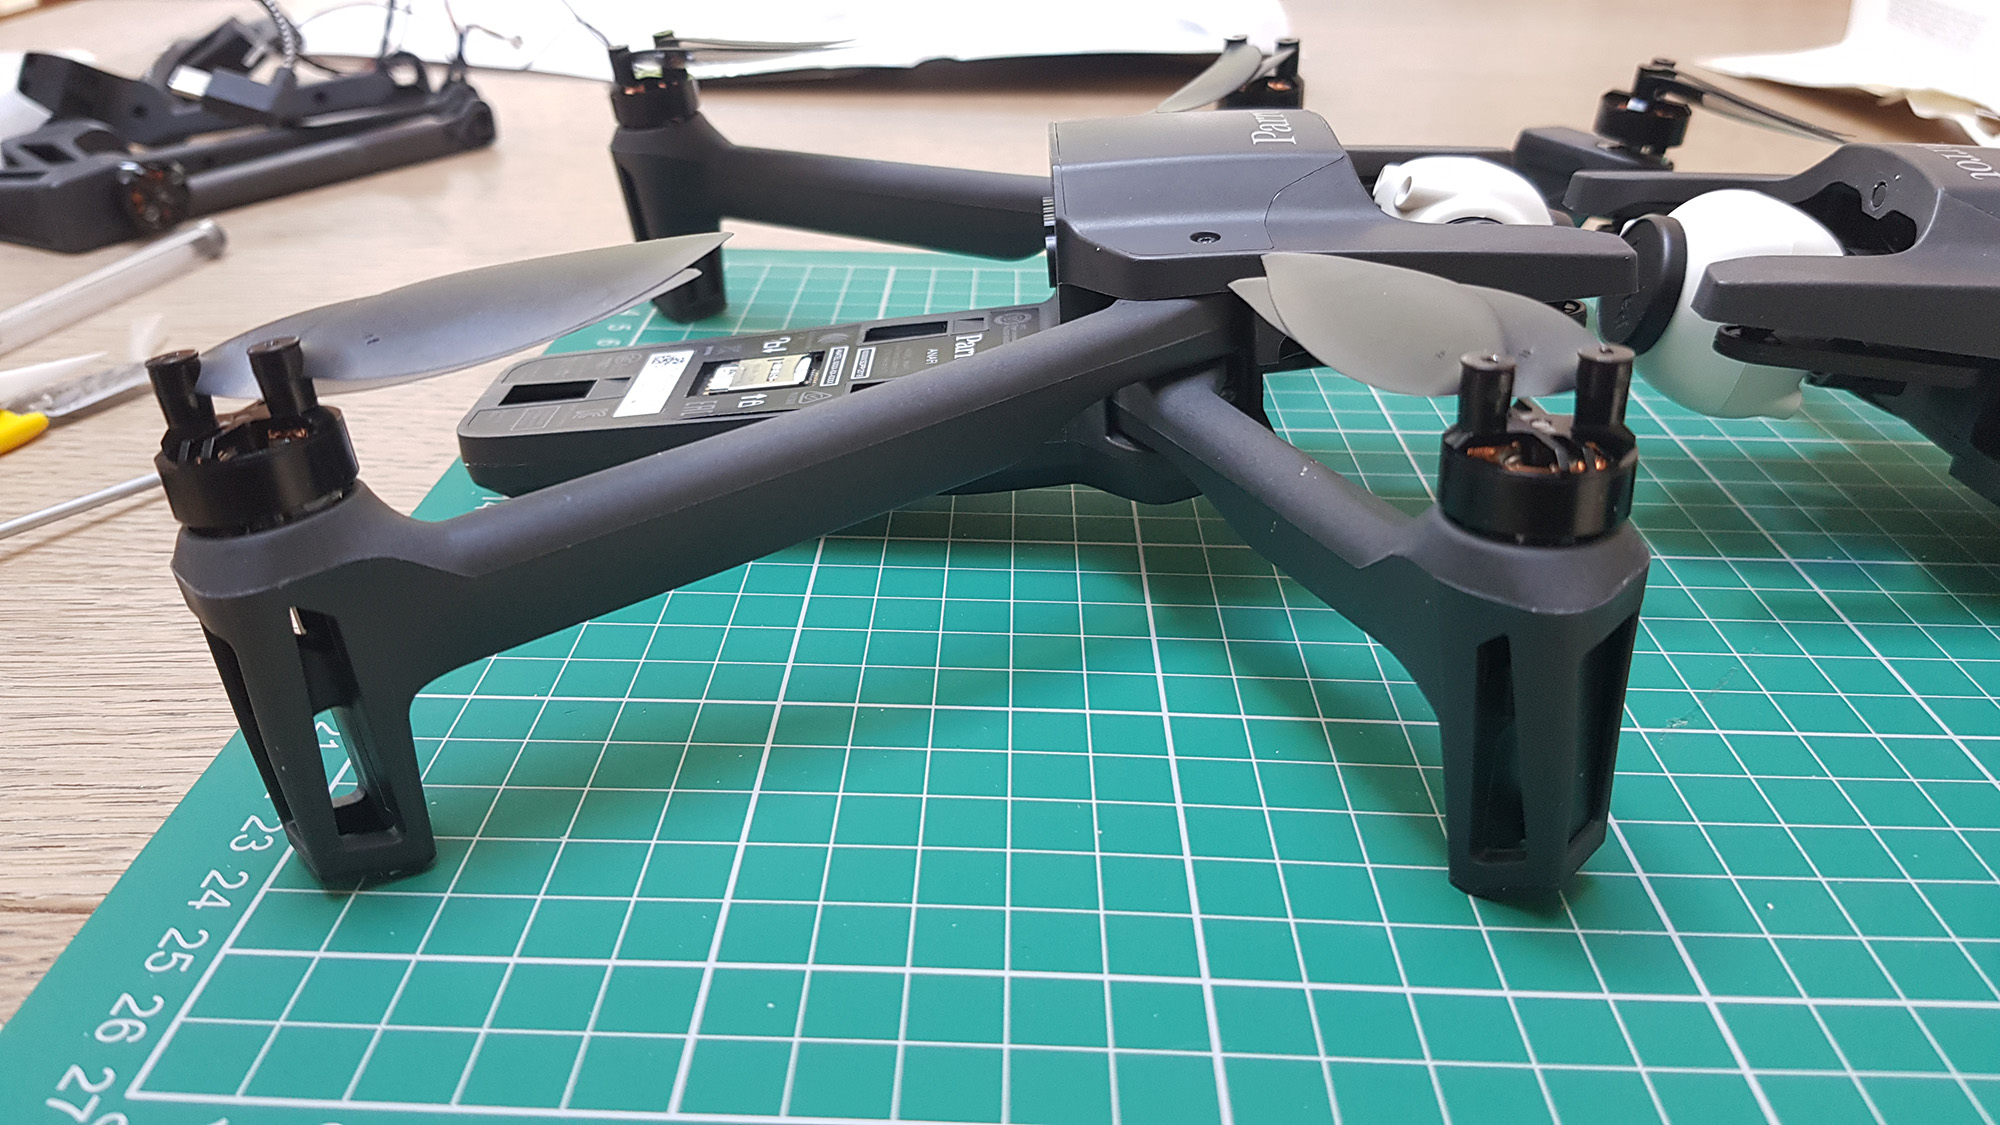
How does it look? Analysis.
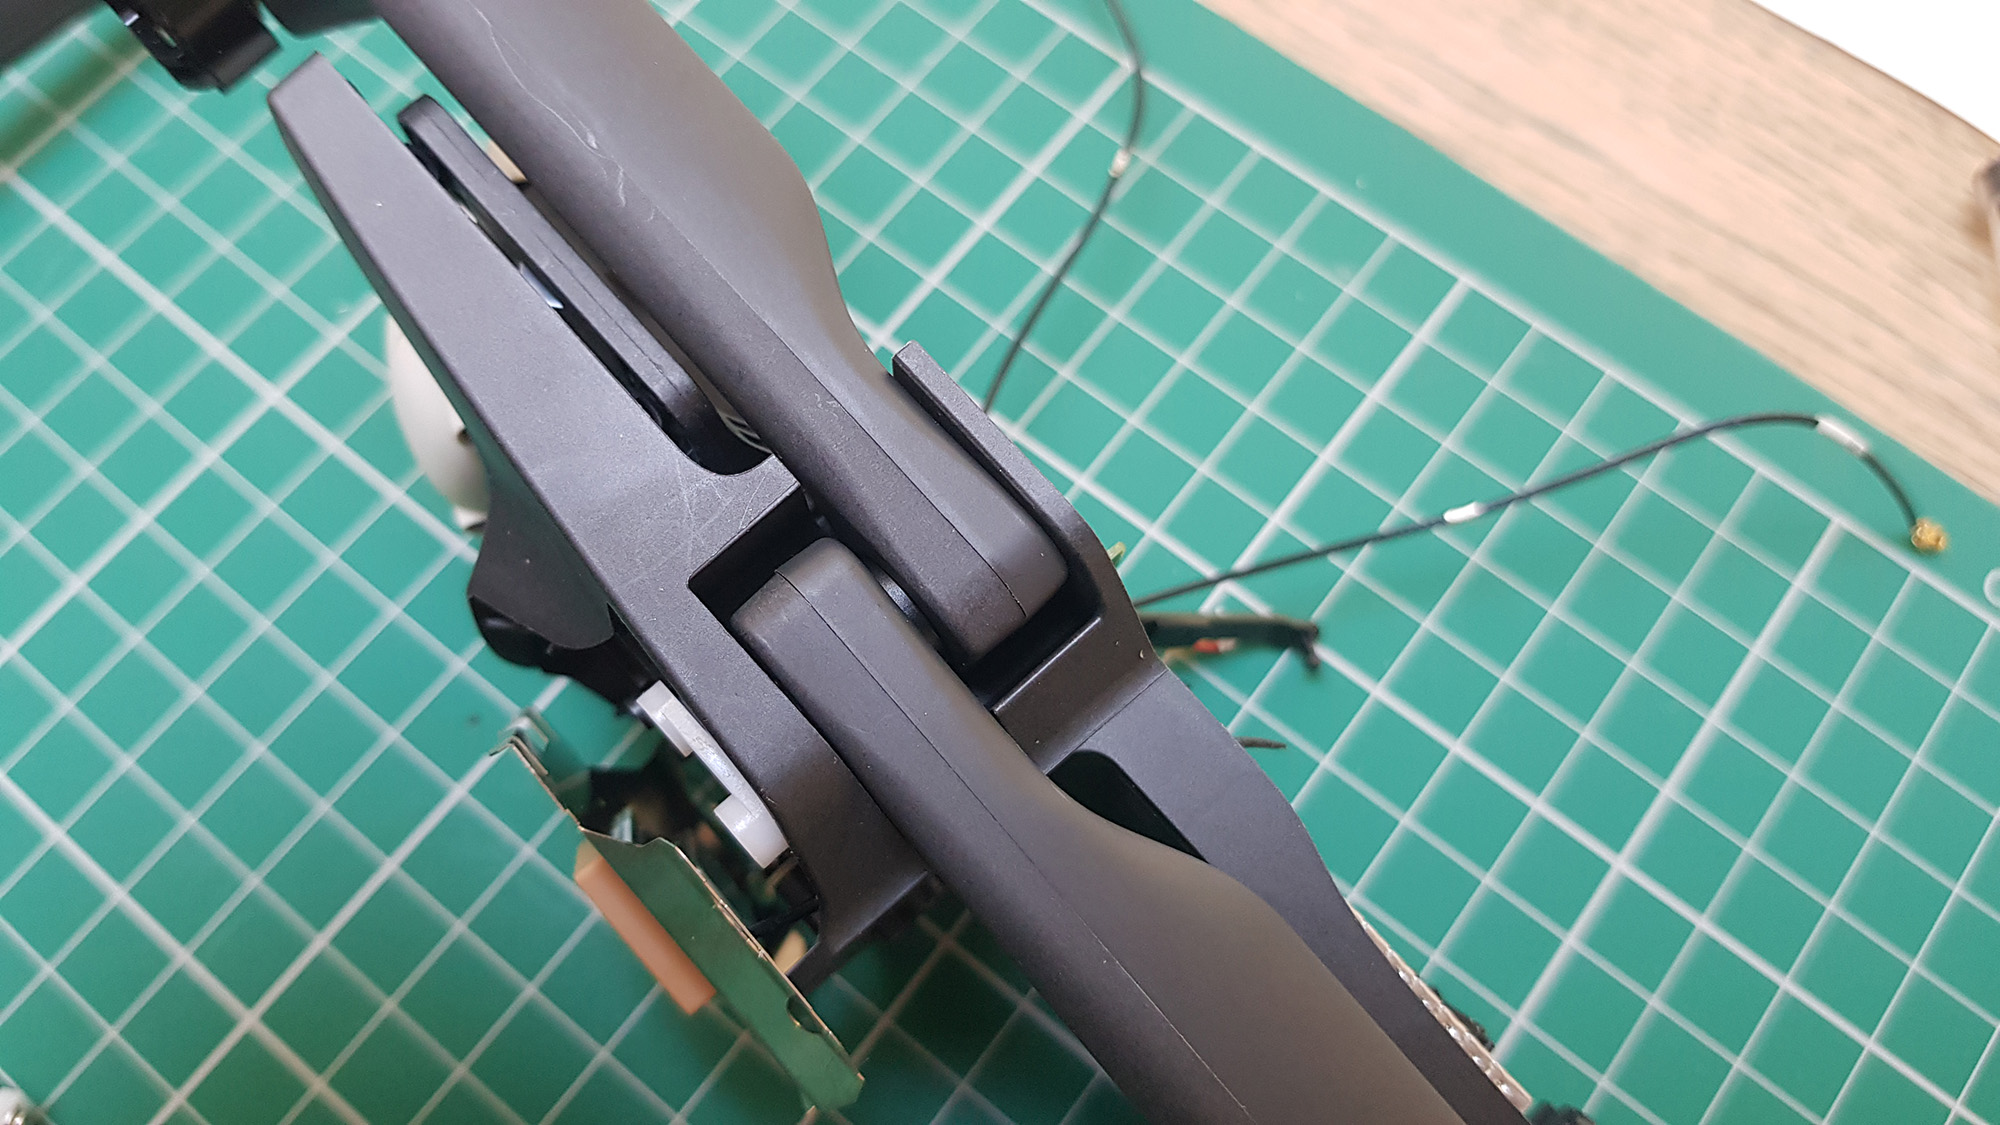
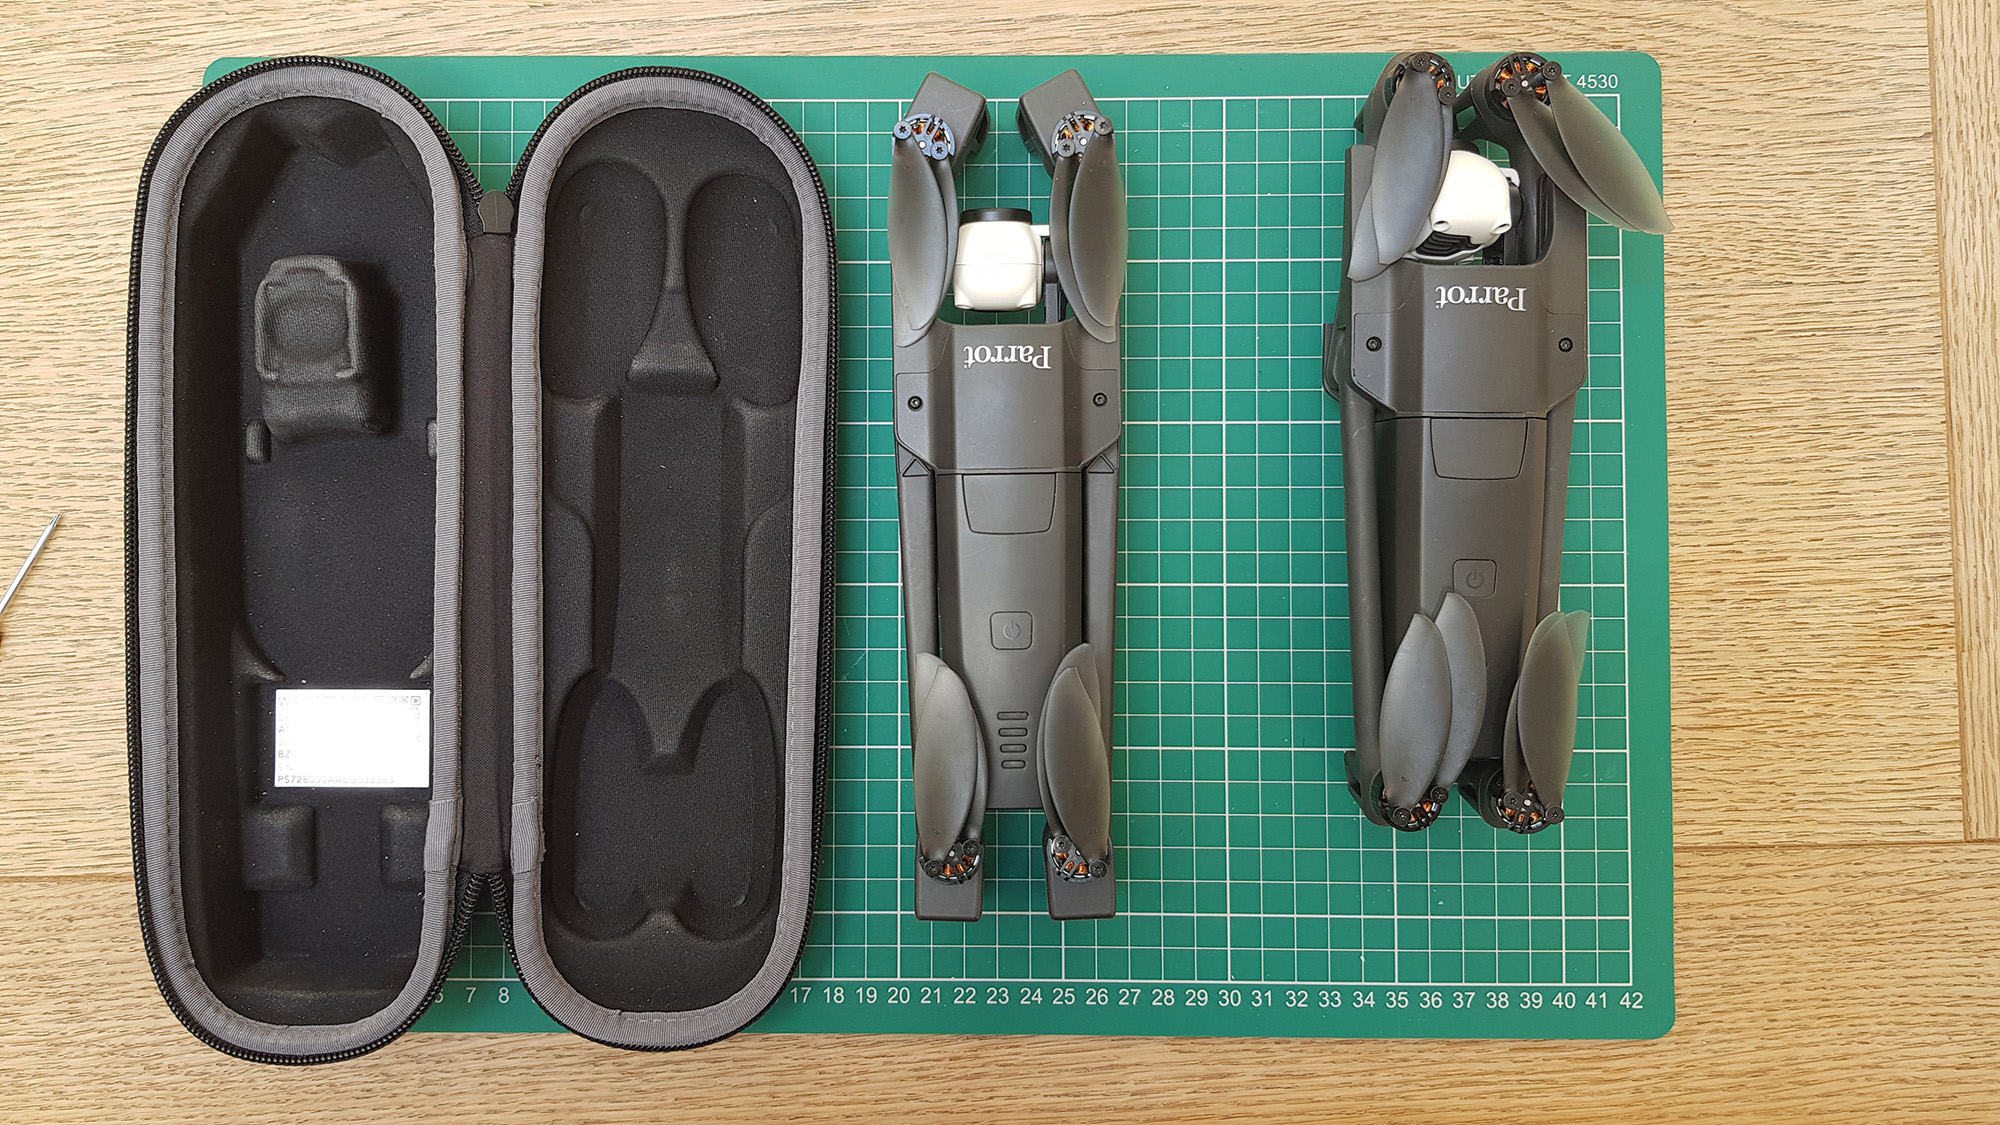
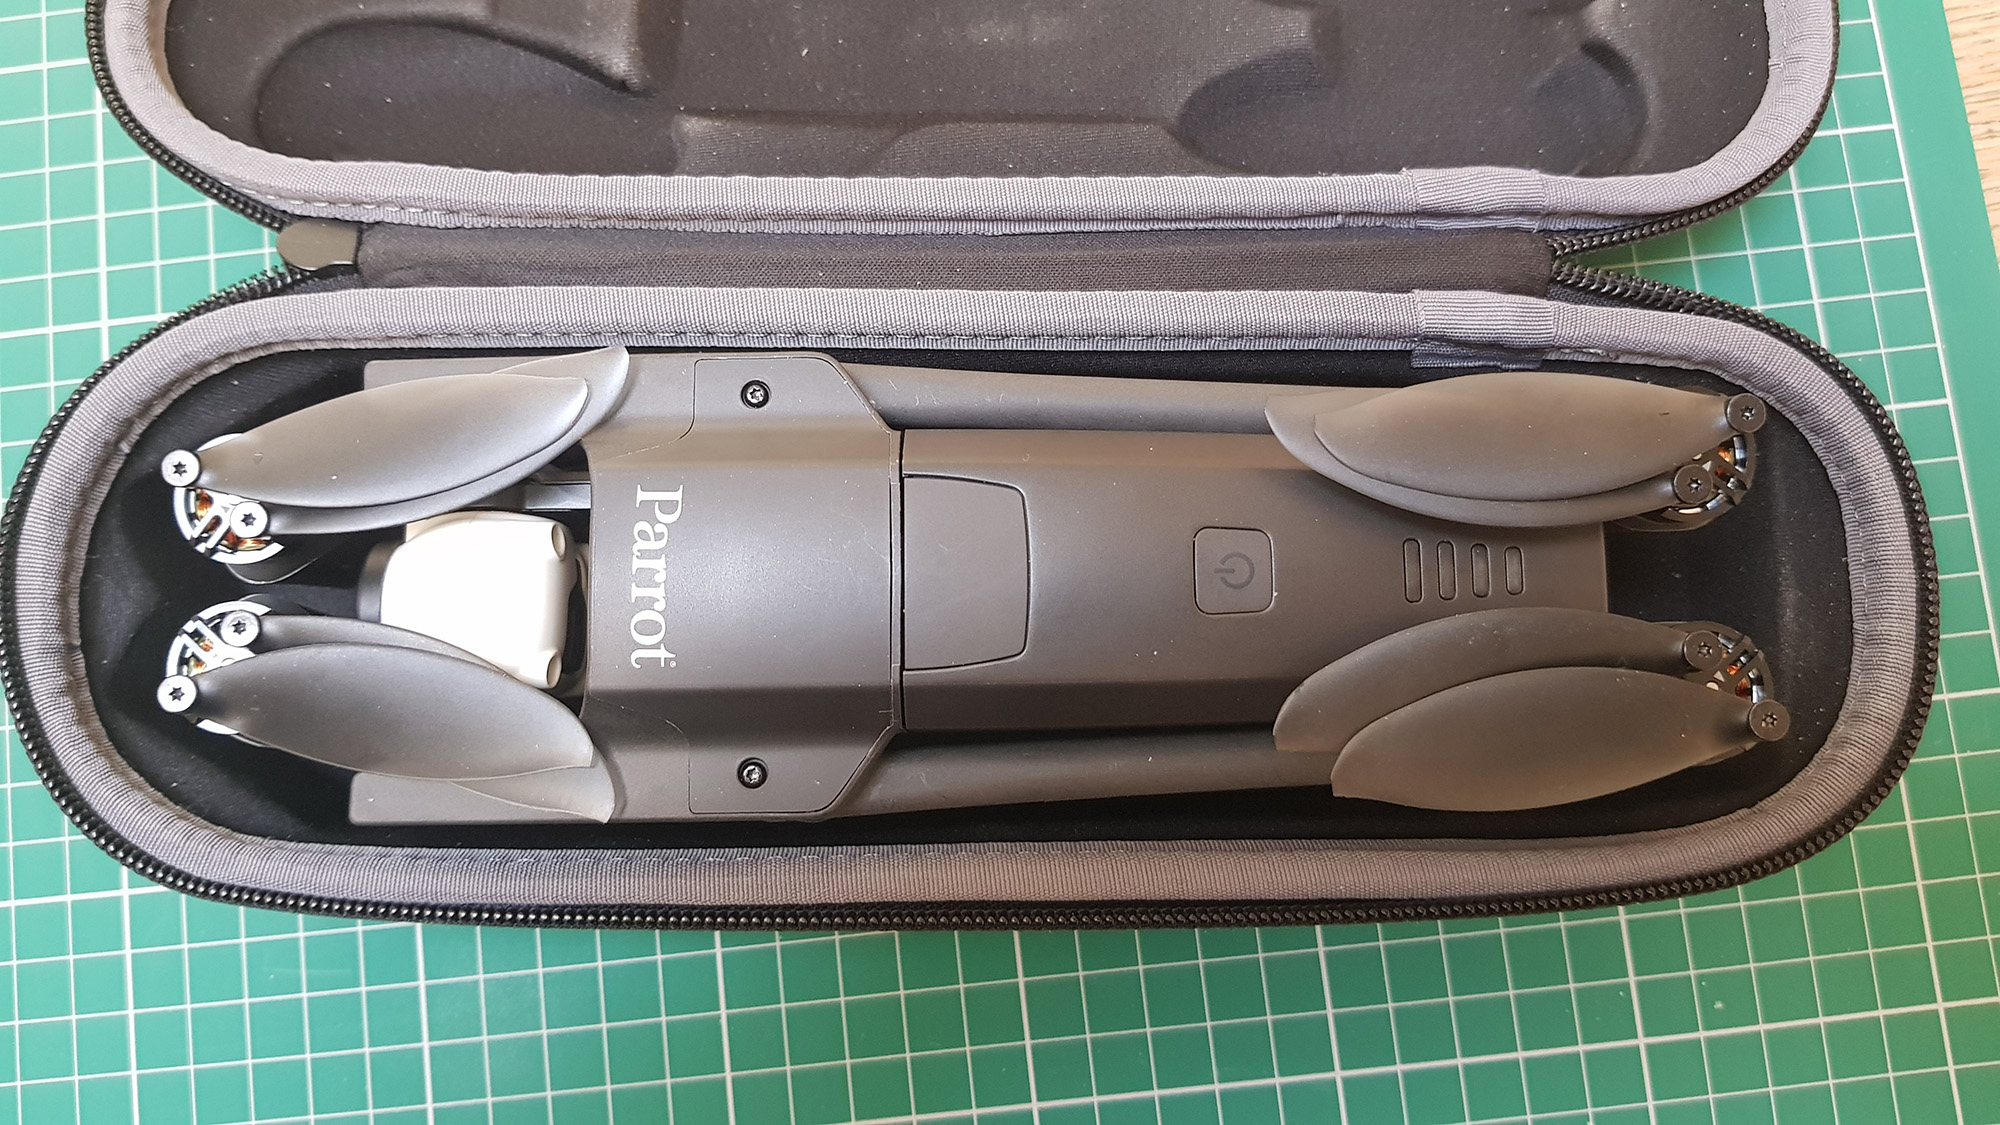
It looks so much smaller! Weighs less as well – With no battery, original legs drone weight is 191grams, new legs weight is 184grams .Sits differently on the ground. Higher at the frontMotor alignments are slightly different. The front motors camber in between them.Motor foot print is actually smaller with the original legs.Motors are placed further out from the drone body.In closed position the drone is much slimmer as the legs are closer together.Same for the rear legs.So much smaller when closed up – less length and less width!One down side – does NOT FIT in the original case!
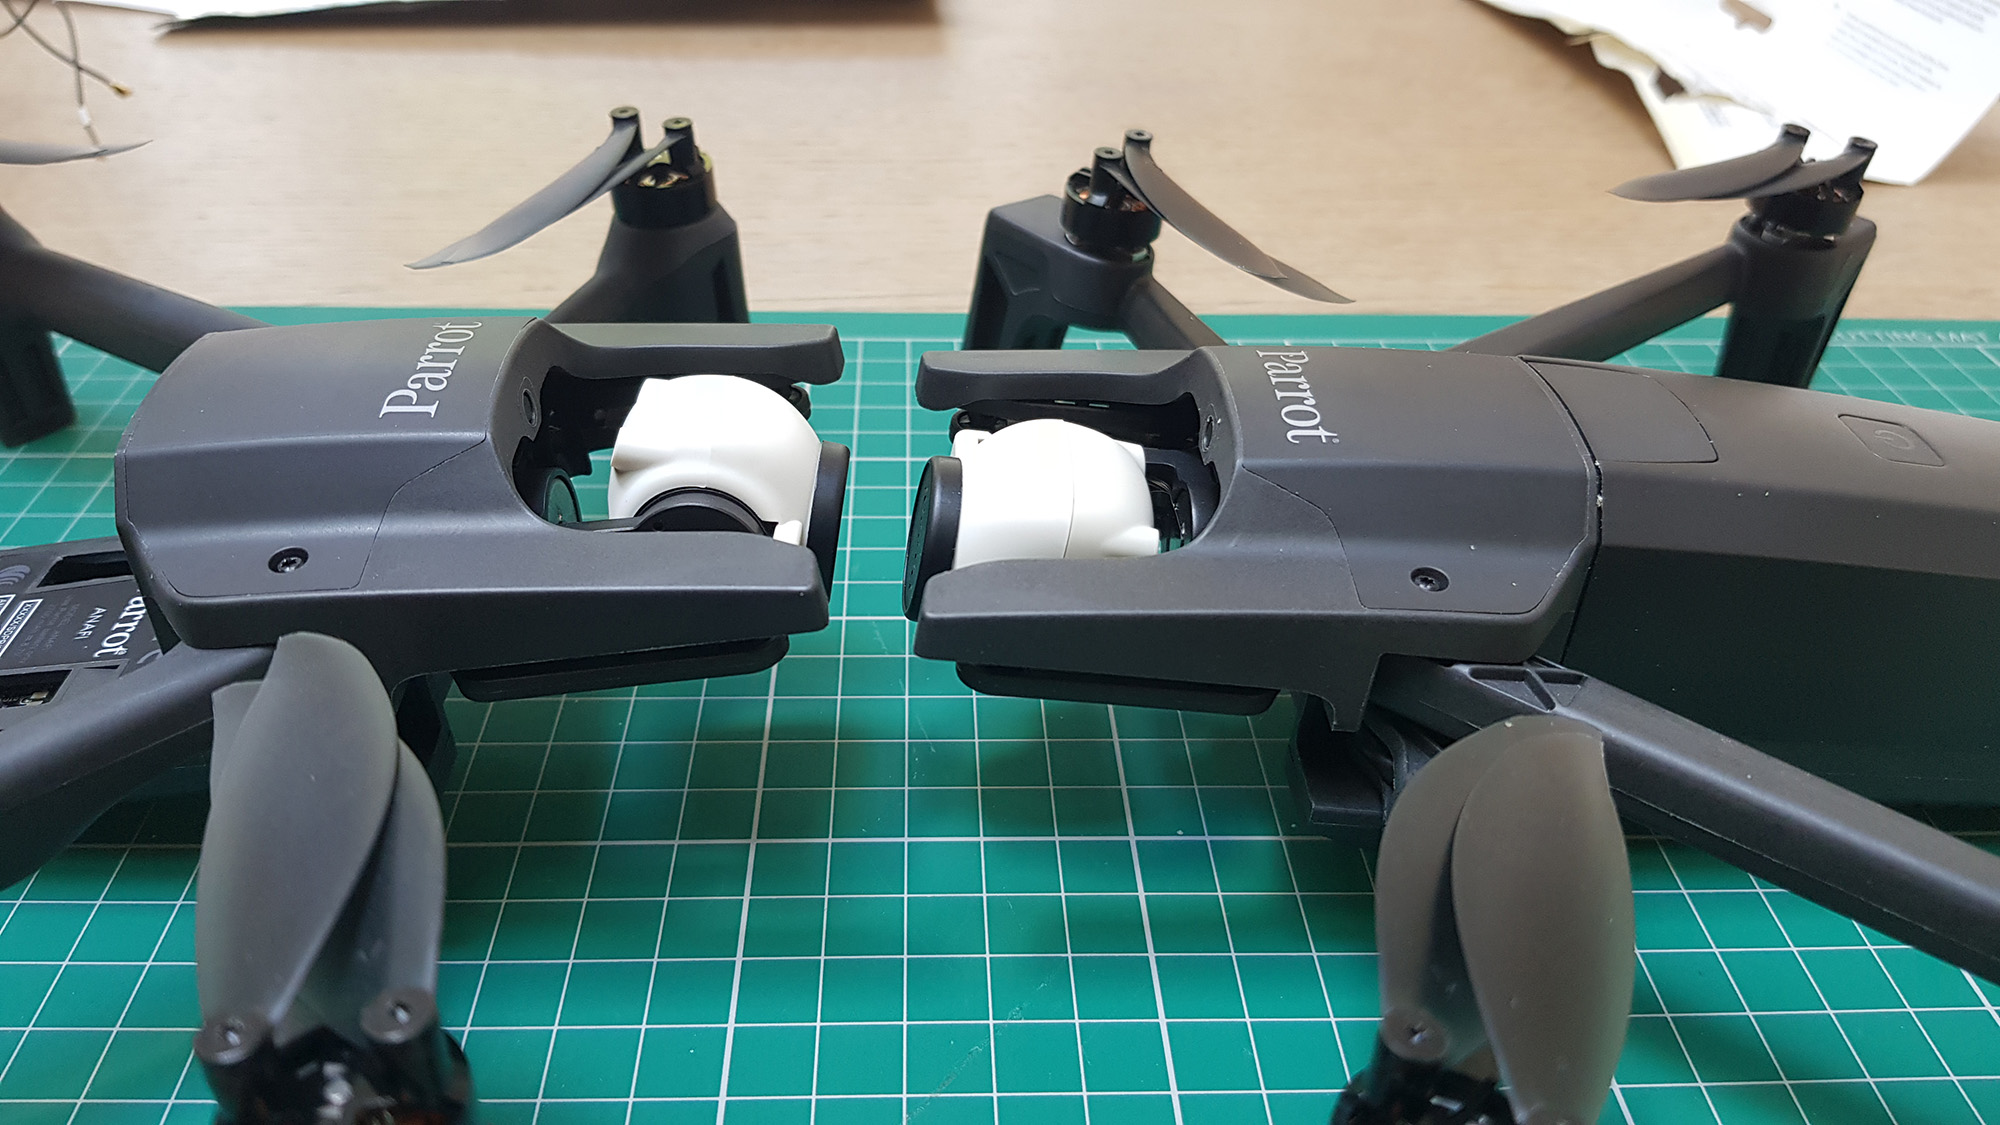
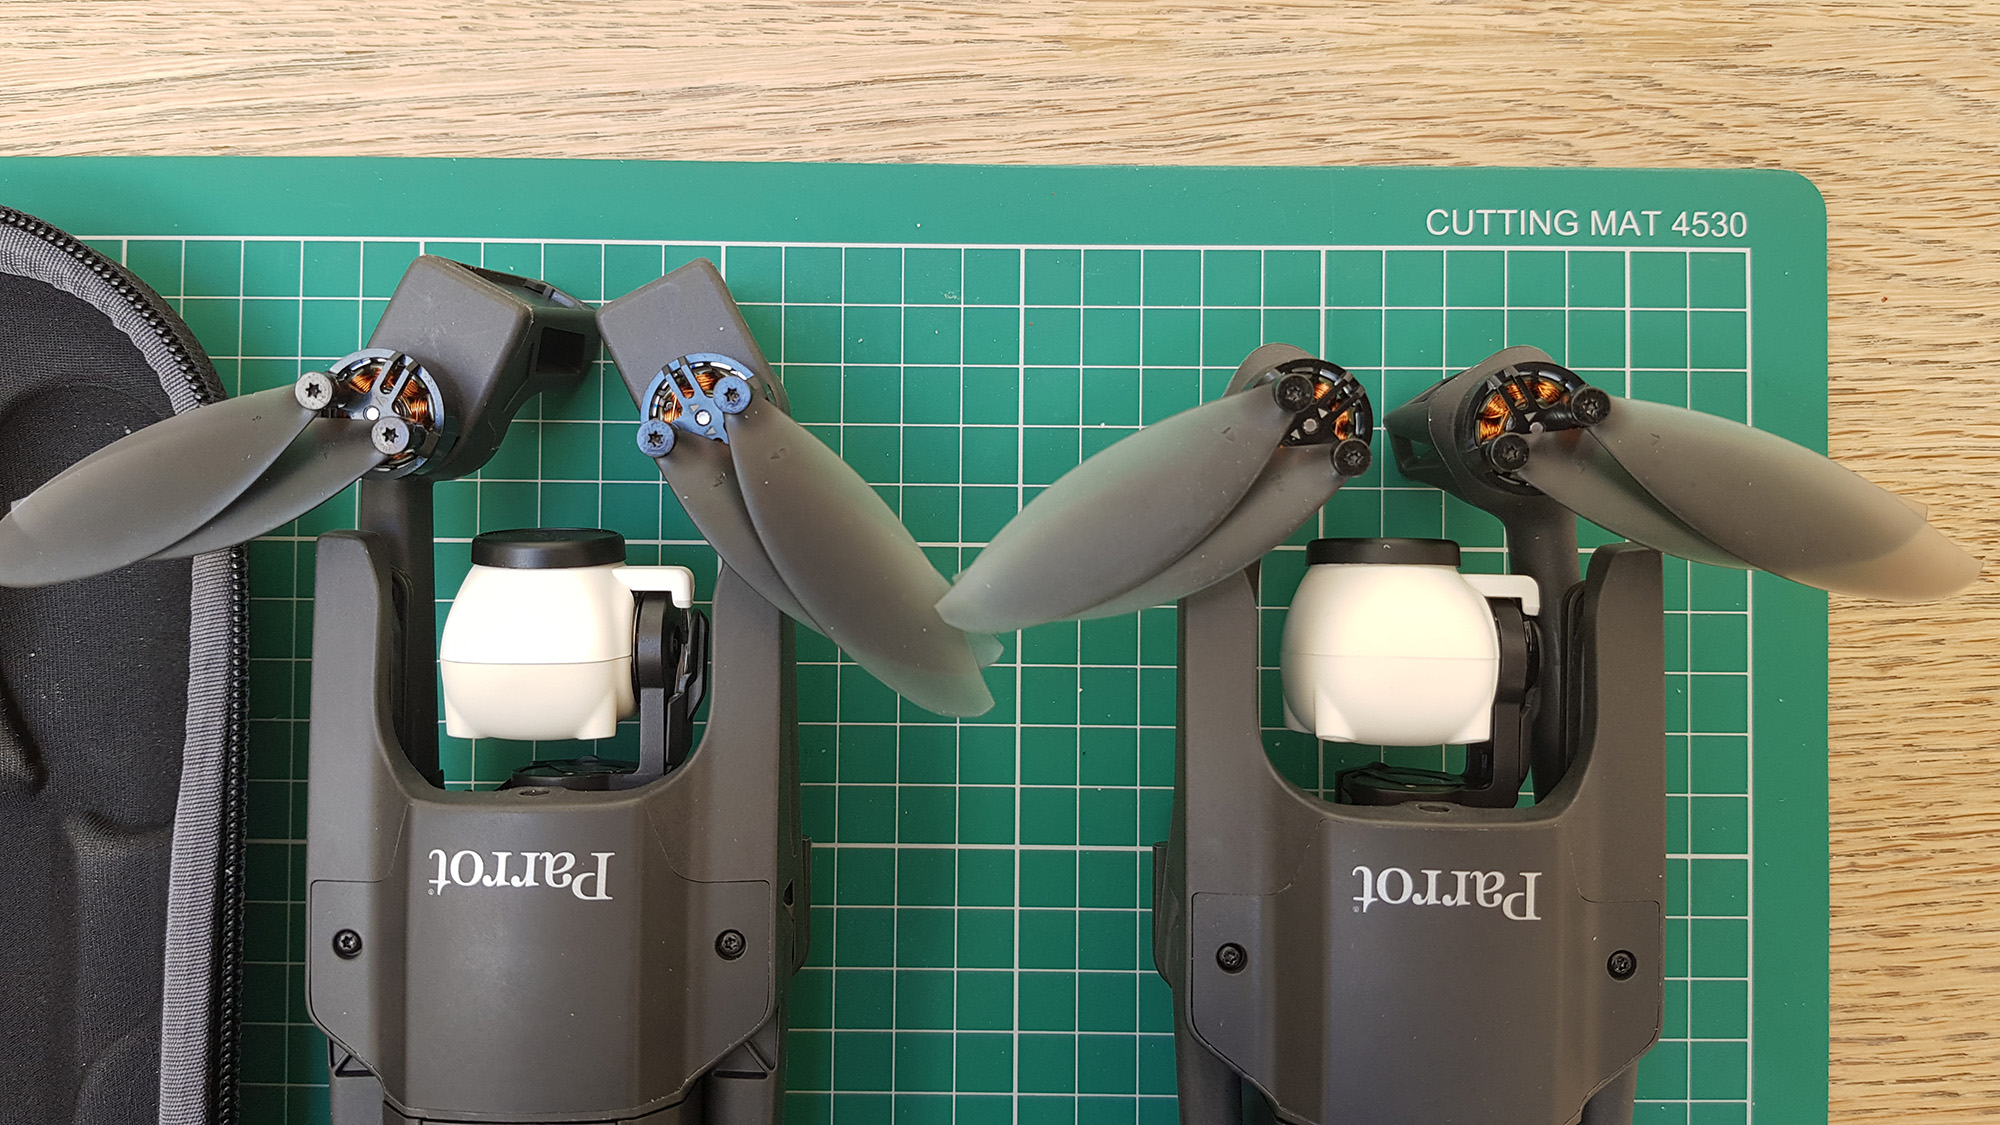
The motor alignment is very interesting.
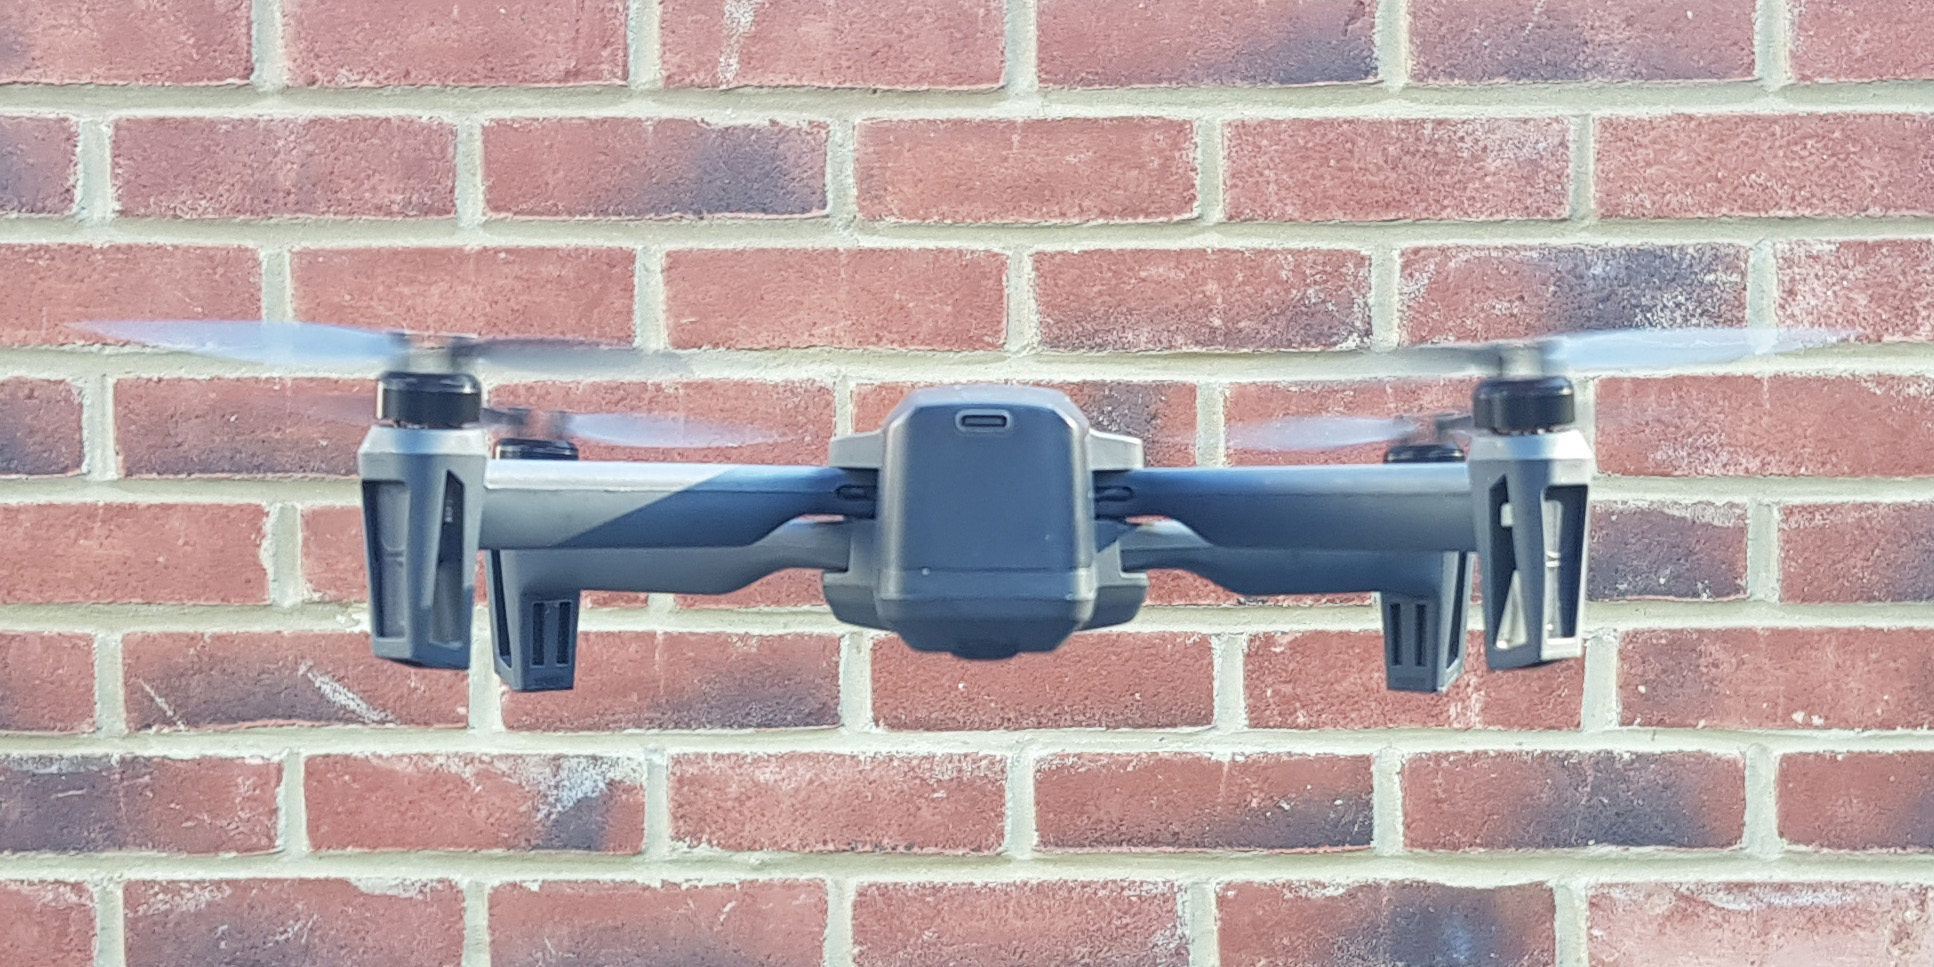
There is a greater camber IN between the two rear motors and the two front motors. This has probably been done to increase agility of the drone for FPV use.
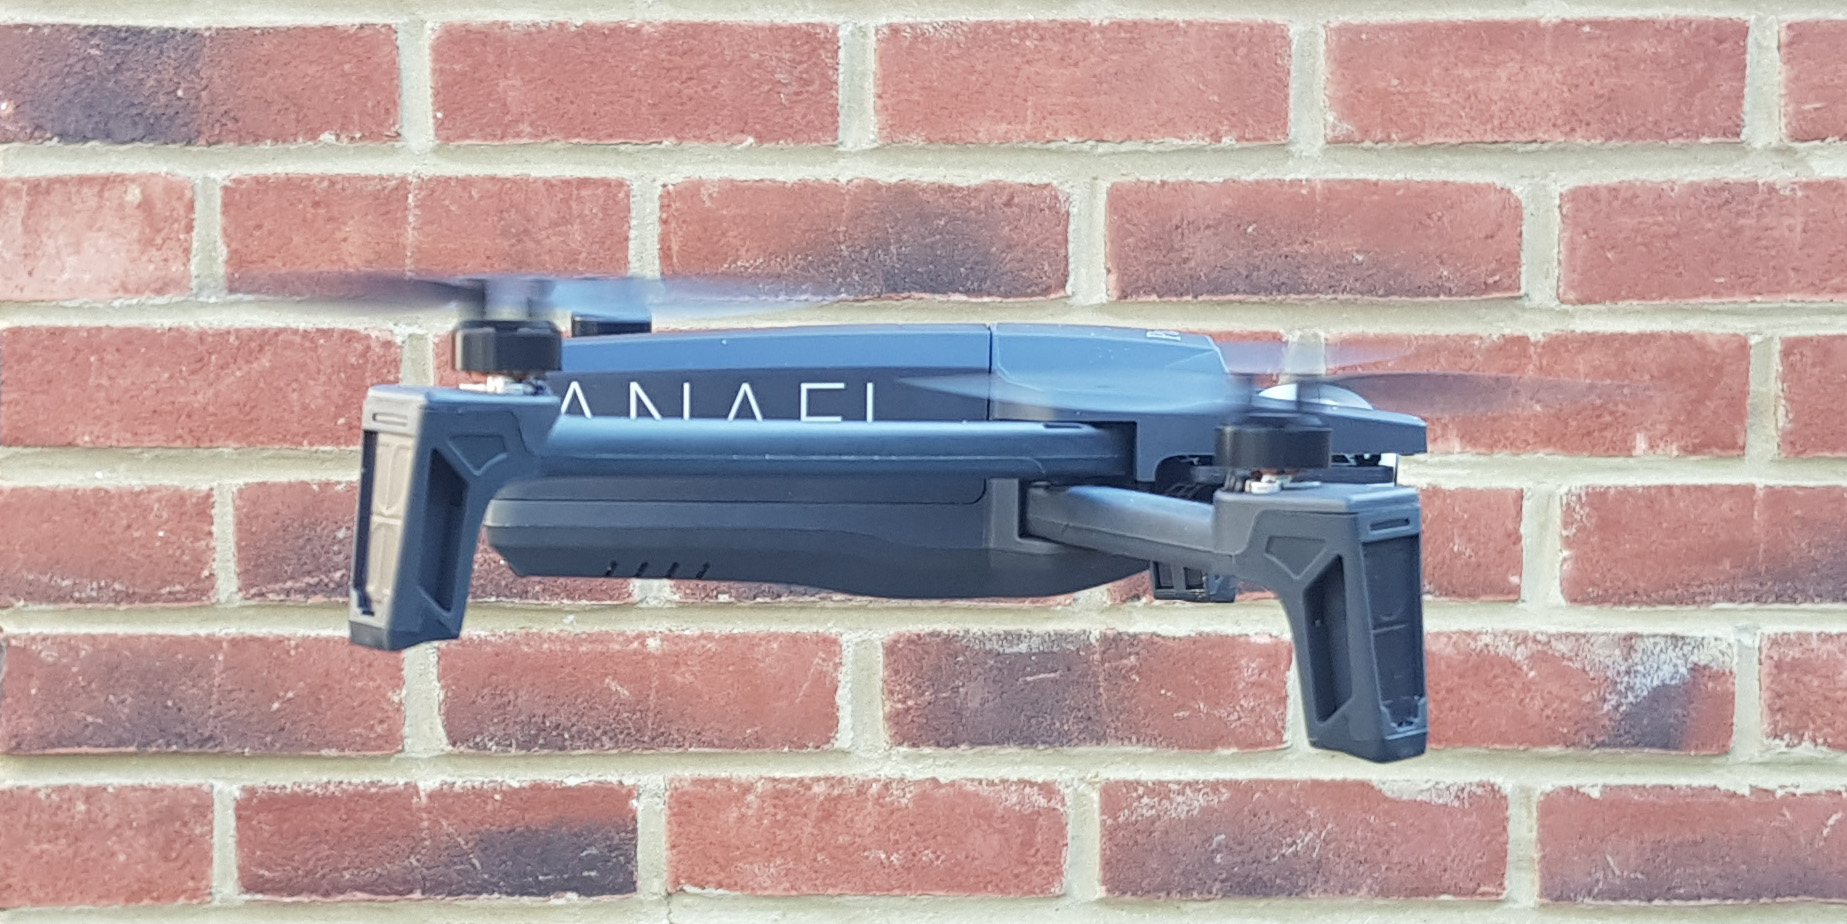
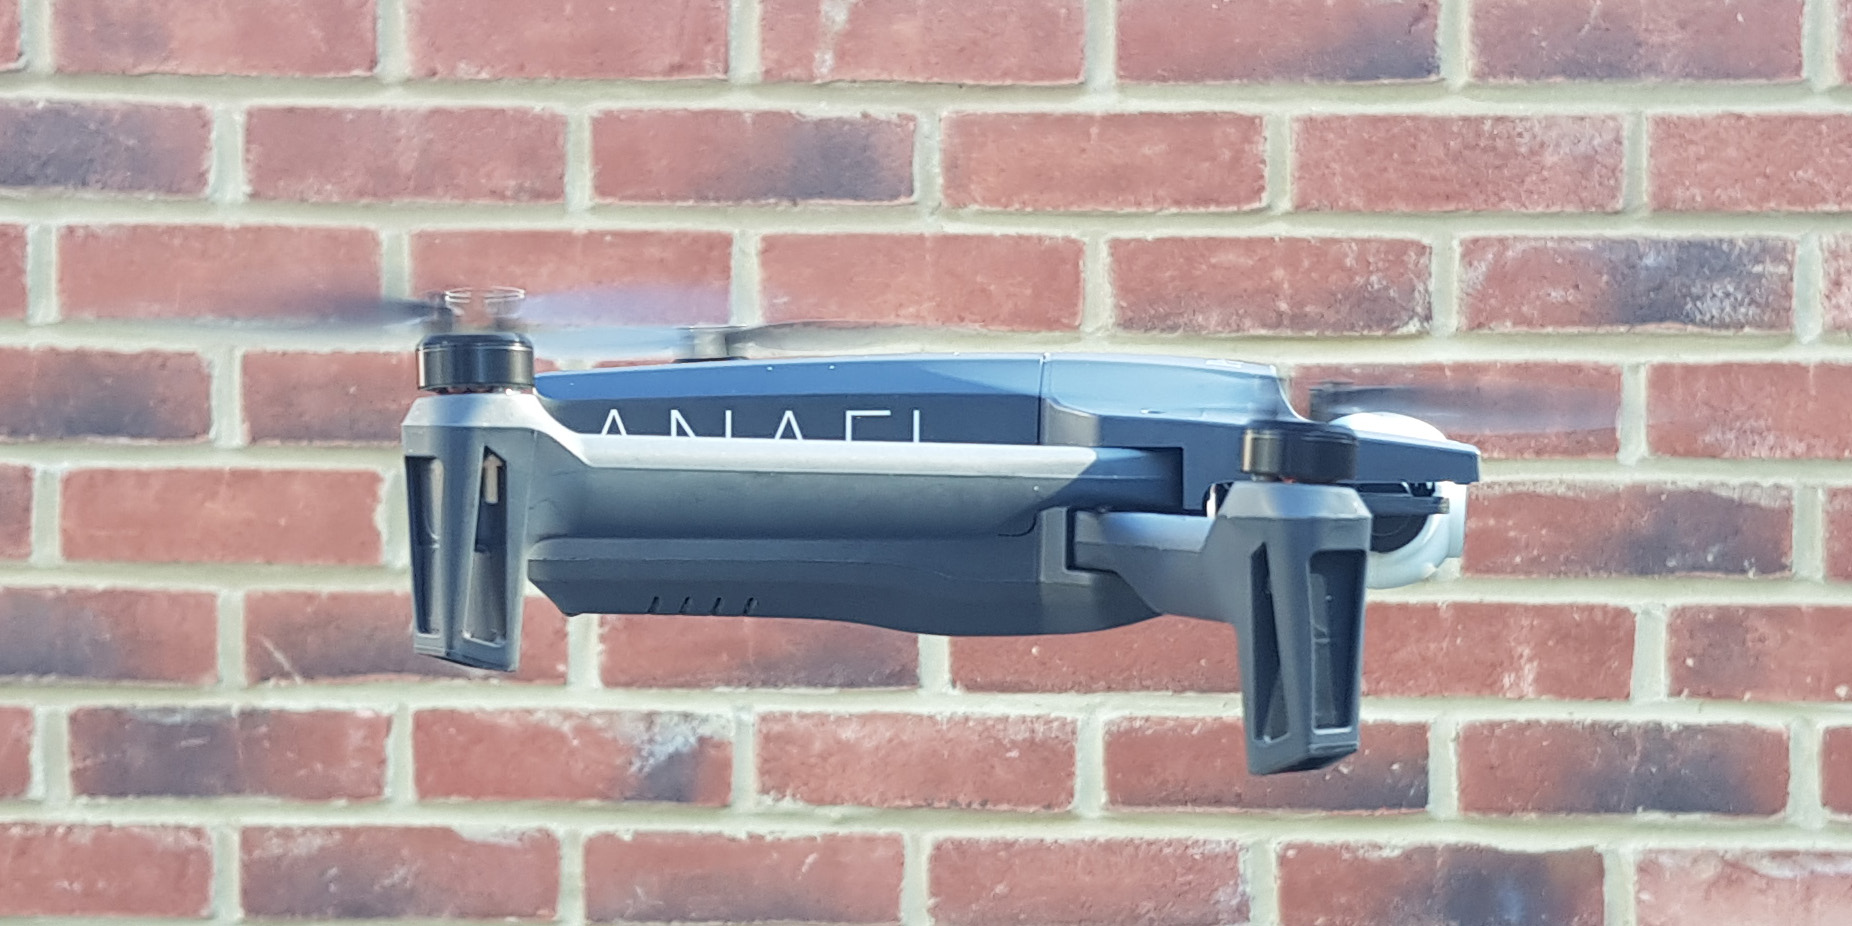
Also I noticed that there is a slight camber OUT between the front and rear motors, so the rear and front motors point away slightly from each other.
On the original legs, there is a very slight camber IN between the rear and front motors, where as there is camber between front to back (motors are perfectly perpendicular to the drone centre line).
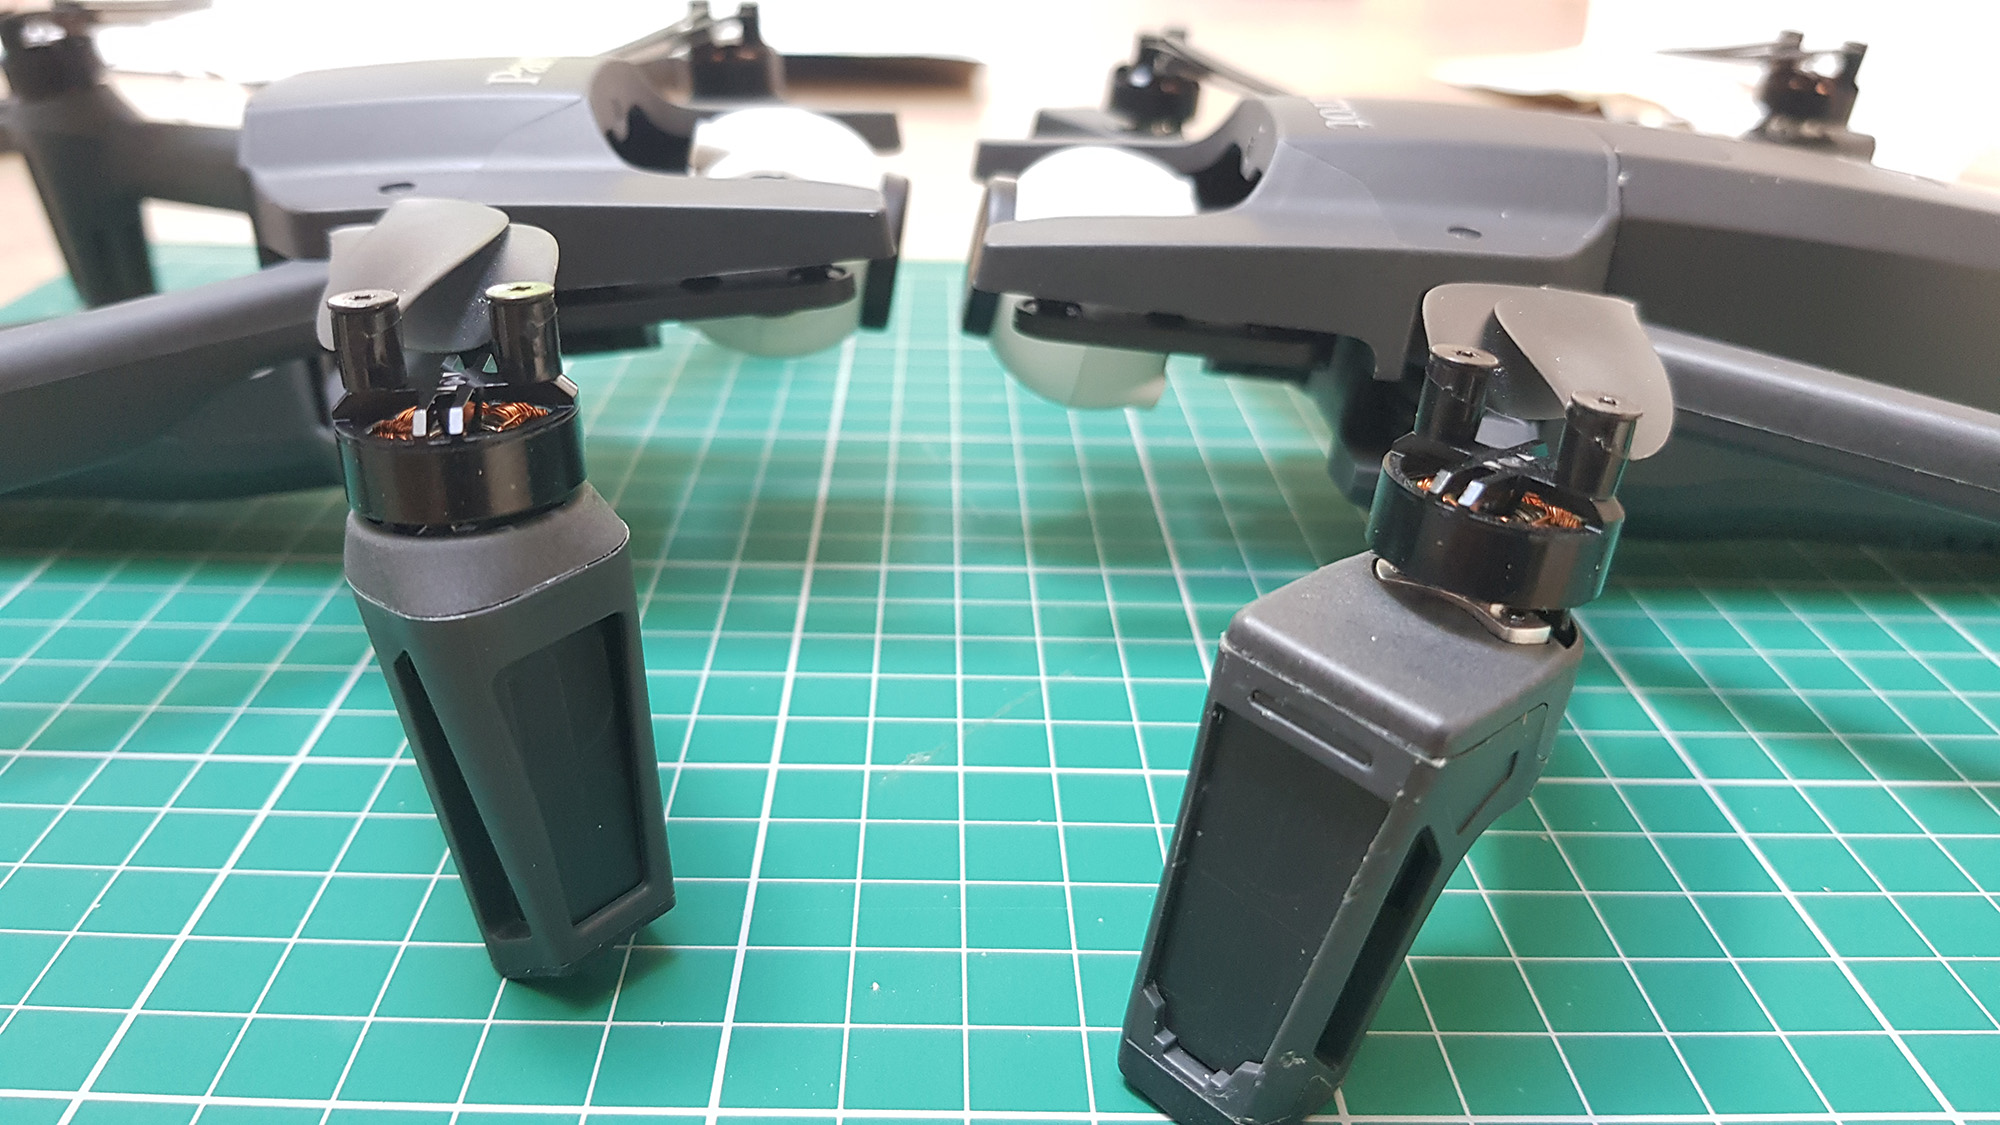
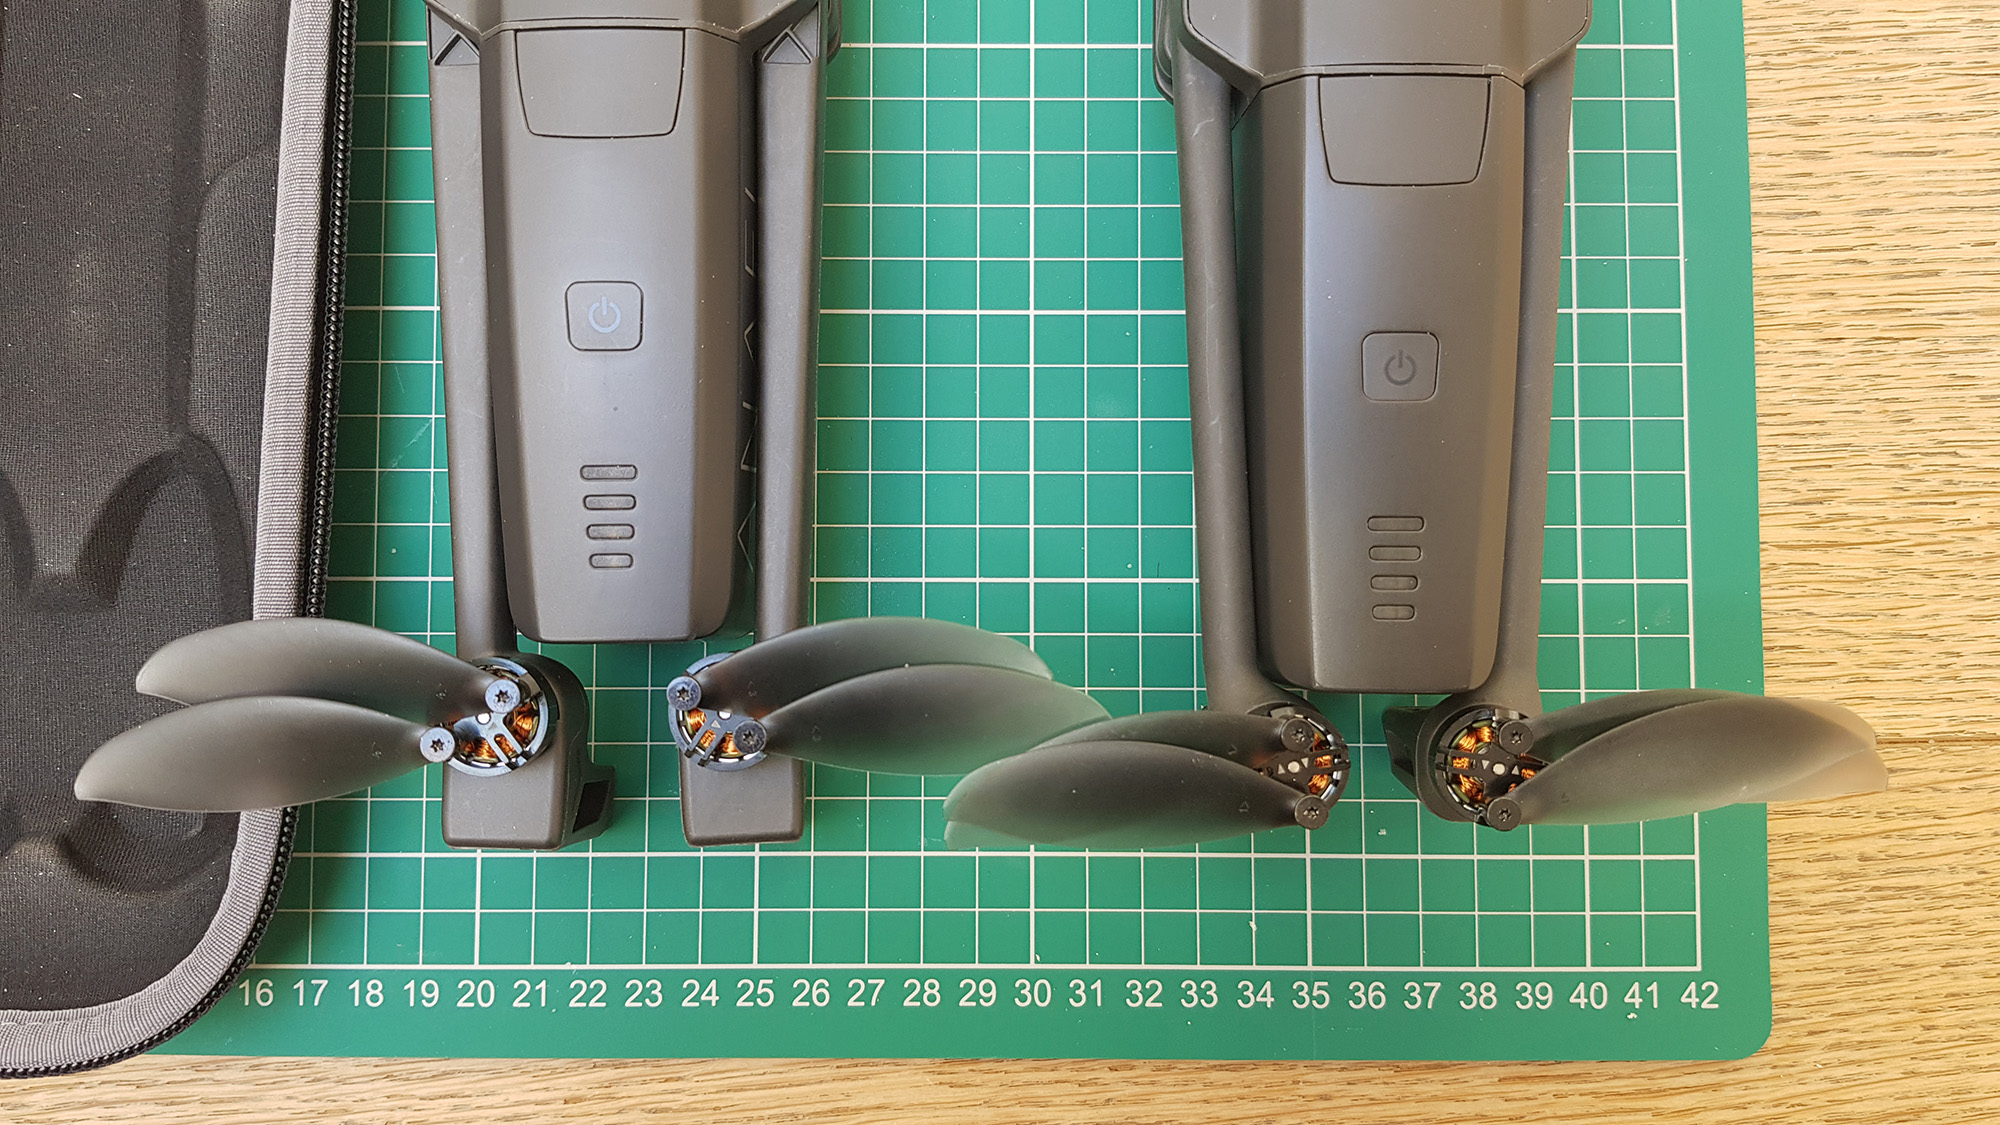
This is how the old legs look in hover.And the new legs in hover.
Final difference I can see is the motor centres are about 6mm (1/4″) further away from the the drone centre, so the motor footprint is actually larger with the new legs.
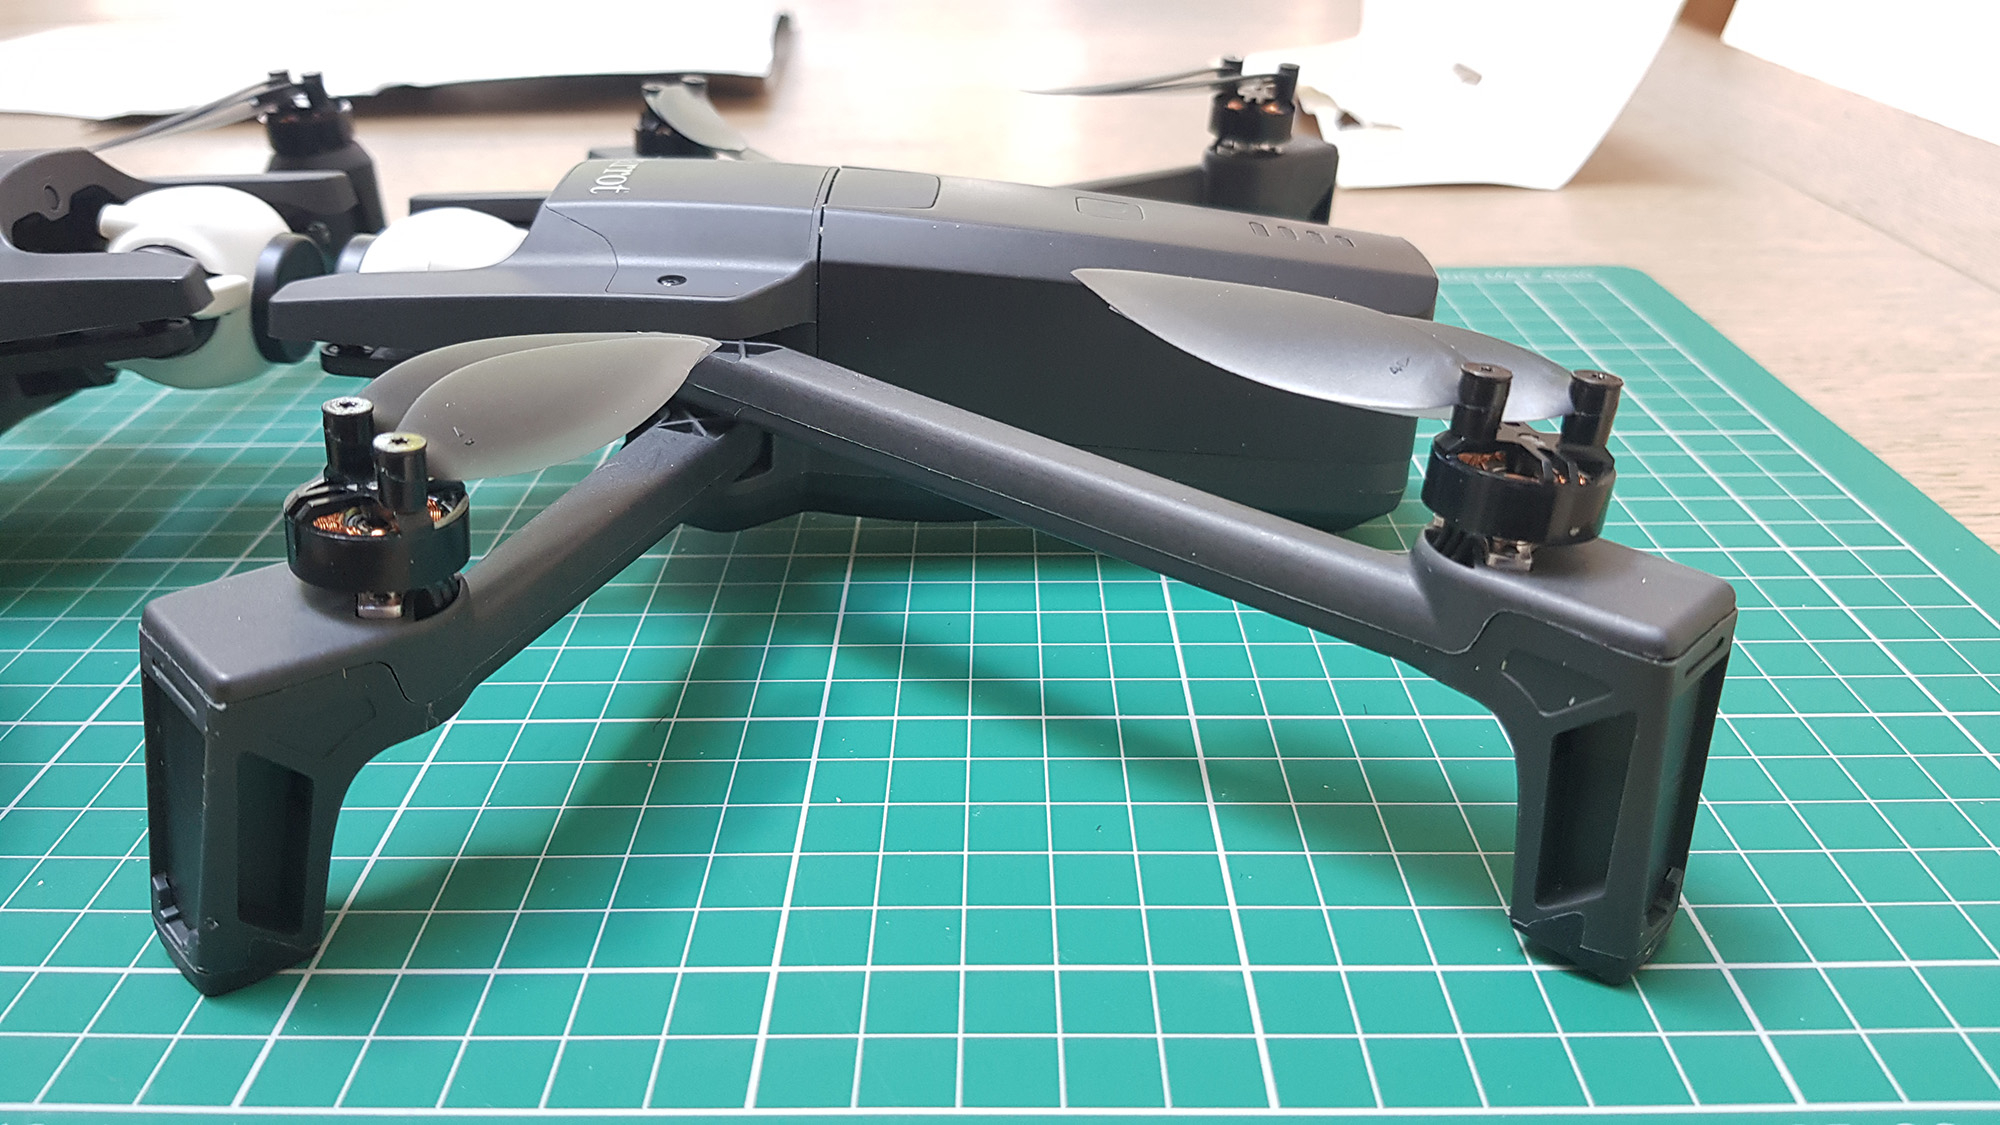
And a gratuitous rear end shot.
Hard to tell if all these changes are just for FPV reasons or increased efficiency and performance (we have to remember these legs are also used on the ANAFI Thermal, so changes cannot be just for FPV use).
The biggest difference in terms of user experience, the new legs are so much stiffer and stronger – when you pick up the ANAFI by the legs there is no distortion or bending. You really notice it when you press the power button – the ANAFI does not move at all. The original when pressing the power button would cause the whole drone to sink down due to the flexing in the legs. That is gone…..
But does it work….
Yes of course it works.
The body is the same for all models – ANAFI, ANAFI FPV, and ANAFI Thermal all share the same part number for the body kit which can be purchased from Parrot.
Mechanically there is no problem.
On the maiden hover test every looks ok and the first flight performed as expected.
One thing worth checking is the camera horizon as well as doing a full drone calibration.
The only concern I have with this mod – if these newer leg designs use different flight parameters as the motor positions have moved and is it something to worry about.
One thought on “Parrot Anafi – Change to FPV / Thermal legs….”
Jim Pfarr
Excellent tutorial! I replaced a broken leg two years ago, and recent had a crash that broke two legs. You have convinced me to invest in a set of Thermal legs to keep my Anafi flying. Thanks so much!
Leave a Reply
This website uses cookies to improve your experience. We'll assume you're ok with this, but you can block them in your browser settings if you wish. AcceptPrivacy Policy
Privacy & Cookies Policy
Privacy Overview
This website uses cookies to improve your experience while you navigate through the website. Out of these, the cookies that are categorized as necessary are stored on your browser as they are essential for the working of basic functionalities of the website. We also use third-party cookies that help us analyze and understand how you use this website. These cookies will be stored in your browser only with your consent. You also have the option to opt-out of these cookies. But opting out of some of these cookies may affect your browsing experience.
Necessary cookies are absolutely essential for the website to function properly. This category only includes cookies that ensures basic functionalities and security features of the website. These cookies do not store any personal information.
Any cookies that may not be particularly necessary for the website to function and is used specifically to collect user personal data via analytics, ads, other embedded contents are termed as non-necessary cookies. It is mandatory to procure user consent prior to running these cookies on your website.

Excellent tutorial! I replaced a broken leg two years ago, and recent had a crash that broke two legs. You have convinced me to invest in a set of Thermal legs to keep my Anafi flying. Thanks so much!